
Employee
Where: Admin portal → Masters → Employee
Route: /masters/employee (the profile of one employee opens at /employee/<id>)
The employee directory. From here you register new employees, open an employee's profile to update it, manage the employee's documents and switch an employee on or off. Set up your Work Location, Department and Designation first – the registration form asks for all three.
Names and phone numbers are blurred in the screenshots. The employee used in this guide, Wiki Demo Asha, is a demo record.
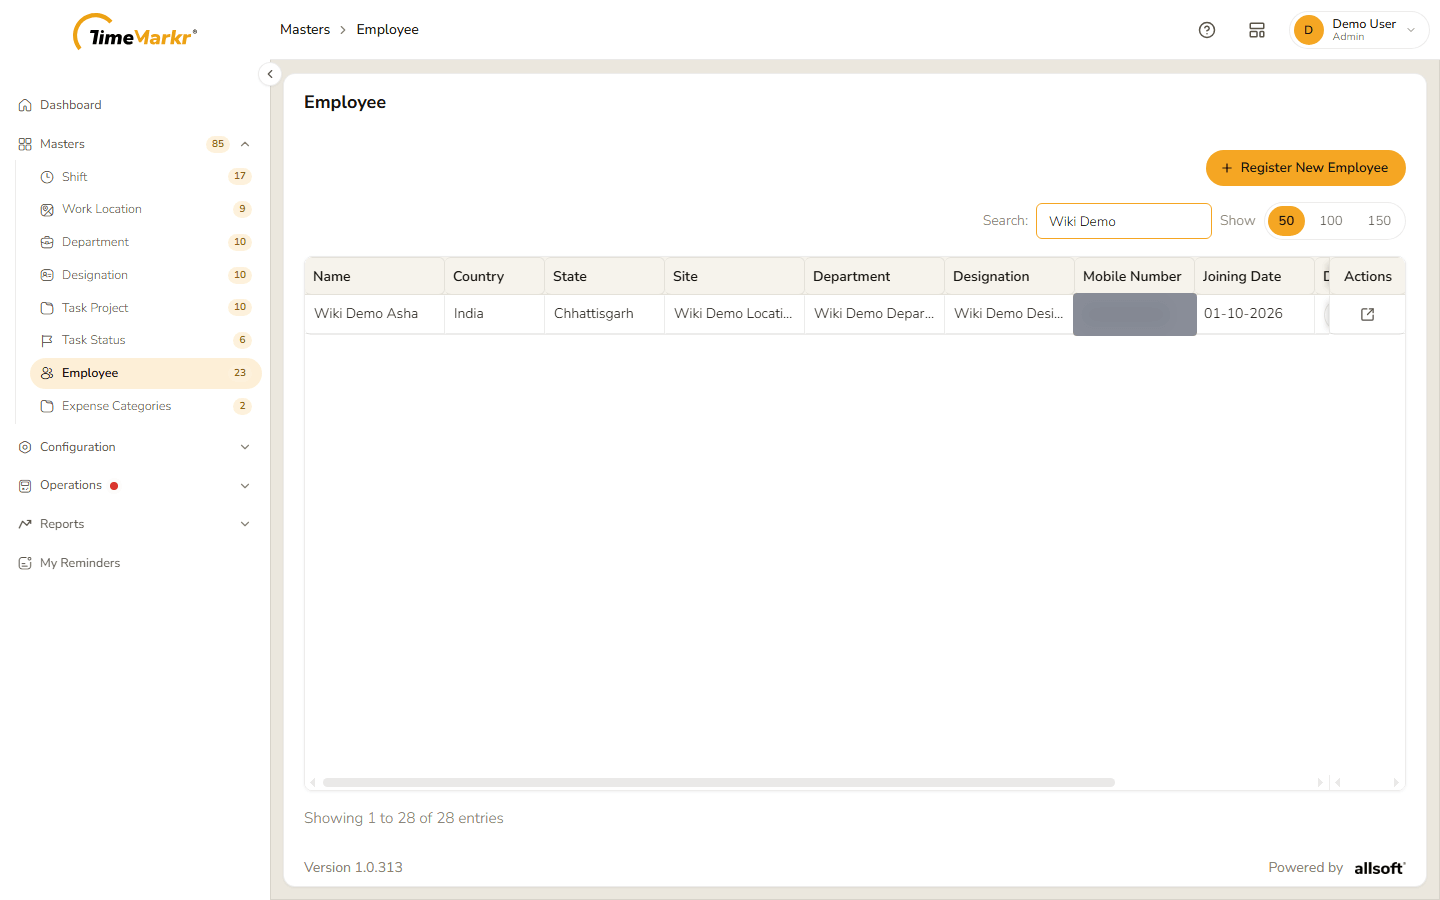
1. The Employee list
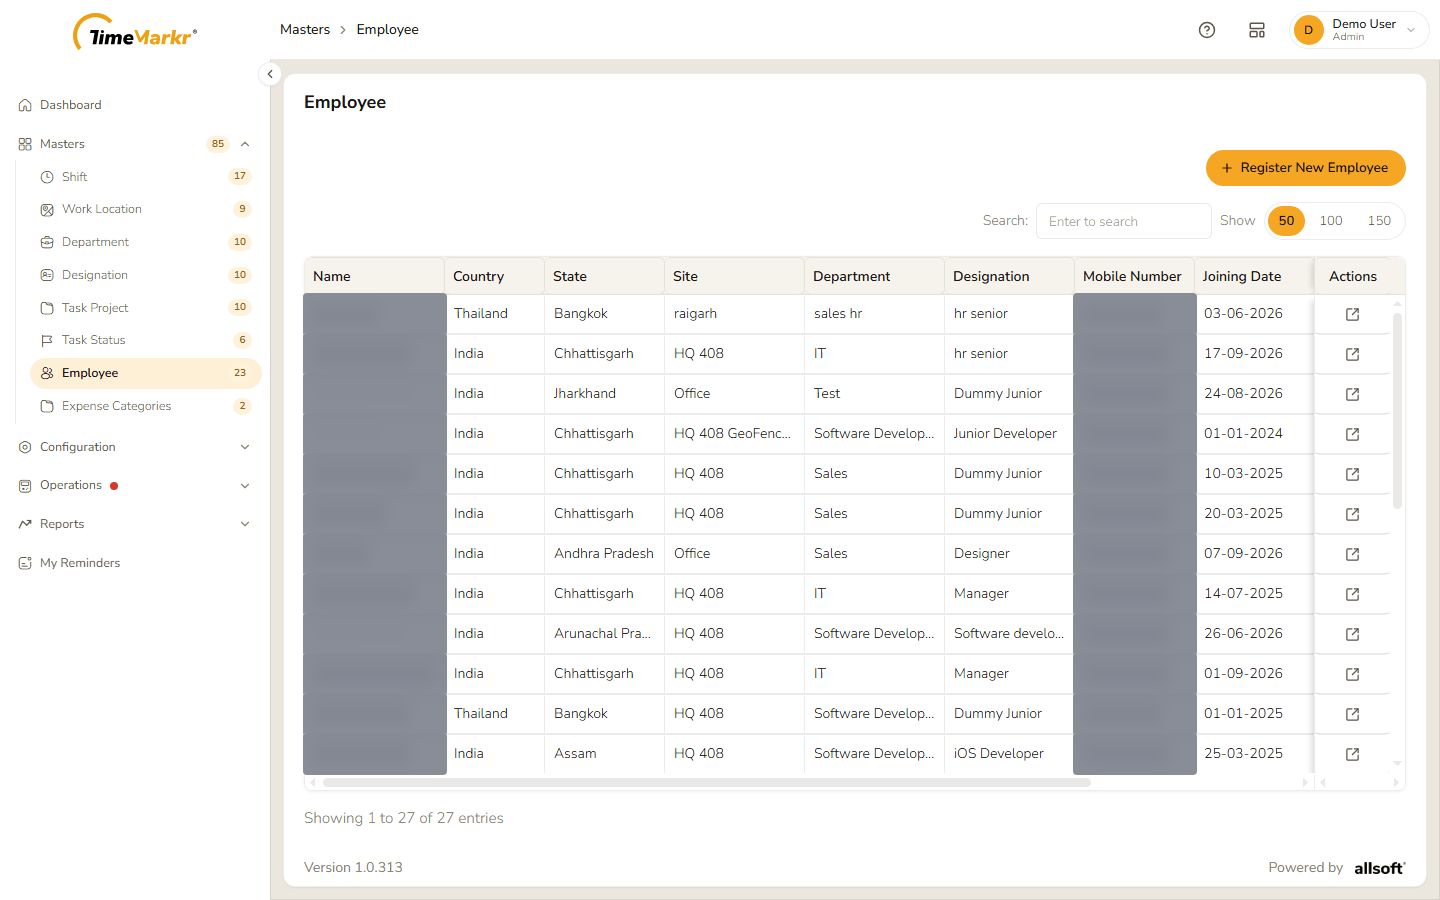
| Column | What it shows |
|---|---|
| Name | The employee's name. |
| Country / State / Site | Where the employee is based. Site is the working location. |
| Department / Designation | From the department and designation lists. |
| Mobile Number | The employee's mobile number. |
| Joining Date | The date the employee joined. |
| Documents | A button that shows how many documents are stored, for example Documents (0) – see Employee documents. |
| Is Active | A switch – see Switch an employee on or off. |
| Actions | The Update icon opens the employee's profile in a new browser tab. |
The grid is wider than the screen: scroll sideways to reach Documents, Is Active and Actions.
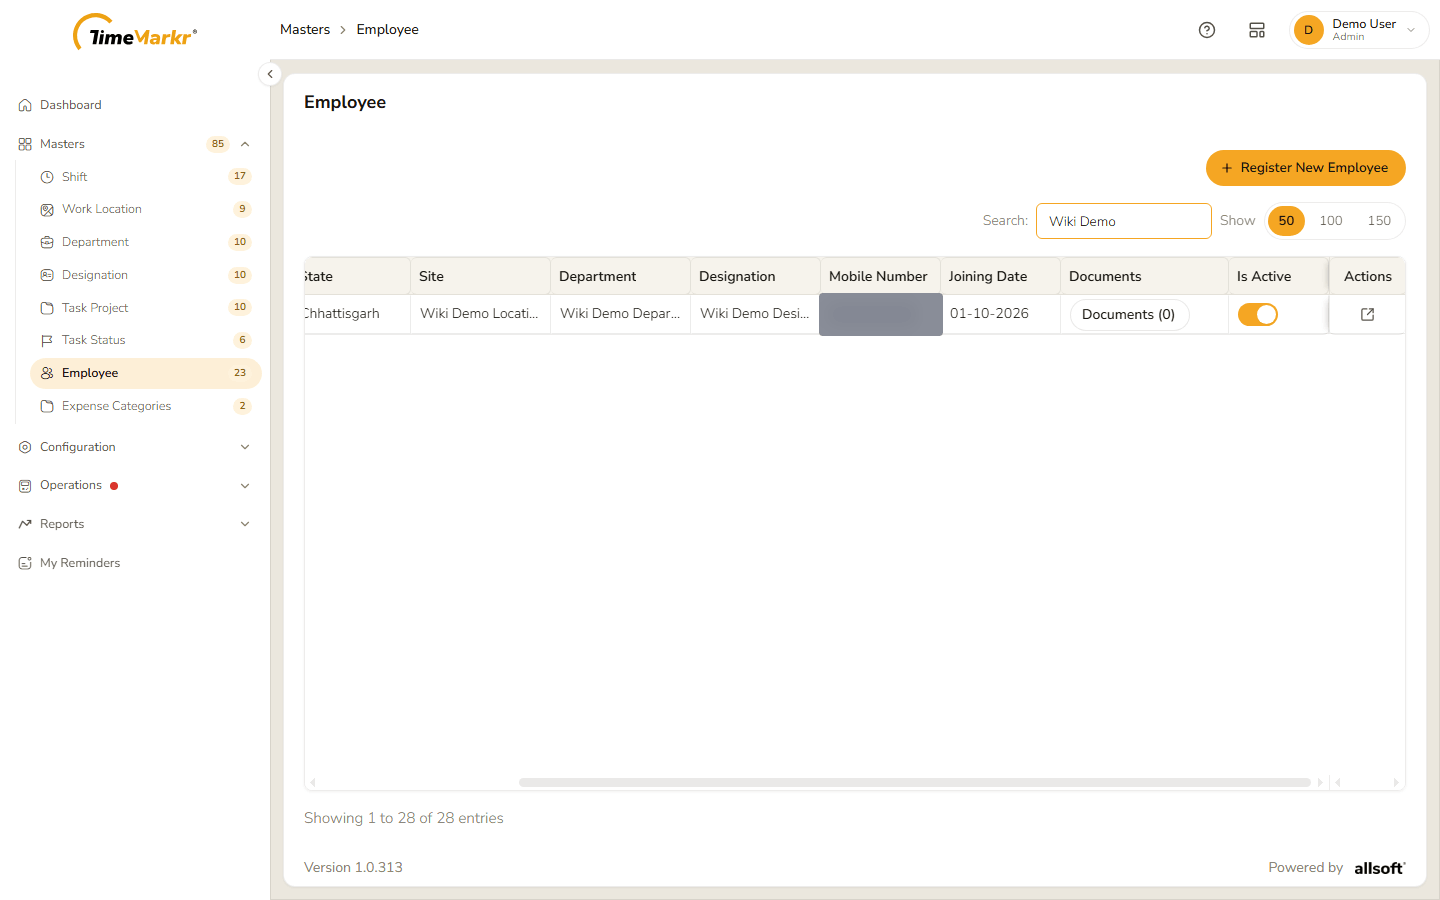
Use Search to narrow the list and Show 50 / 100 / 150 to choose how many rows to see.
2. Register a new employee
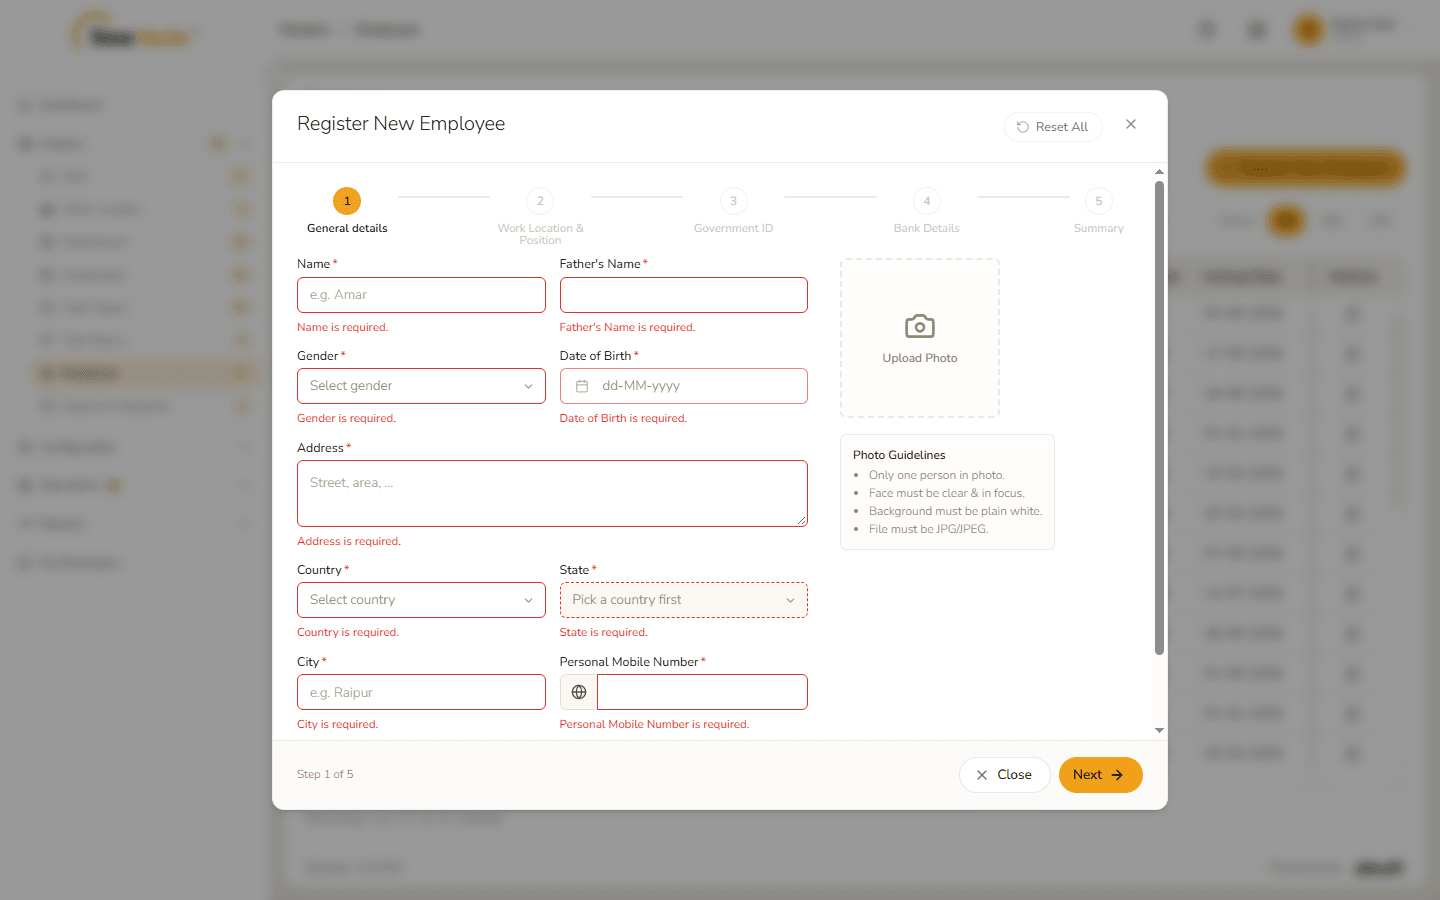
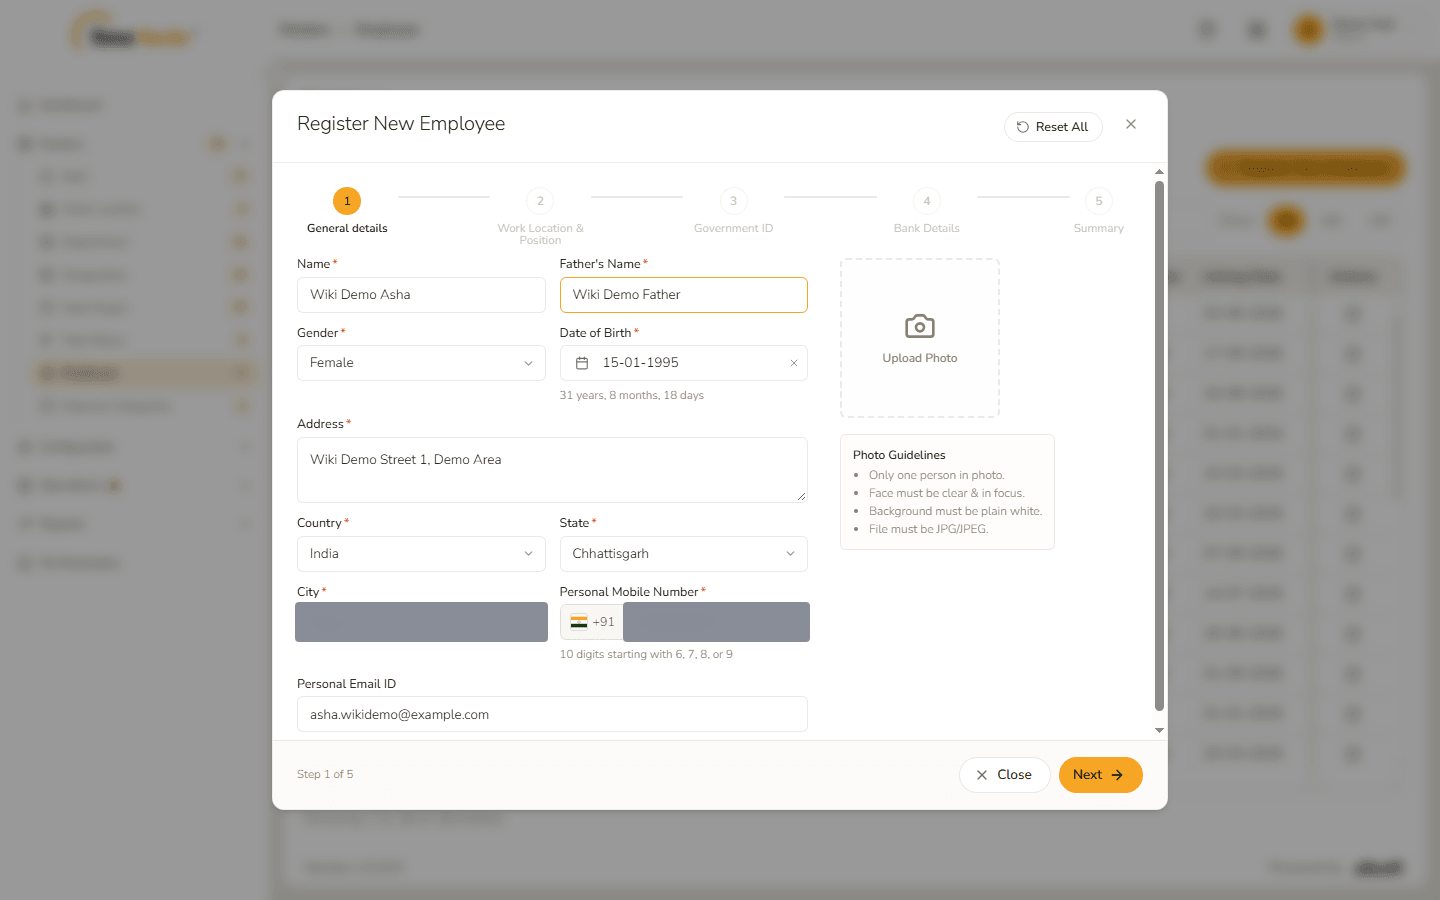
Click Register New Employee. A five-step form opens. The steps are shown across the top – General details, Work Location & Position, Government ID, Bank Details and Summary – and a tick appears on each step you finish. Reset All (top right) clears everything you have typed.
Step 1 – General details
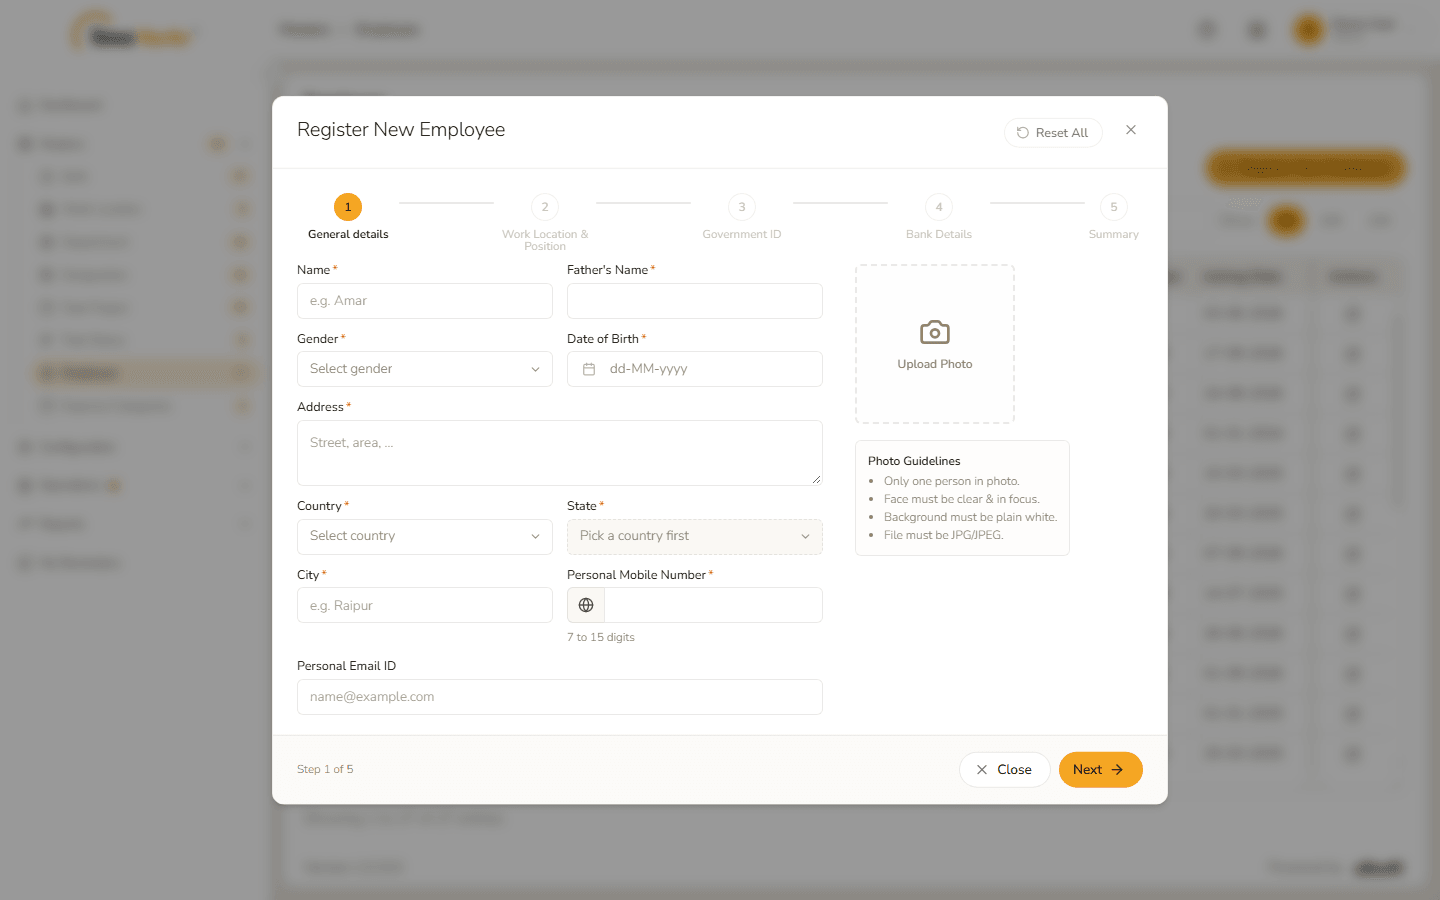
| Field | Notes |
|---|---|
| Name* | Required. |
| Father's Name* | Required. |
| Gender* | Male, Female or Other. |
| Date of Birth* | Click the field and choose the month and year from the two lists at the top of the calendar, then the day. The form shows the age underneath, for example 31 years, 8 months, 18 days. |
| Address* | Required. |
| Country* and State* | Choose the country first – State stays disabled ("Pick a country first") until you do. |
| City* | Required. |
| Personal Mobile Number* | Required. With India selected: 10 digits starting with 6, 7, 8 or 9. Before a country is chosen the hint reads "7 to 15 digits". |
| Personal Email ID | Optional. |
| Upload Photo | Optional. The Photo Guidelines beside it say: only one person in the photo, face clear and in focus, plain white background, JPG/JPEG file. |
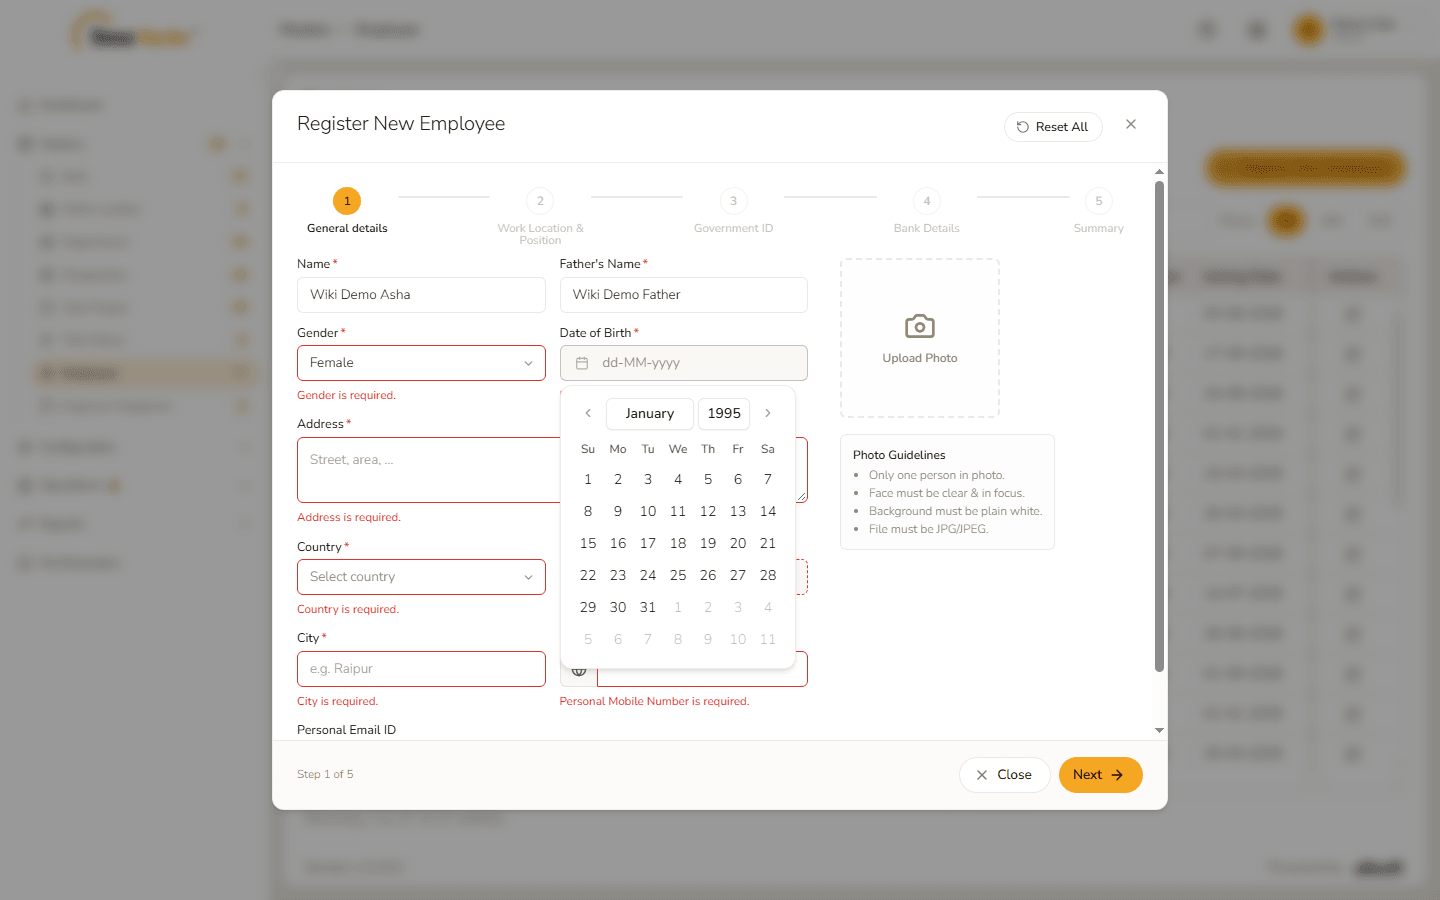
Click Next with required fields empty and each one is marked in red with "… is required."
Step 2 – Work Location & Position
| Field | Notes |
|---|---|
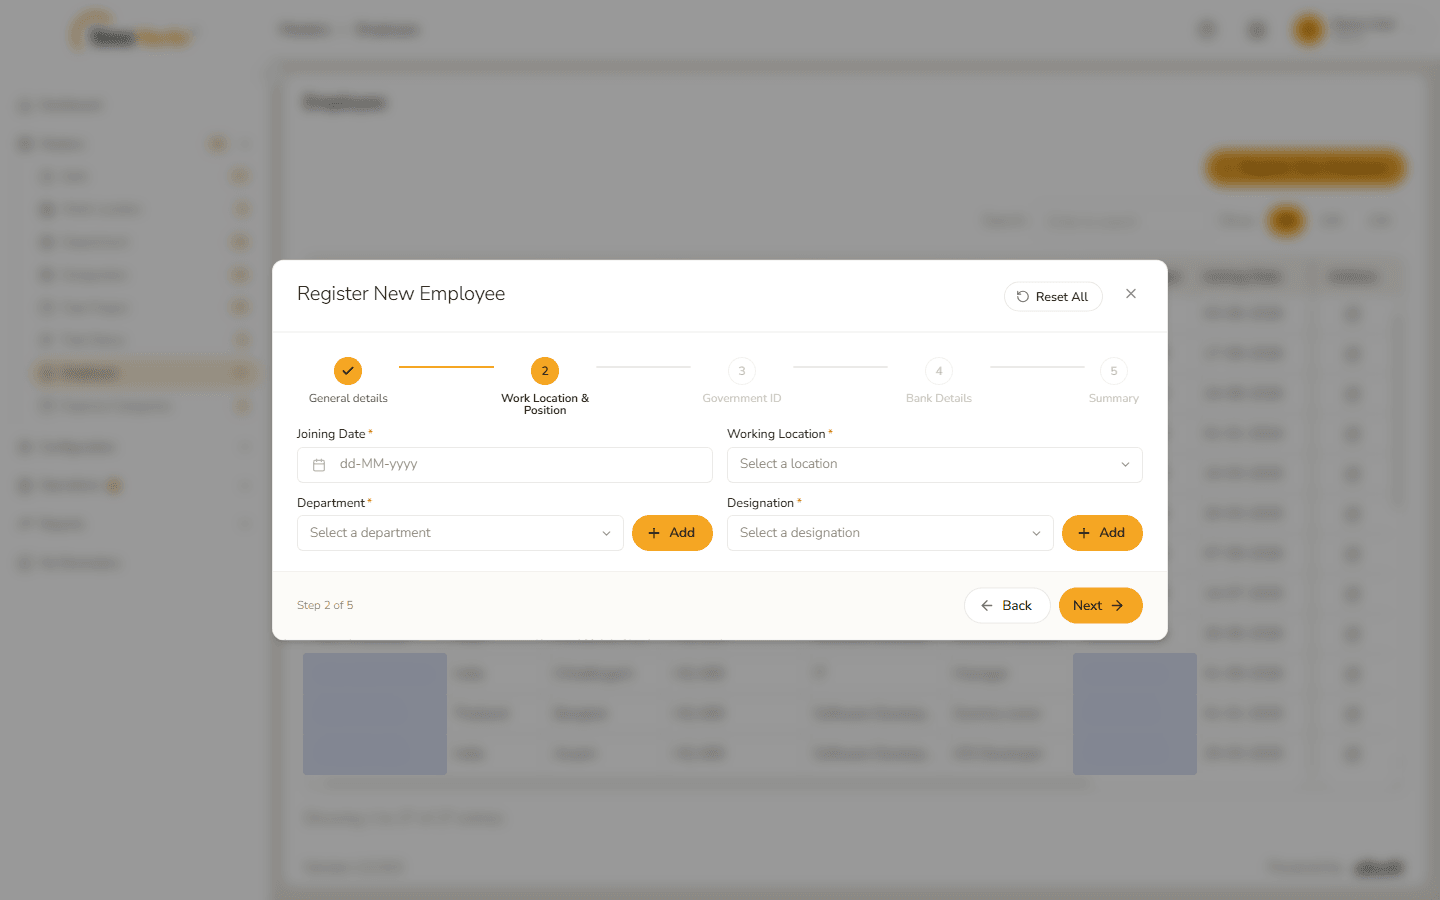
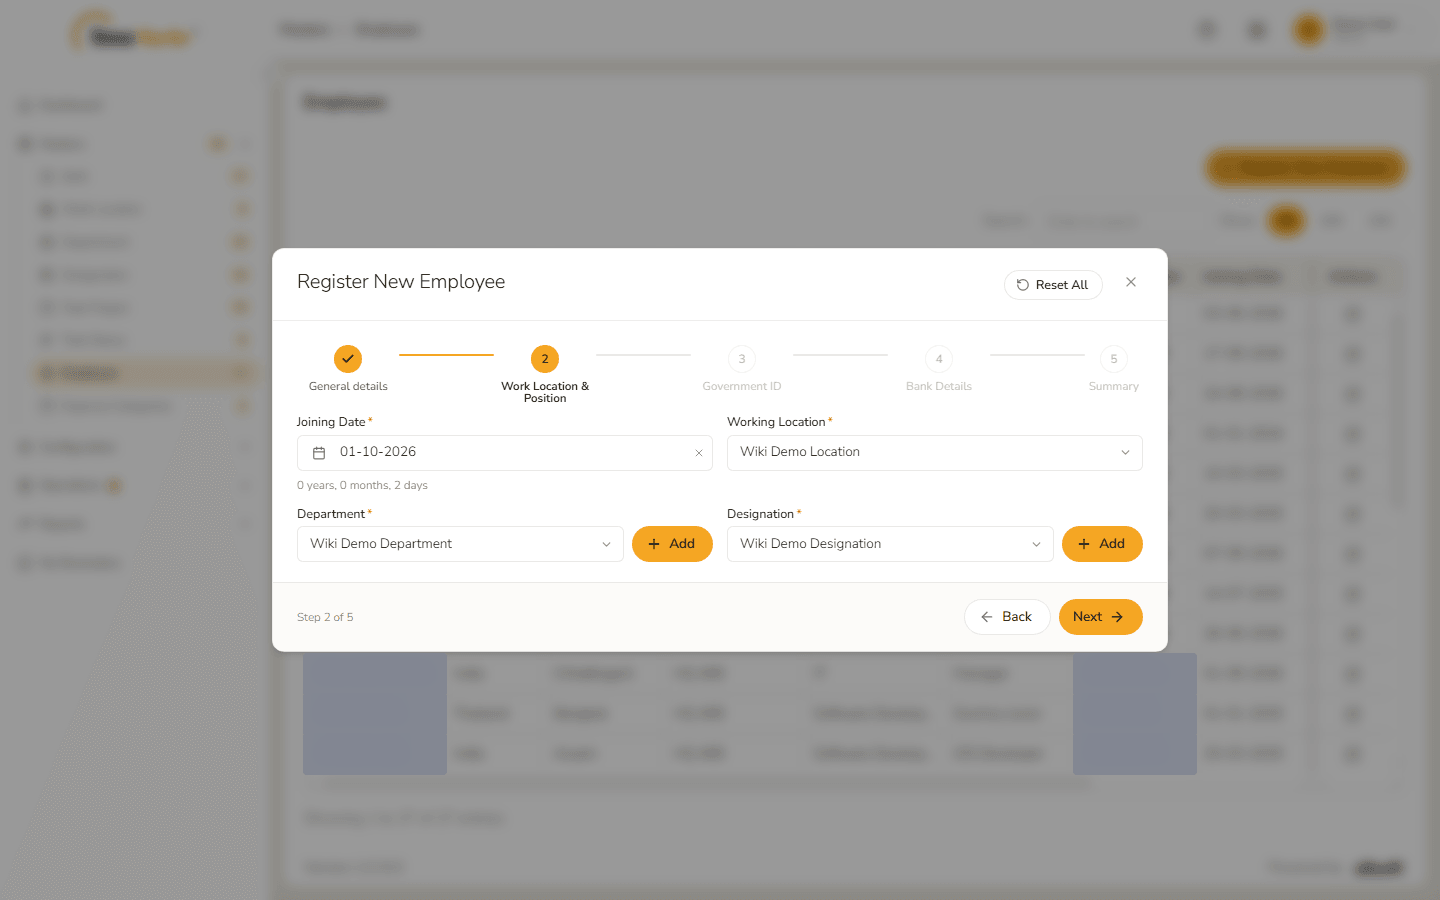
| Joining Date* | Pick the date. The form shows how long ago it was, for example 0 years, 0 months, 2 days. |
| Working Location* | One of your working locations. |
| Department* | One of your departments. The Add button beside it lets you create a department without leaving the form. |
| Designation* | One of your designations. Its Add button works the same way. |
The form does not ask for a shift. The employee gets the Default Shift of the working location – the profile shows it under Work Location.
Step 3 – Government ID
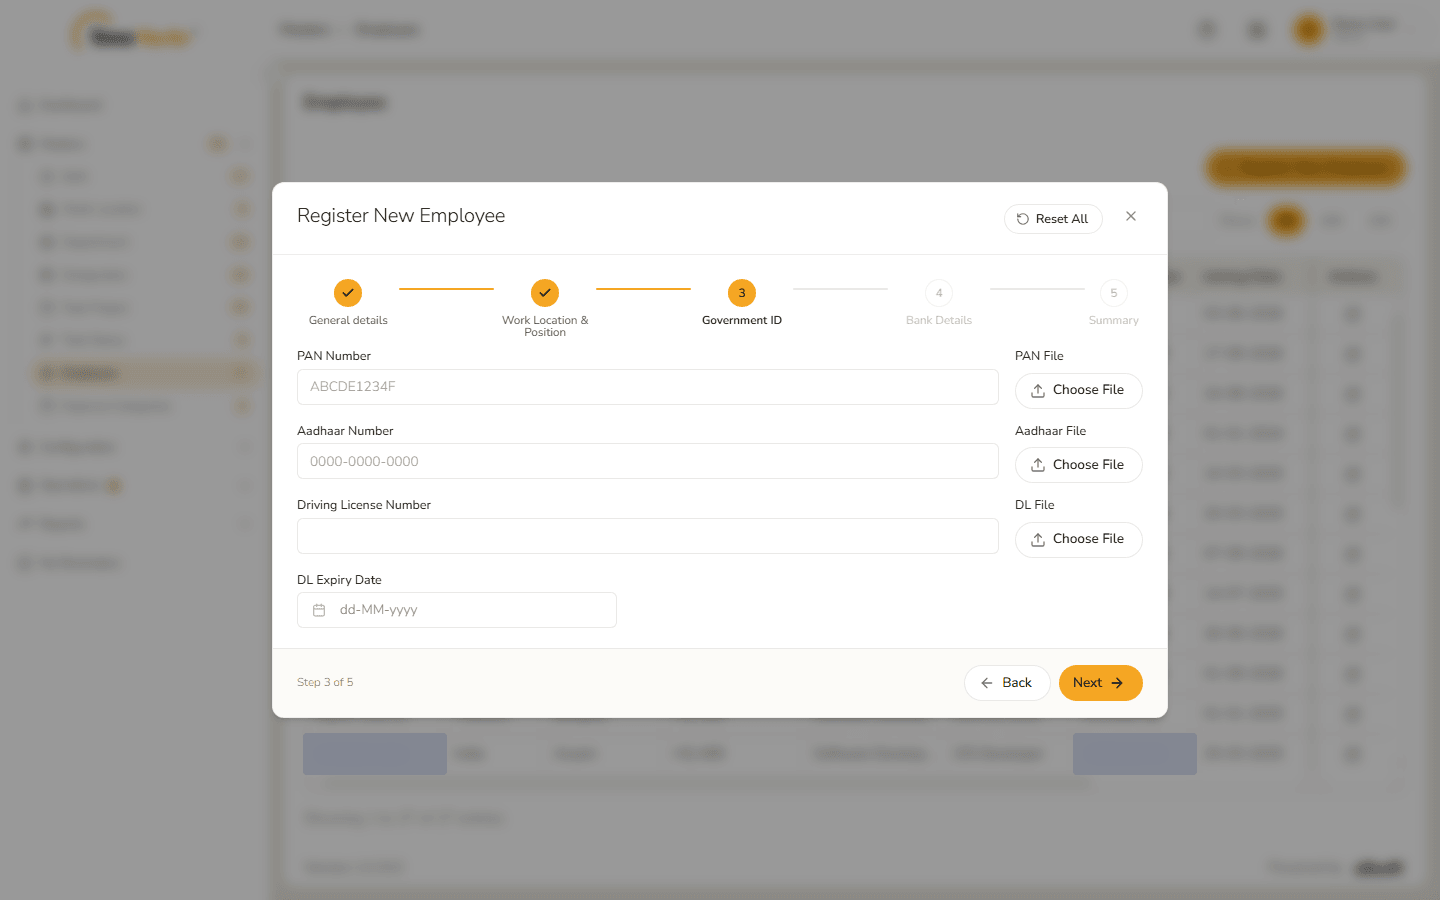
Every field on this step is optional: PAN Number and PAN File, Aadhaar Number and Aadhaar File, Driving License Number, DL File and DL Expiry Date. The grey text in the number fields shows the expected format. You can leave the step empty and add the details later from the profile.
Step 4 – Bank Details
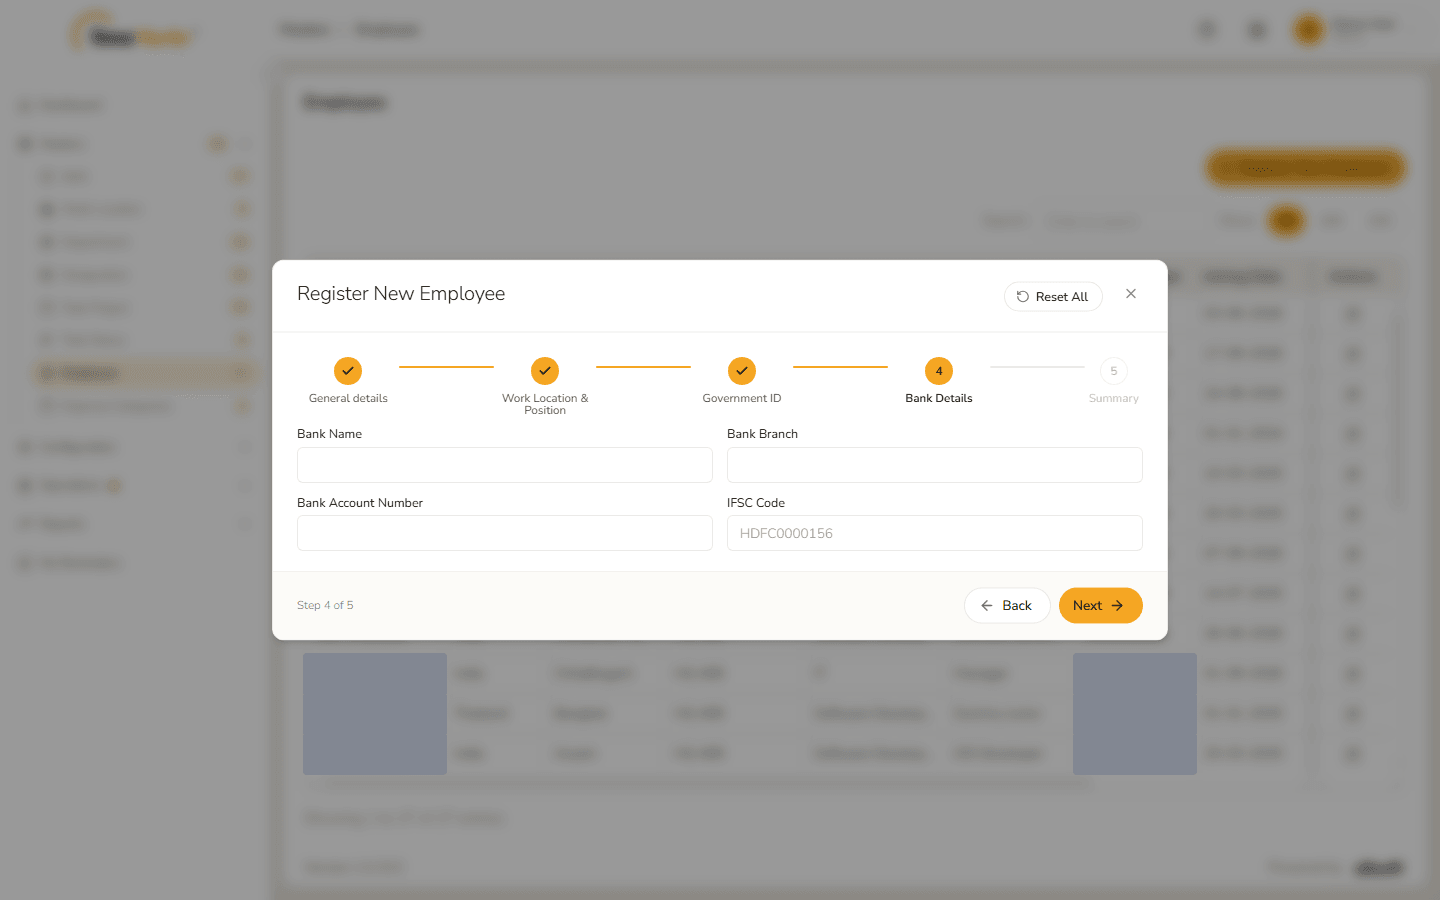
Bank Name, Bank Branch, Bank Account Number and IFSC Code – all optional.
Step 5 – Summary
Everything you entered is listed for a last check: "Review everything below before submitting. Use the step tabs above to go back and fix anything." Fields you left empty show a dash.
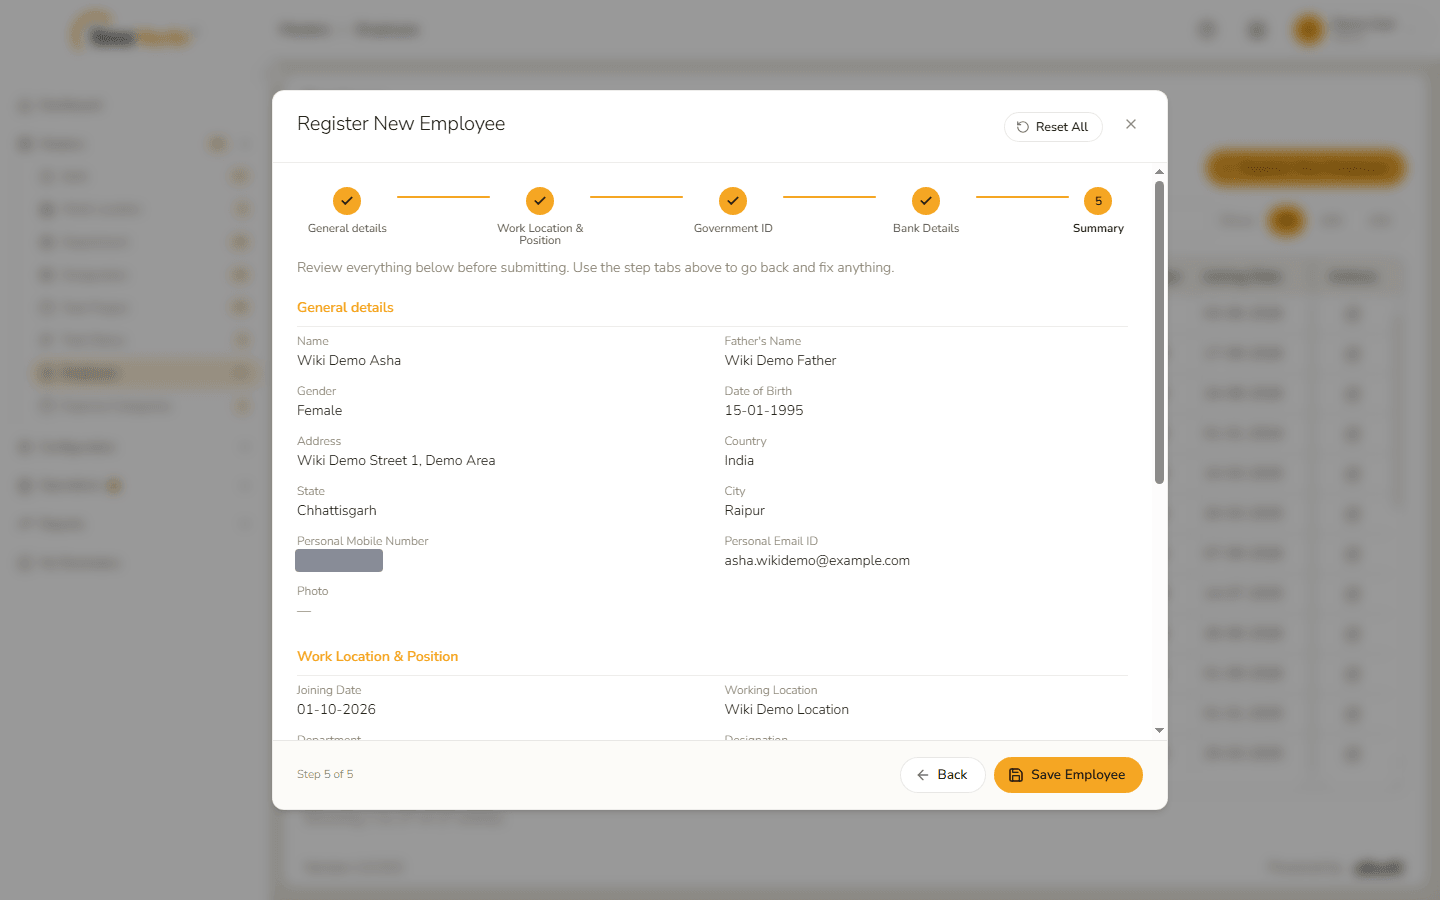
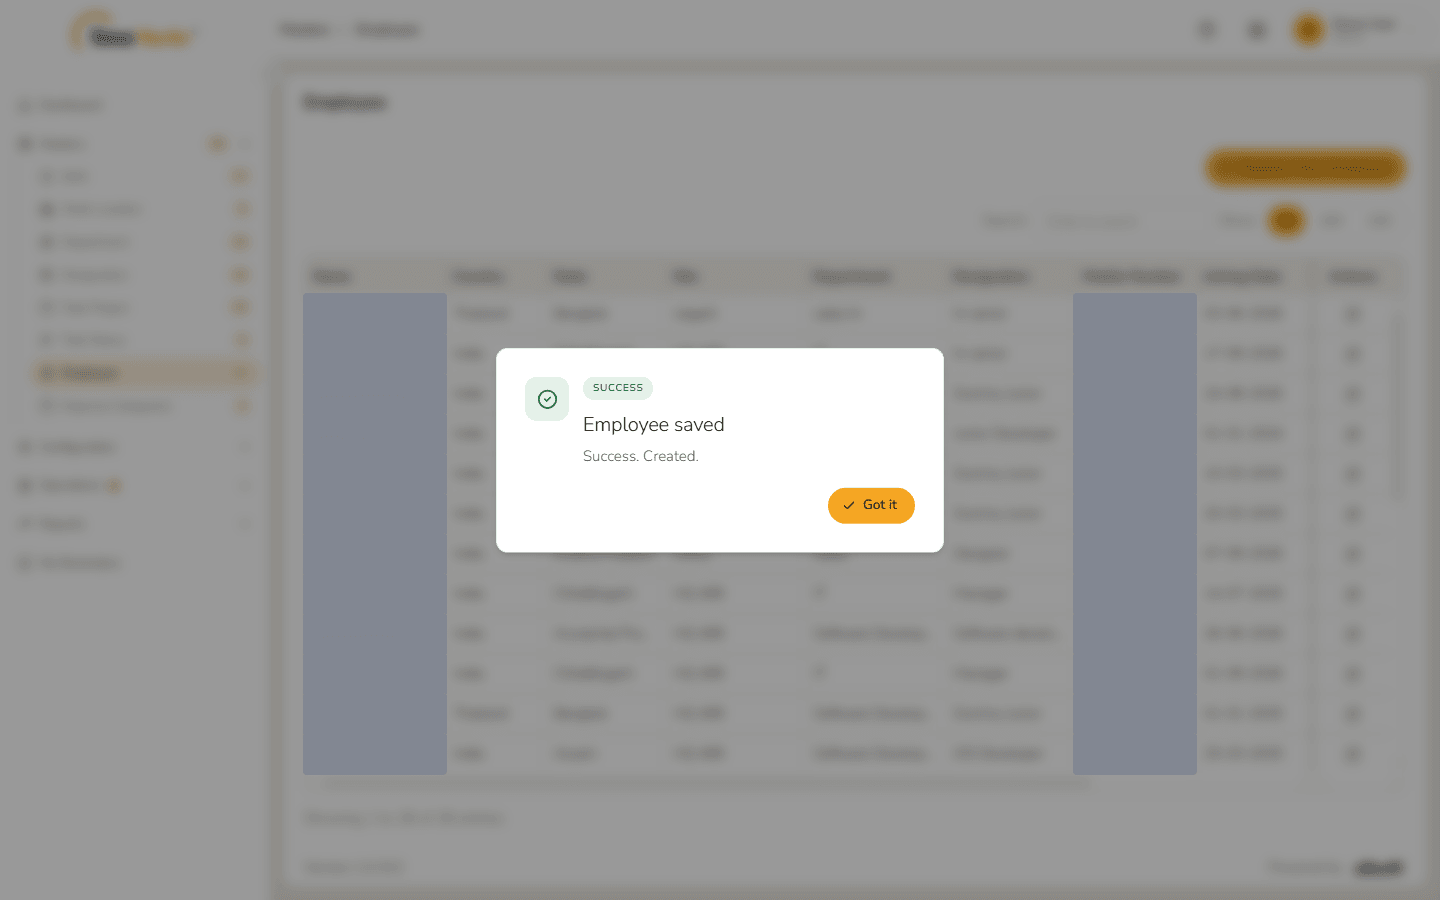
Click Save Employee. Employee saved – Success. Created. confirms it. Click Got it.
The new employee is in the list.
3. The employee profile
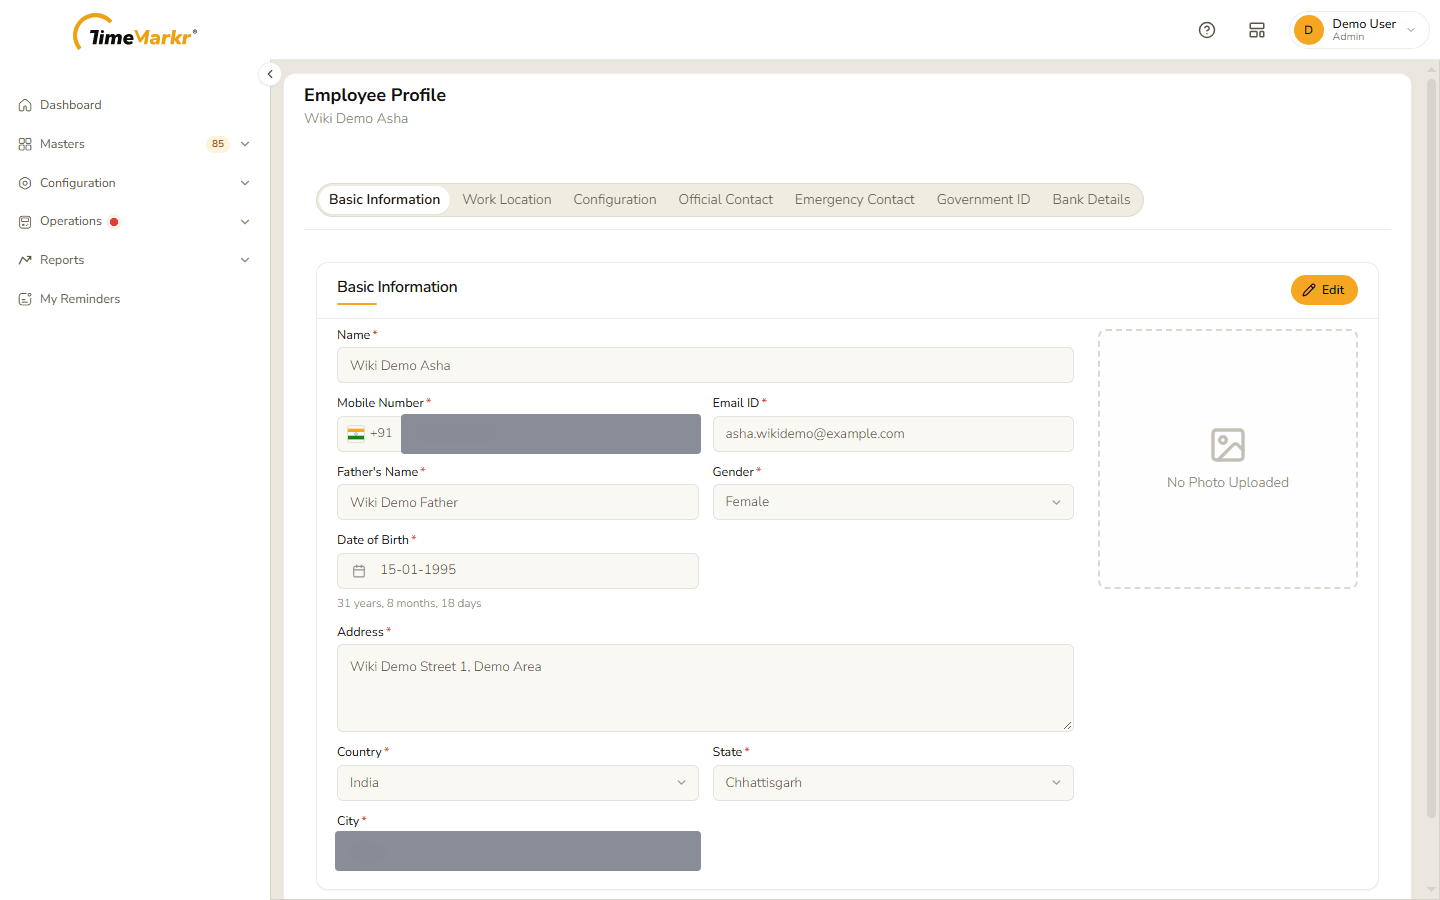
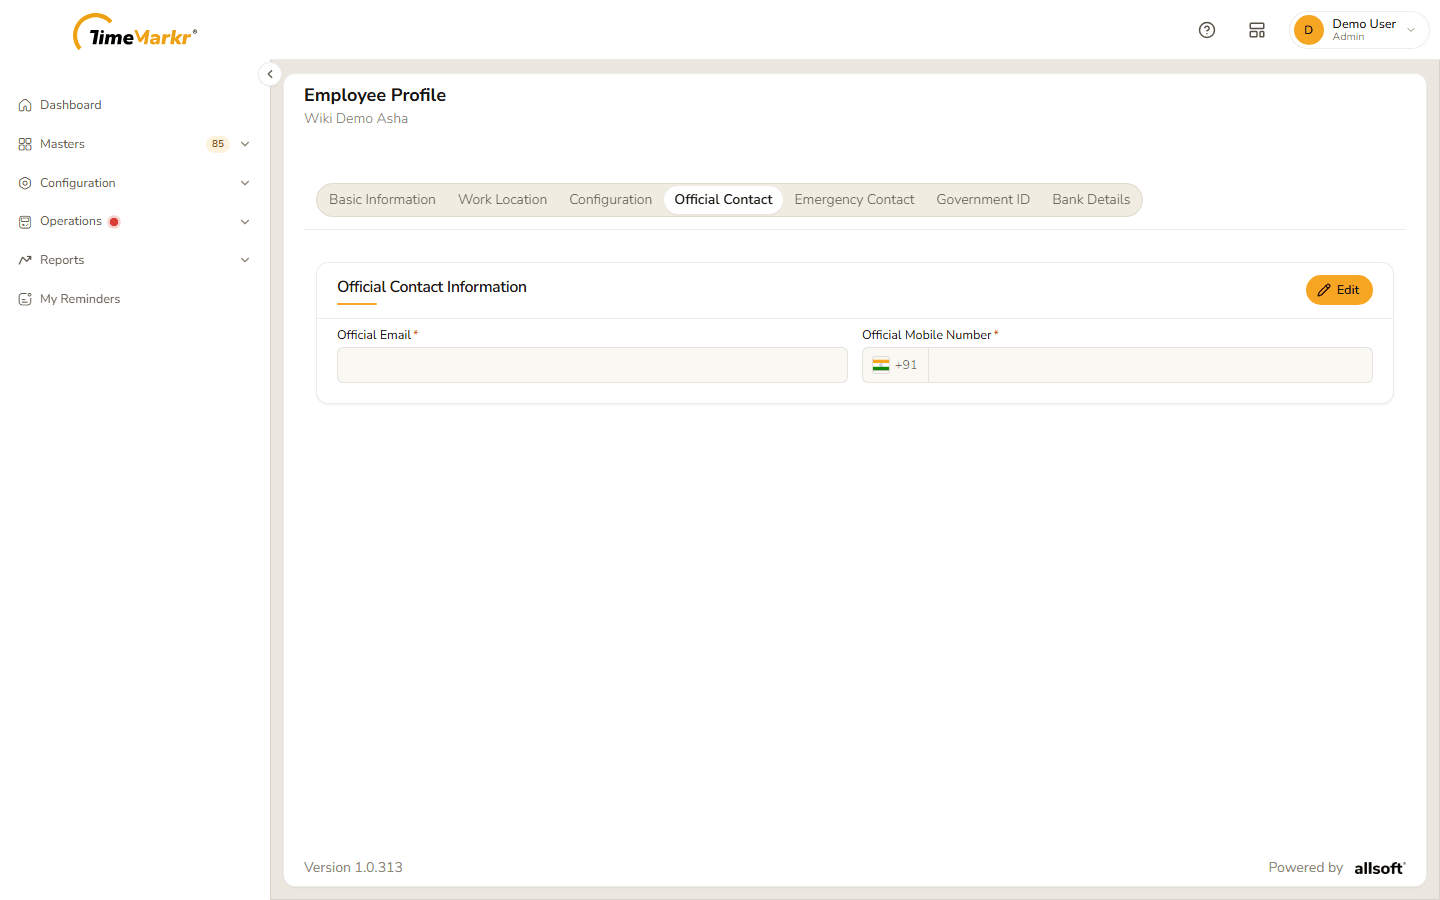
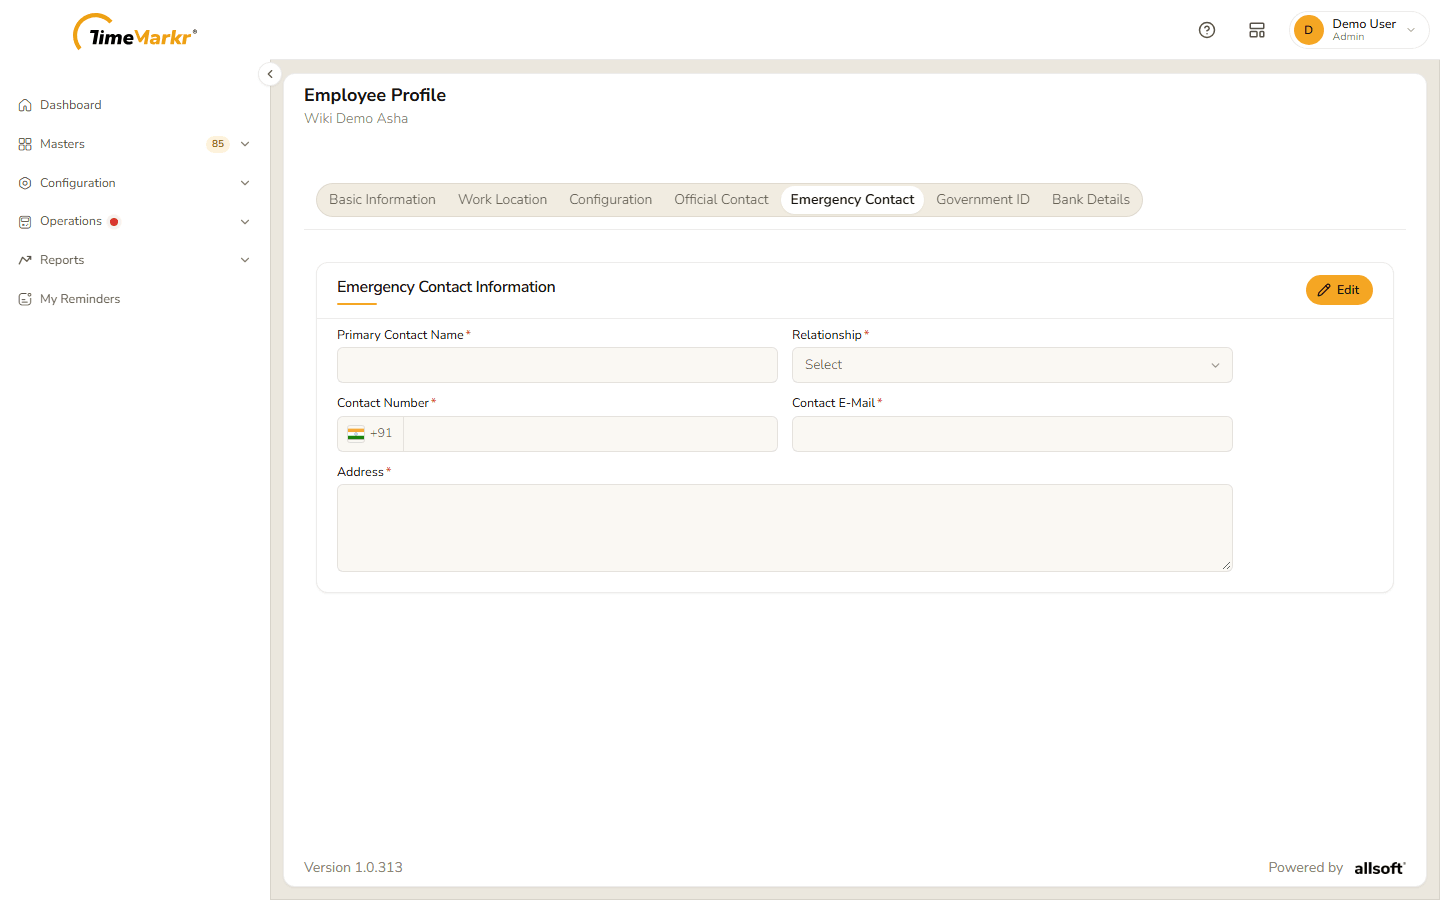
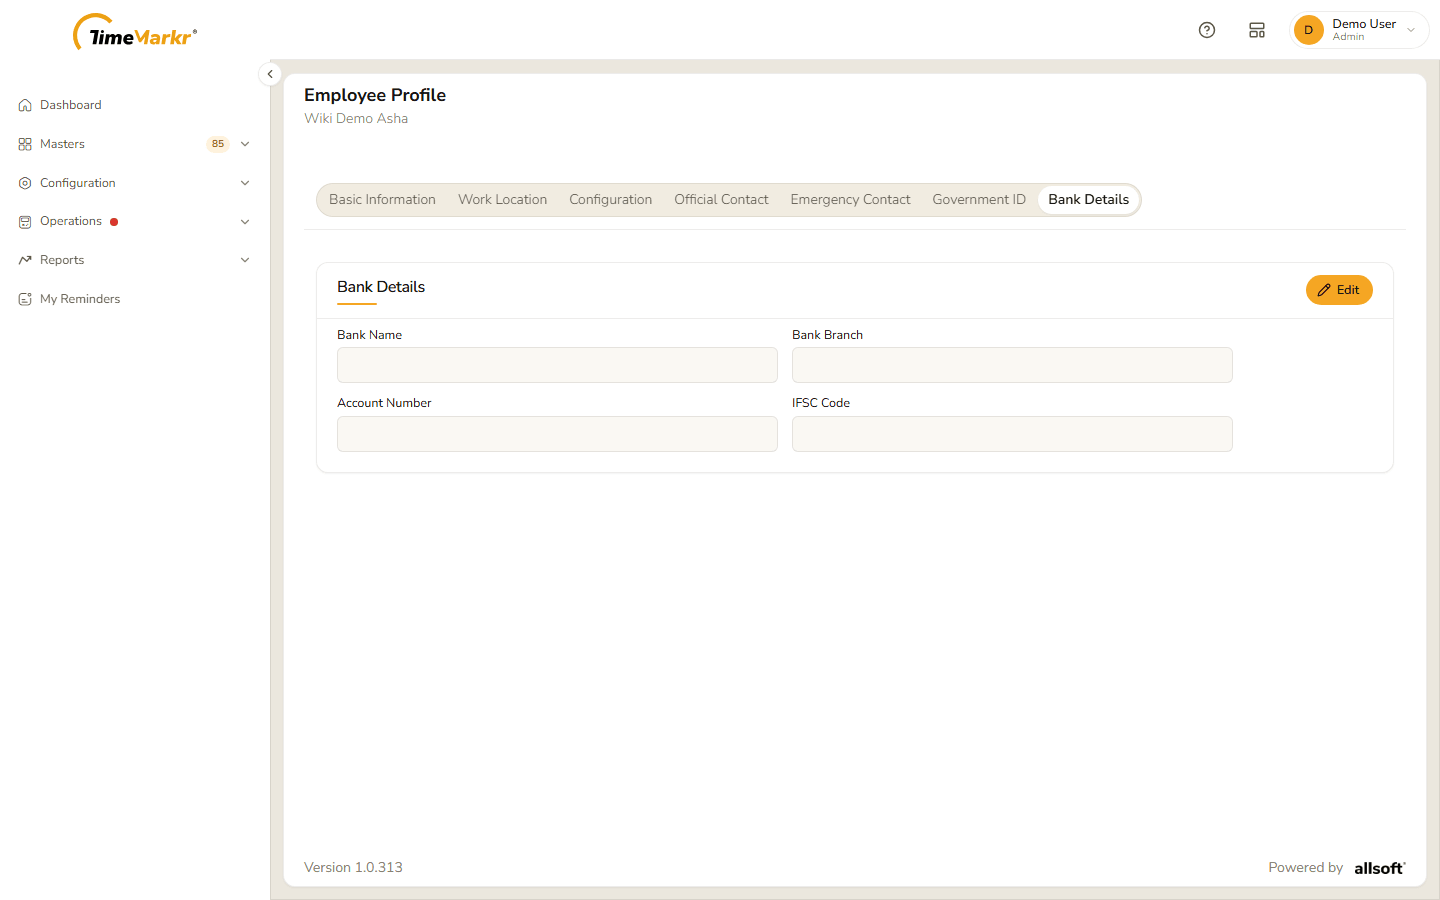
Click the Update icon on a row. The profile opens in a new tab at /employee/<id>, with the employee's name under the heading Employee Profile and seven tabs.
| Tab | What it holds |
|---|---|
| Basic Information | Name, mobile number, email, father's name, gender, date of birth, address, country, state, city and the photo. |
| Work Location | Joining Date, Department, Designation, Working Location and Shift. |
| Configuration | Geo Fence Enabled?, Location Latitude, Location Longitude, Allowed Geo Fence Radius, Ask Late Punch In Reason?, Ask Early Punchout Reason?, Ask Over Time Reason?, Ask Daily Progress Report? and Allow Task Create?. |
| Official Contact | Official Email and Official Mobile Number. |
| Emergency Contact | Primary Contact Name, Relationship, Contact Number, Contact E-Mail and Address. |
| Government ID | PAN, Aadhaar and driving-licence numbers, plus the scanned documents. |
| Bank Details | Bank Name, Bank Branch, Account Number and IFSC Code. |
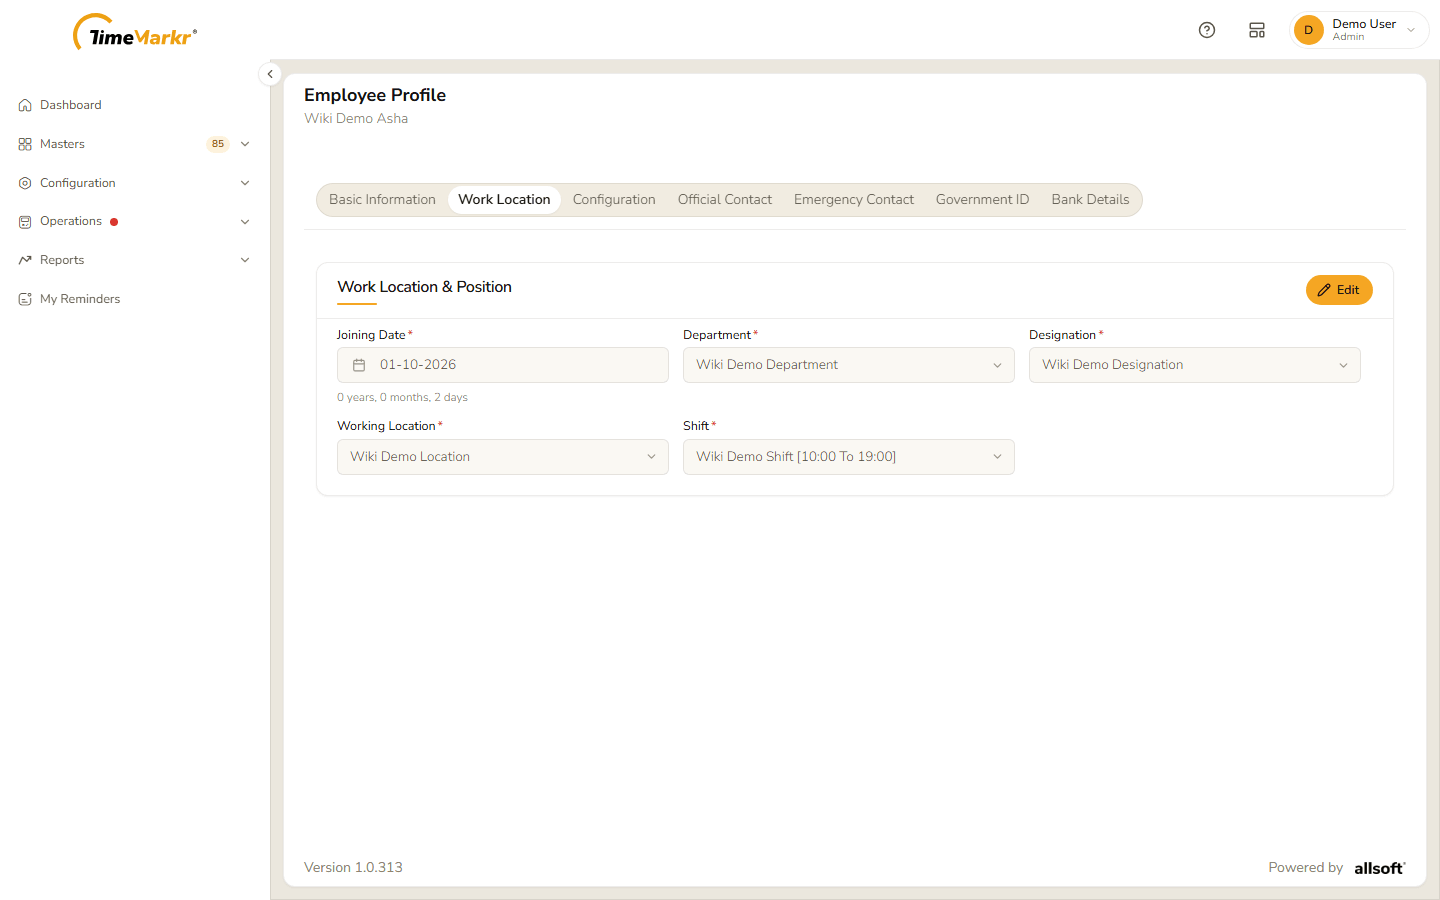
On the Work Location tab the Shift shows the default shift of the working location chosen at registration.
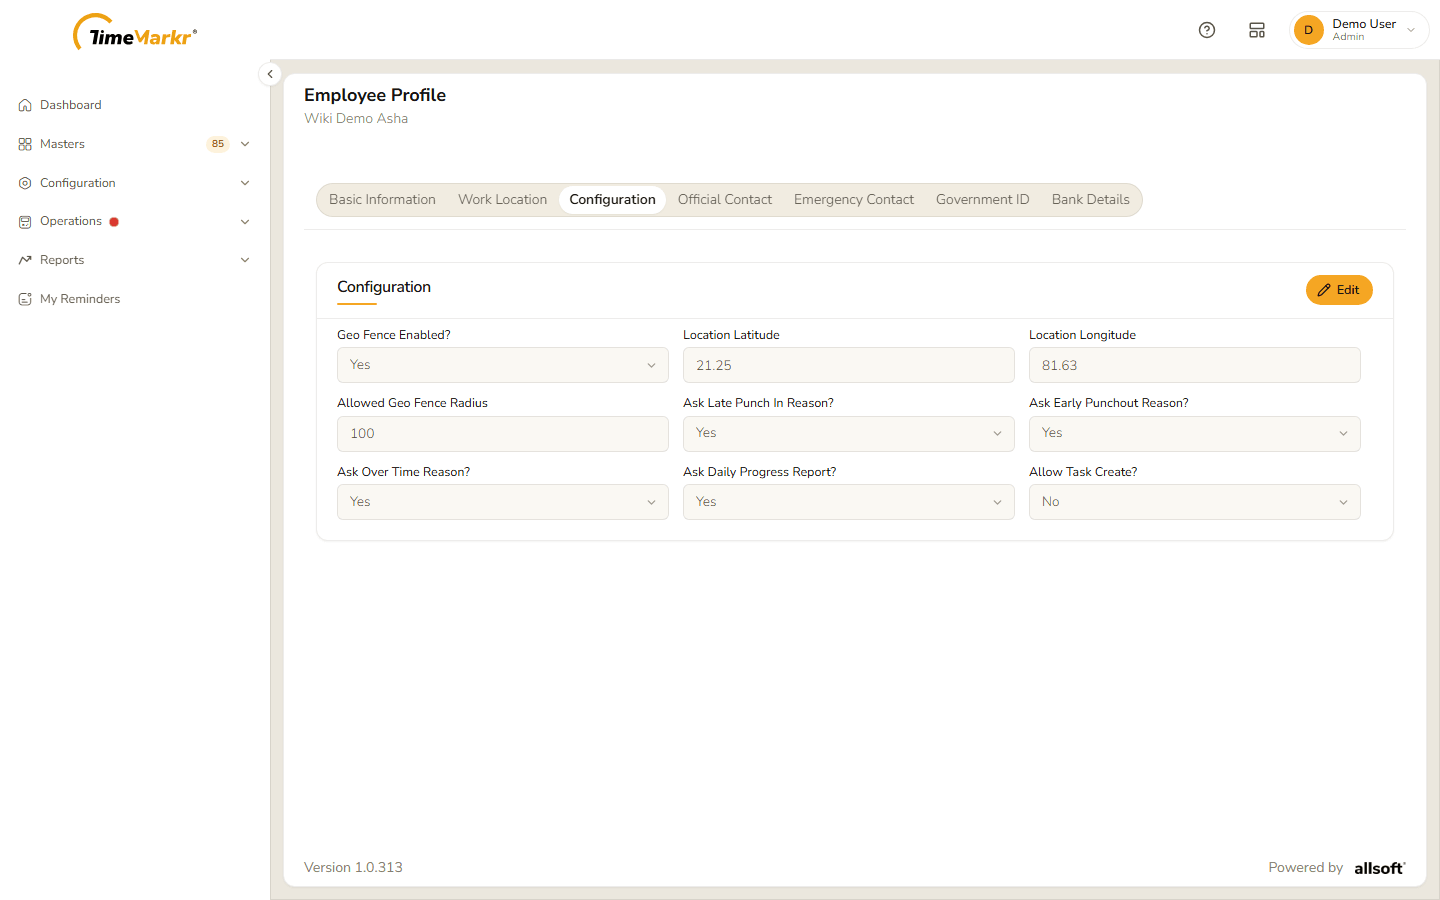
On the Configuration tab a new employee starts with the values of the working location – here the latitude, longitude and radius of the demo location.
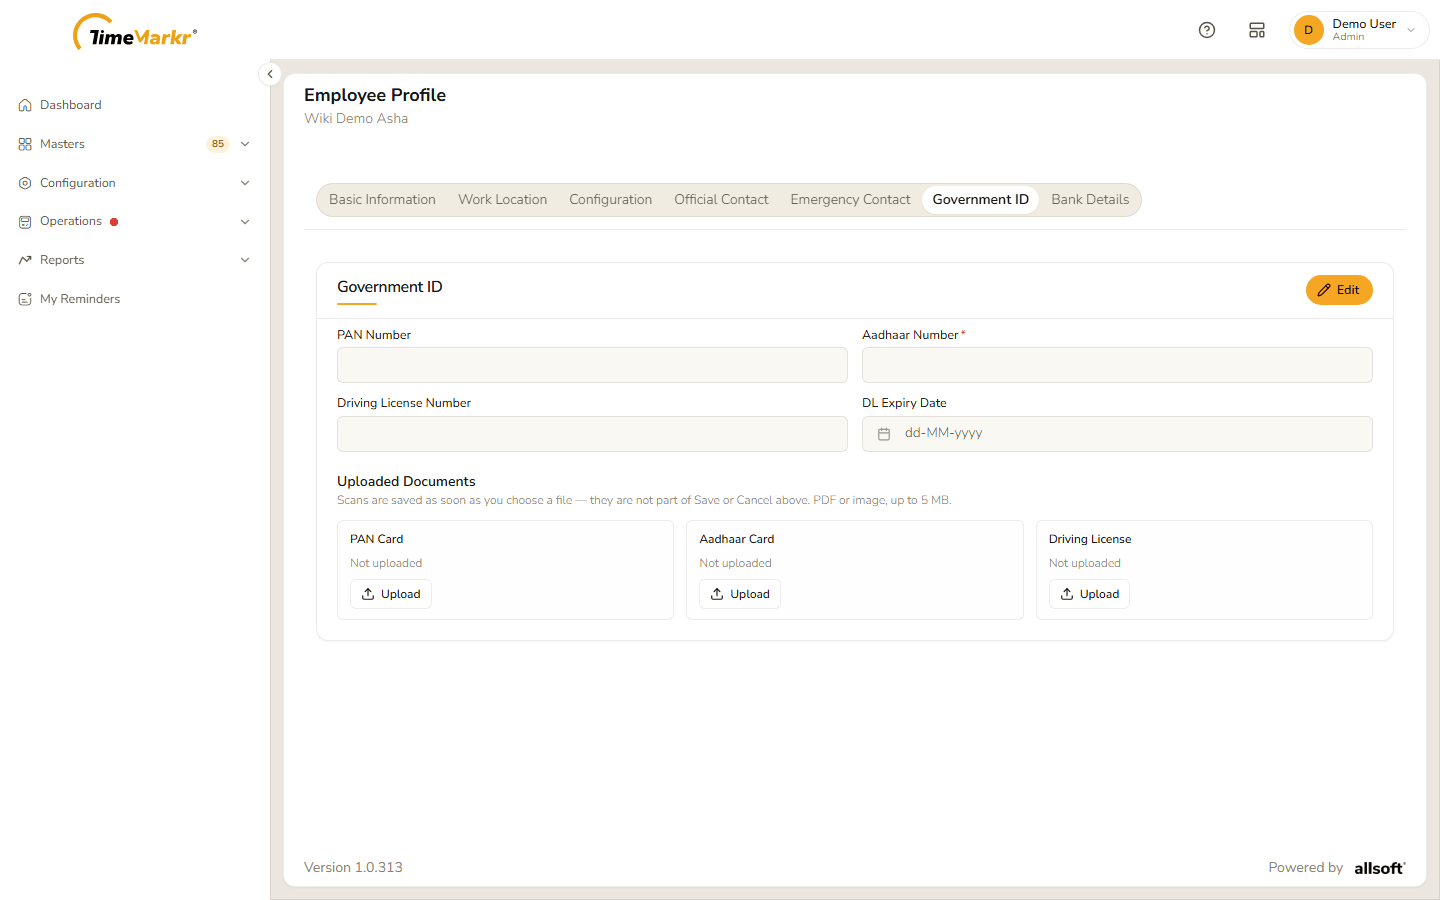
On the Government ID tab, under Uploaded Documents, each scan – PAN Card, Aadhaar Card, Driving License – has an Upload button. The page says: "Scans are saved as soon as you choose a file — they are not part of Save or Cancel above. PDF or image, up to 5 MB."
Edit a tab
Open the tab and click Edit (top right of the card). The fields become editable and Save and Cancel appear. On Basic Information an Upload Photo button appears too.
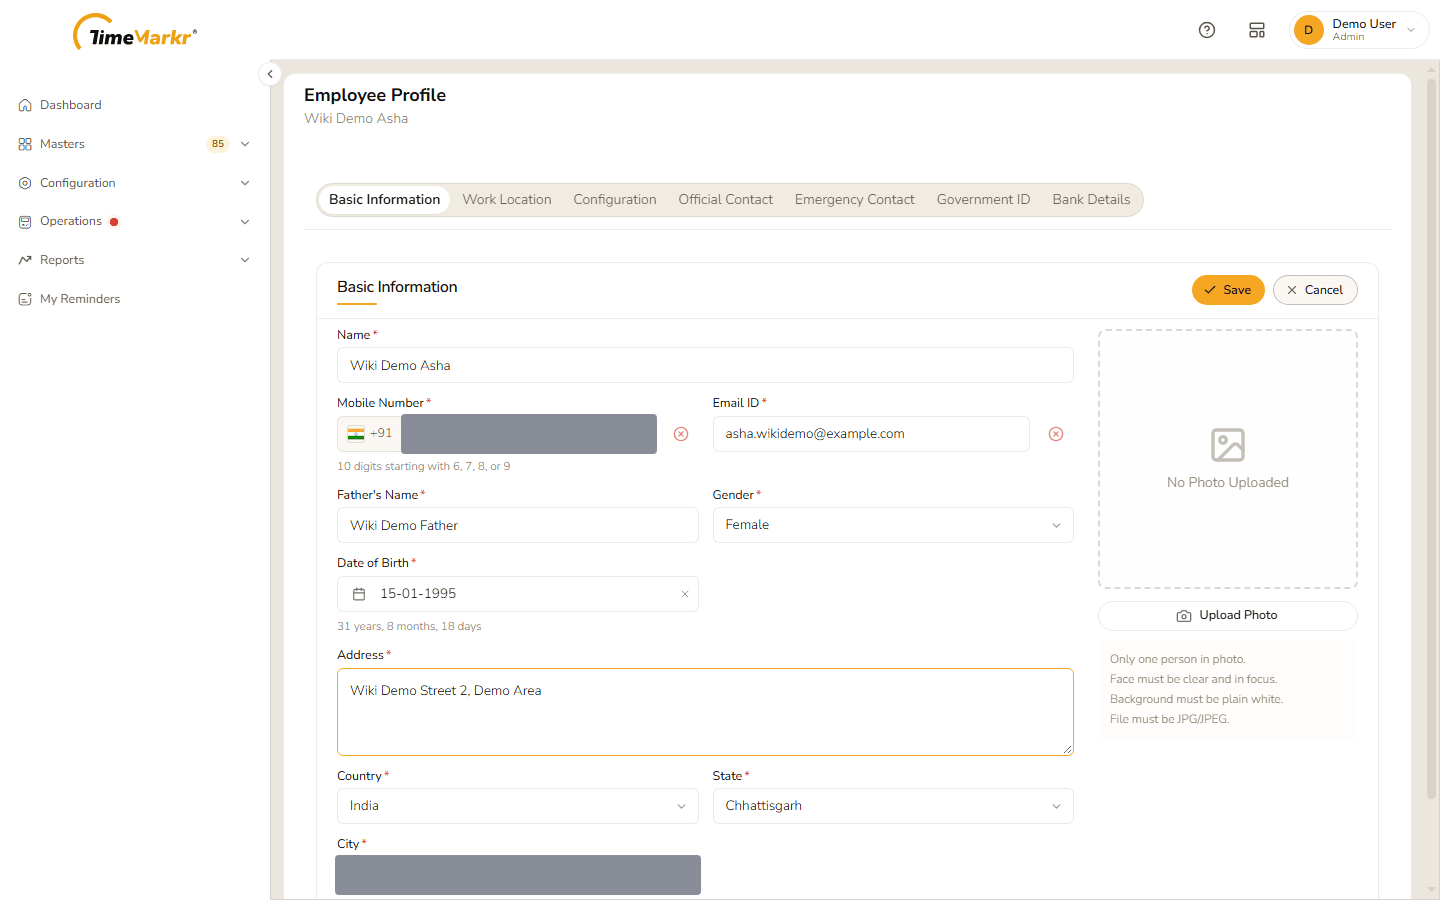
Editing Basic Information Change the fields and click Save. Basic details updated – Basic information updated successfully. confirms it on this tab. Click Got it. Cancel leaves the tab as it was.
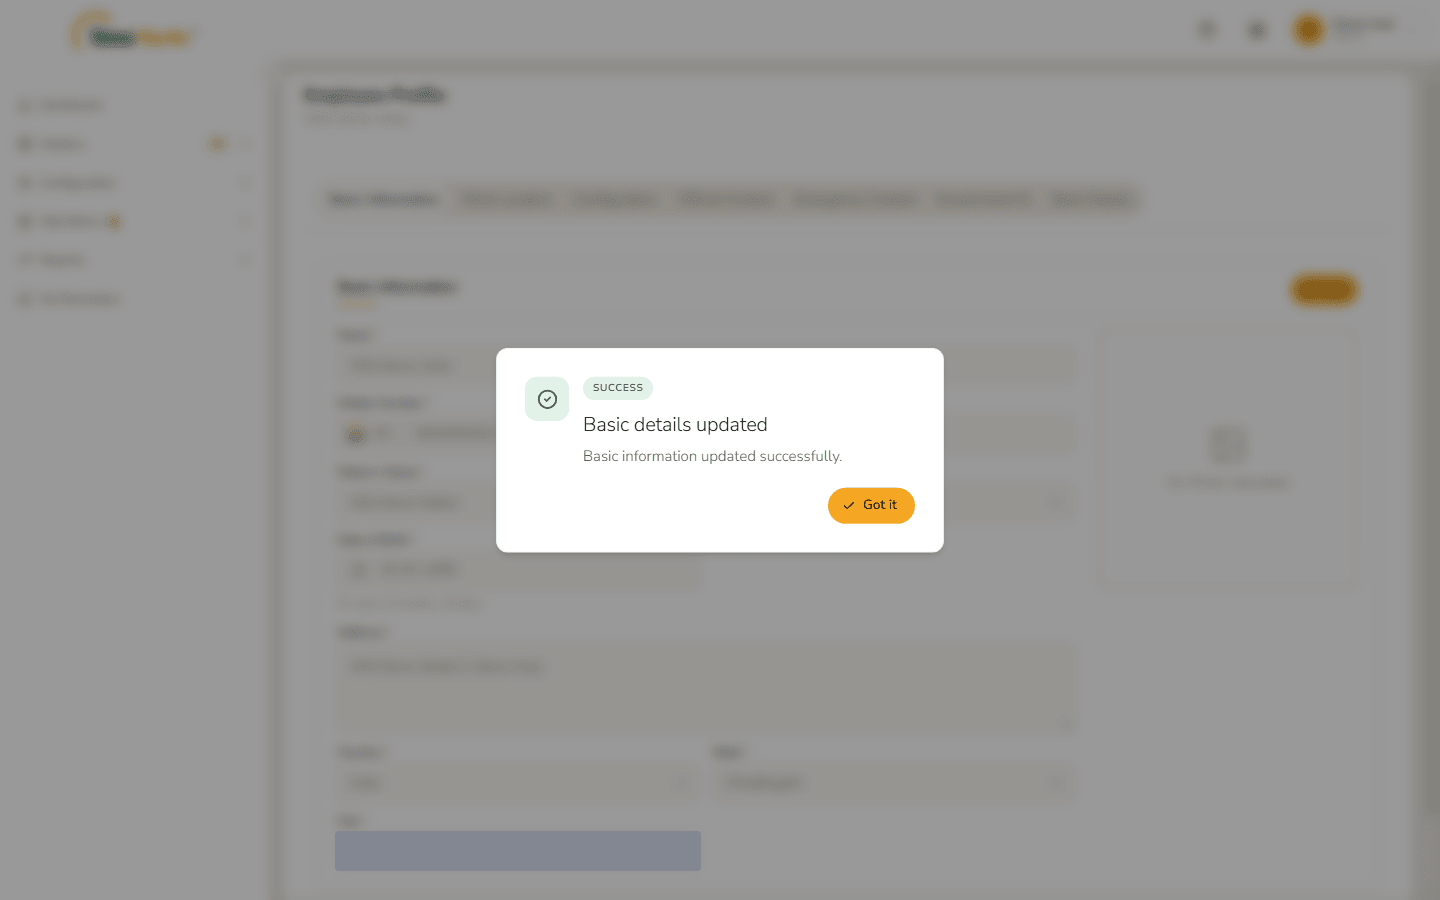
Basic details updated
4. Employee documents
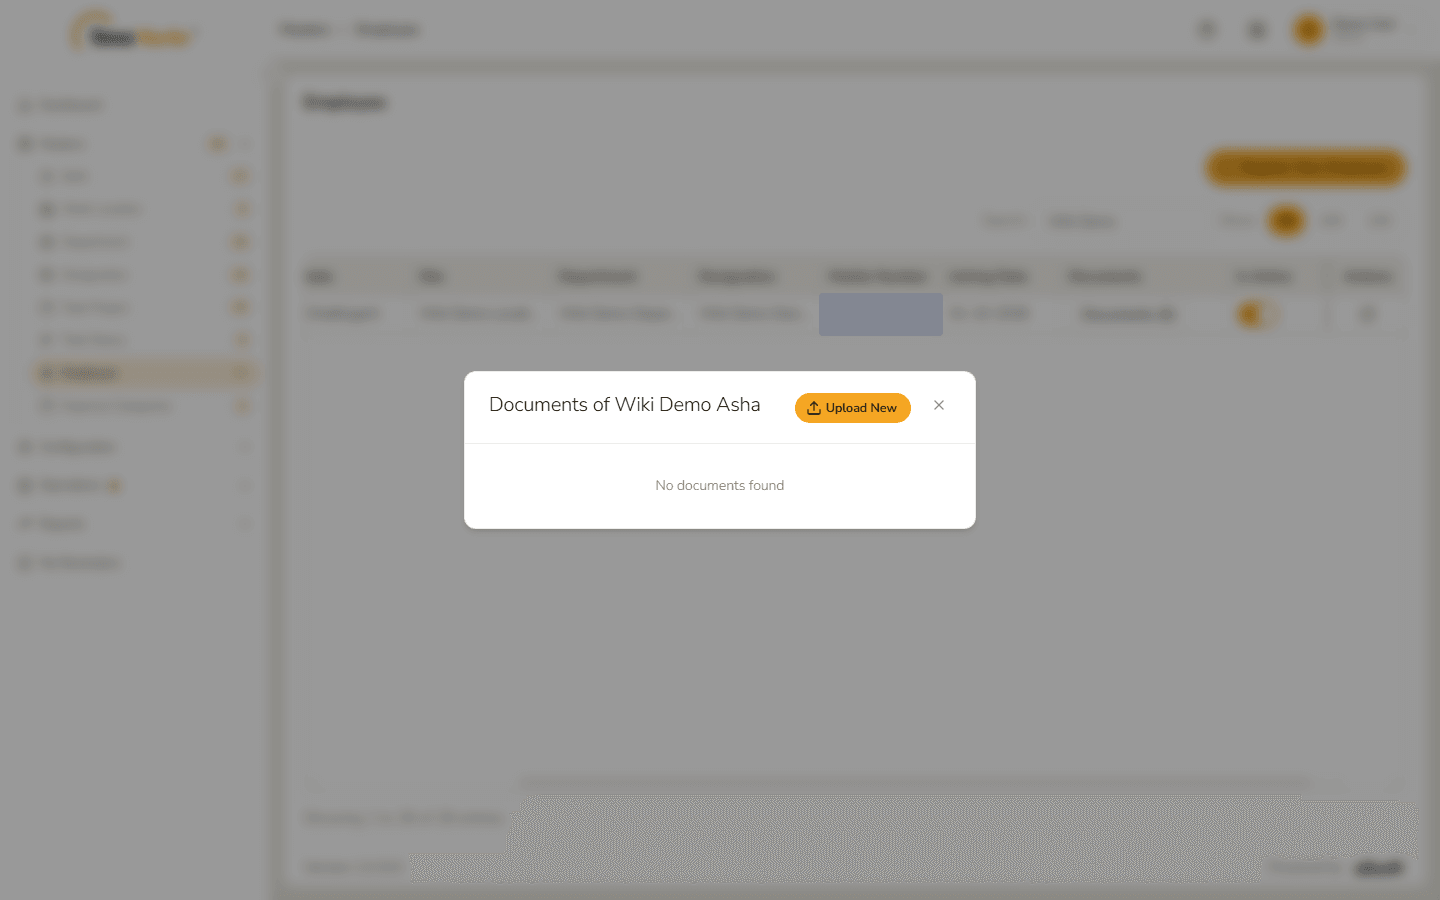
Click the Documents button on a row to open Documents of <employee name>. It lists the stored documents, each with Download and Delete, or says "No documents found".
Click Upload New. A form opens with File (Supported formats: PDF, Images) and Document Title. The titles to choose from are Signed Offer Letter, Signed NDA, Contract Agreement, Relieving Letter, Senior Secondary Marksheet, Higher Secondary Marksheet, Graduation I Marksheet and Other.
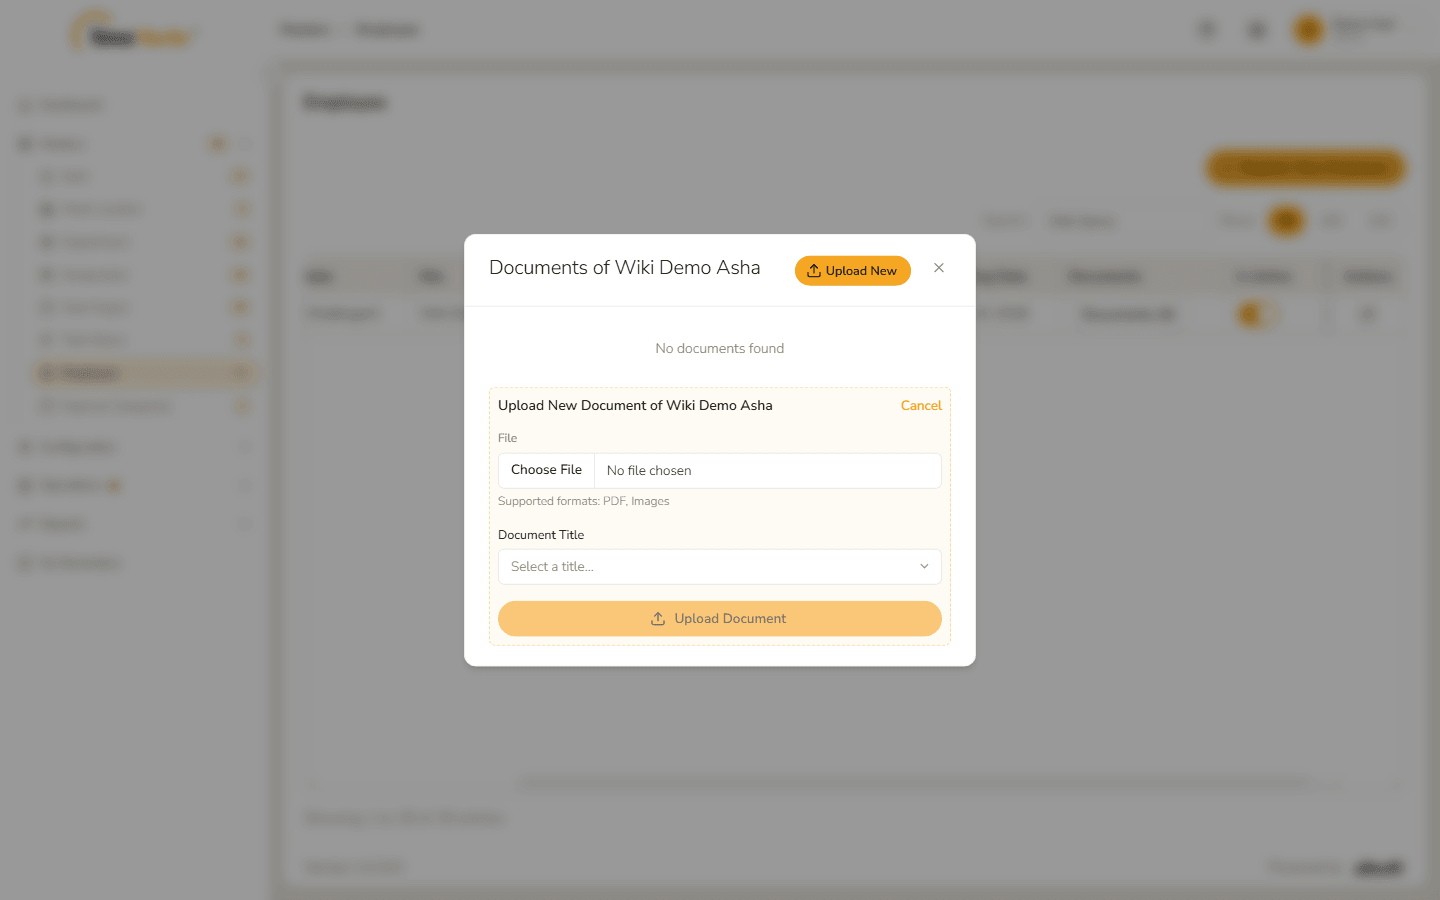
Upload form Choose the file and the title, then click Upload Document. The button reads Uploading… for a moment.
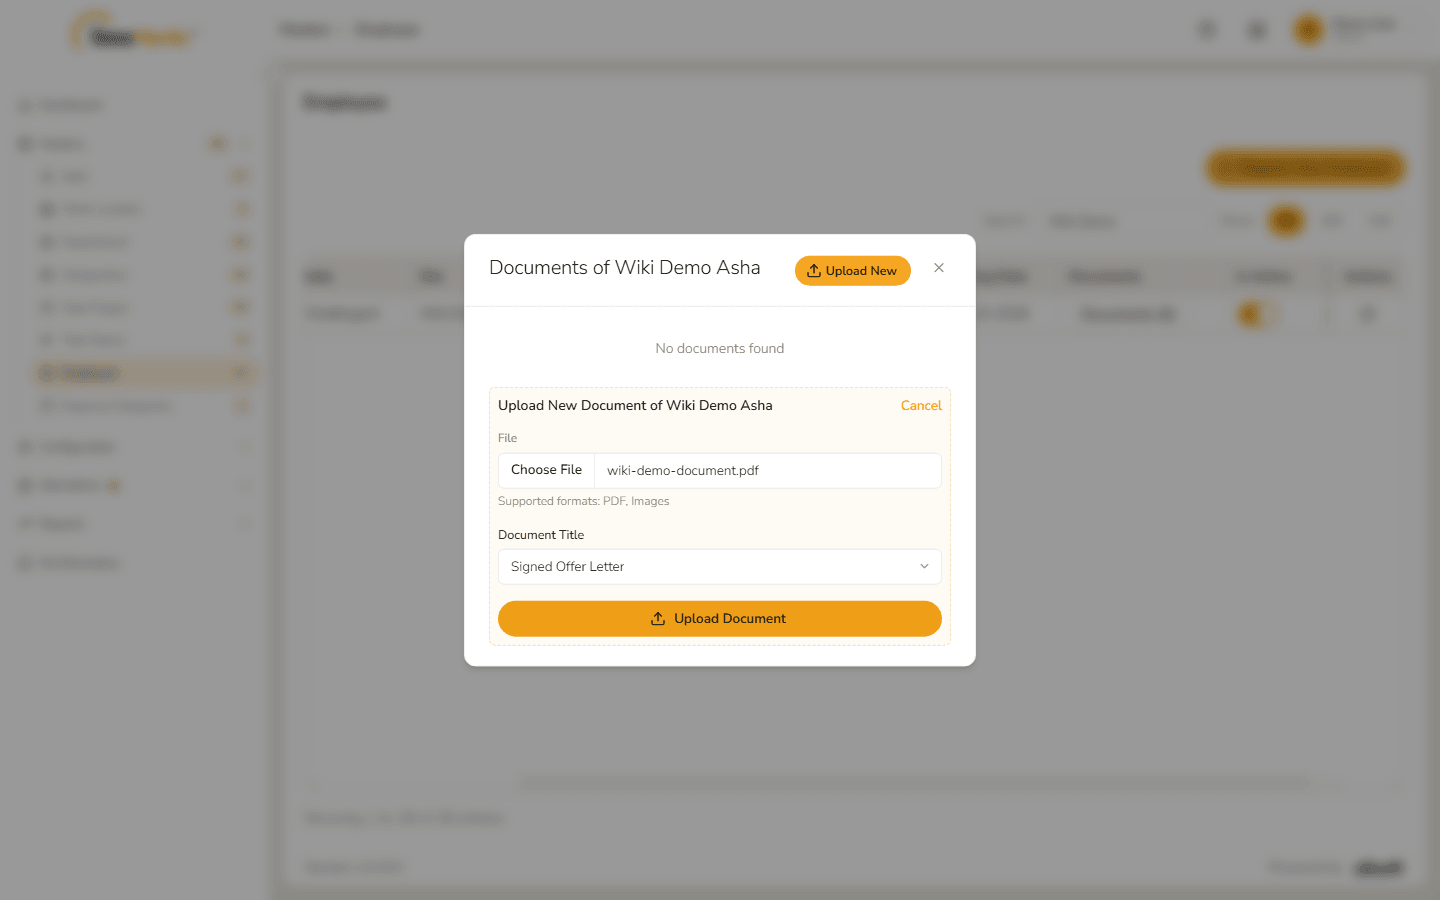
Upload form filled in Document uploaded – Success. Uploaded. confirms it. Click Got it; the document is in the list.
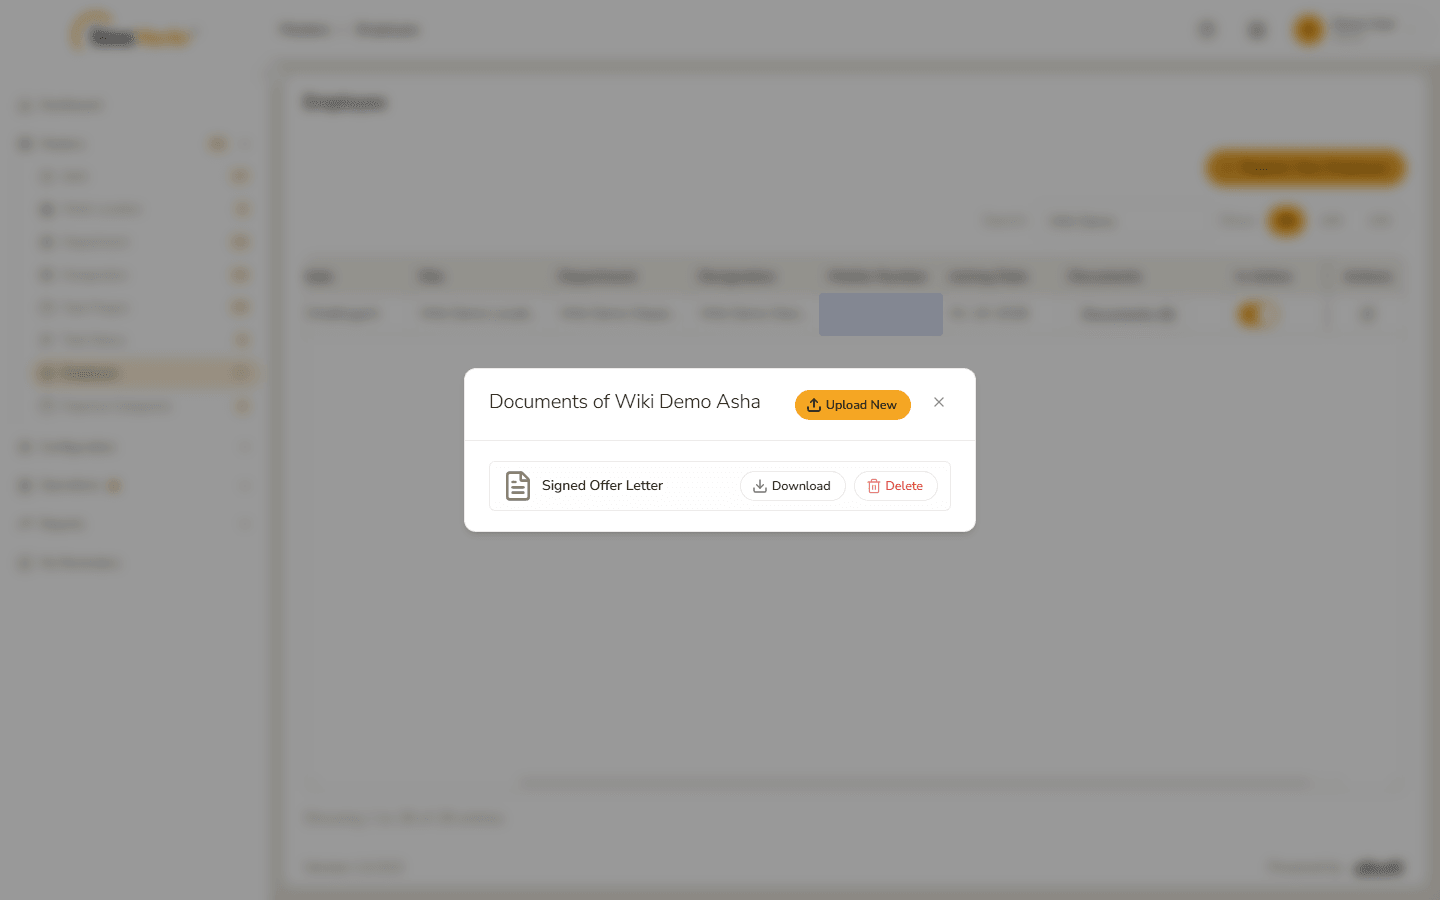
The document in the list To remove it, click Delete. The confirmation reads "Are you sure you want to delete <document title>?".
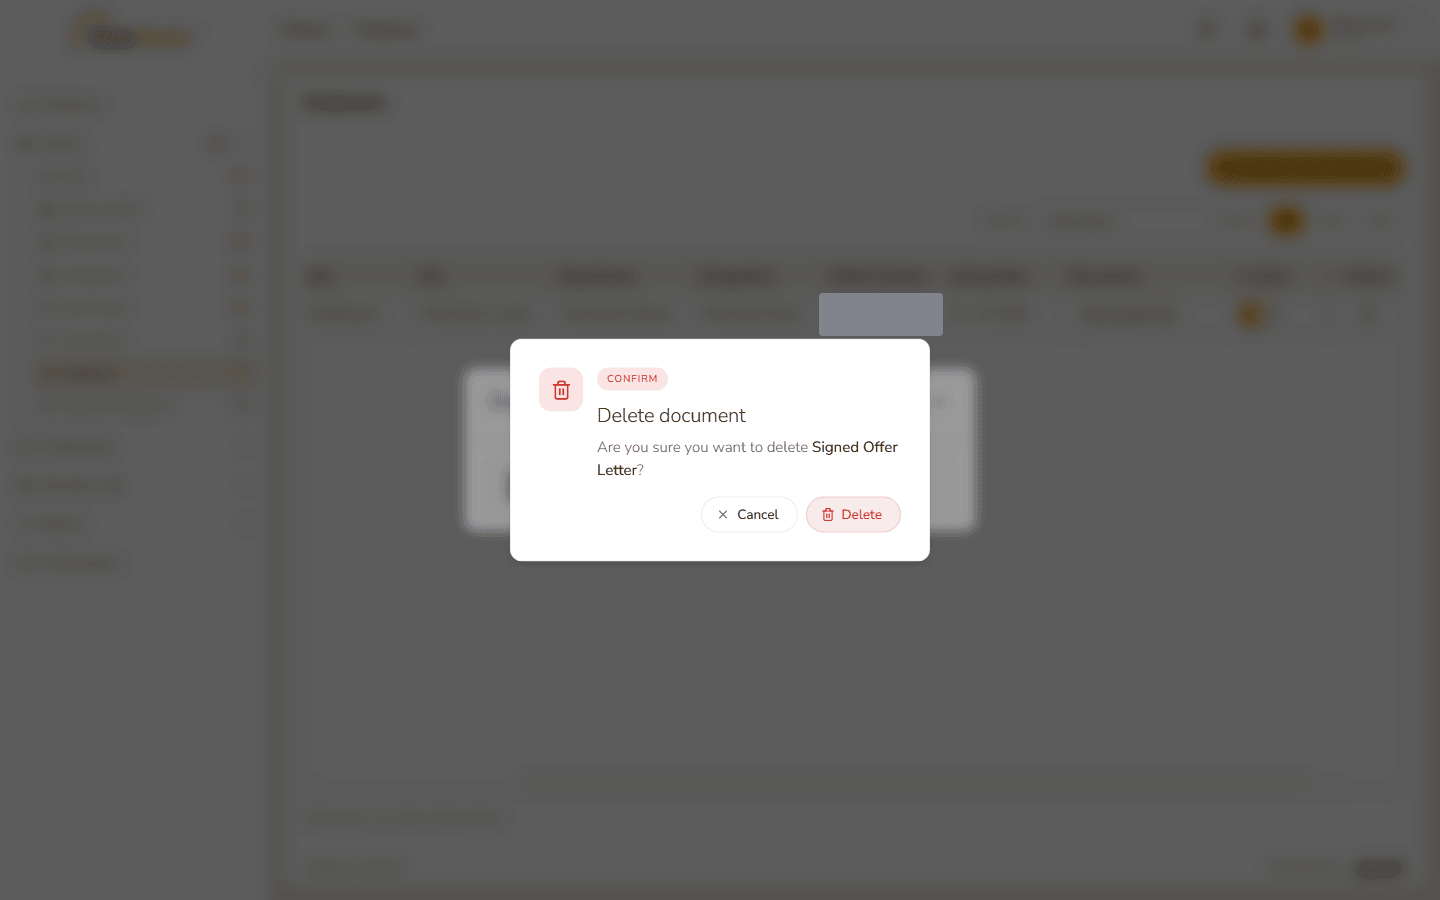
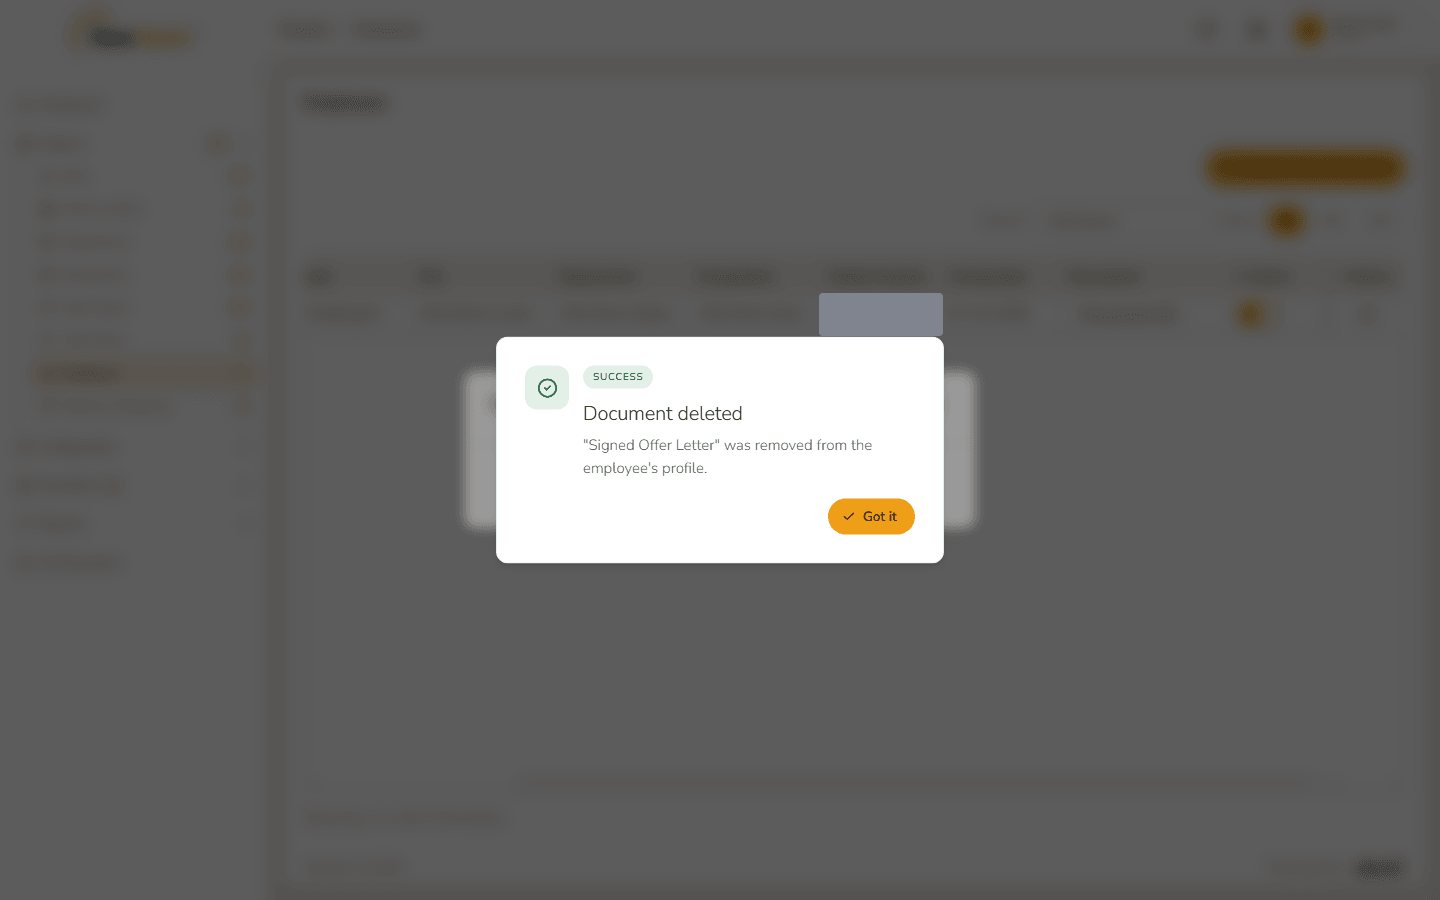
Delete confirmation After you confirm, Document deleted says the document "was removed from the employee's profile."
Document deleted
5. Switch an employee on or off
The Is Active switch asks you to confirm: "Set <employee name> to Inactive?" with Cancel and Confirm.
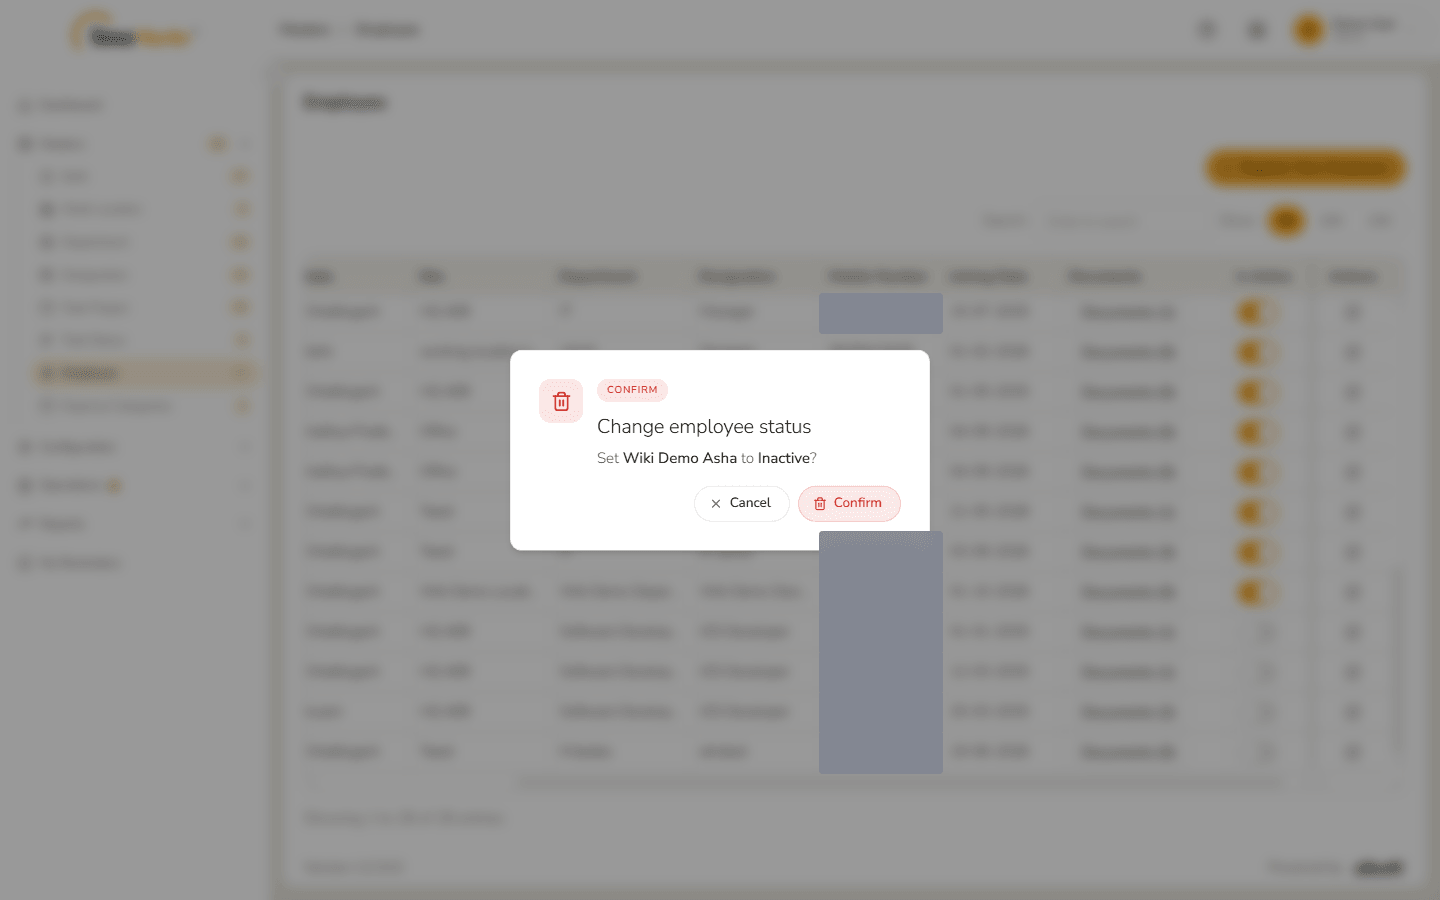
Check the name in the confirmation before you click Confirm. It says which employee the change will be made for. If the server cannot make the change, an Update Employee Status failed message says that nothing was changed and gives the employee id to quote to support.
Related: Work Location · Department · Designation · Shift · Bulk Update Shifts