
Setup Wizard
Where: Admin portal → Dashboard → the Finish setting up. banner → Start setup wizard
Route: /dashboard
A guided, one-time setup for a new company. In six short steps it collects what TimeMarkr needs before it can be used: your company details, a shift, a working location, a department, a designation and your first employee. Everything it saves can be changed later on the pages it links to.
1. Starting the wizard
While your company profile is not filled in, or a shift, a working location, a department or a designation is still missing, the Dashboard shows a banner at the top. The wizard also opens by itself the first time the Dashboard loads (reloading the page counts as a new visit). Employees are not part of this check.

The banner reads Finish setting up. Configure shifts, locations, departments, designations and your first employee in one guided flow. Click Start setup wizard to open the wizard. The banner goes away once everything is in place.
2. How the wizard works
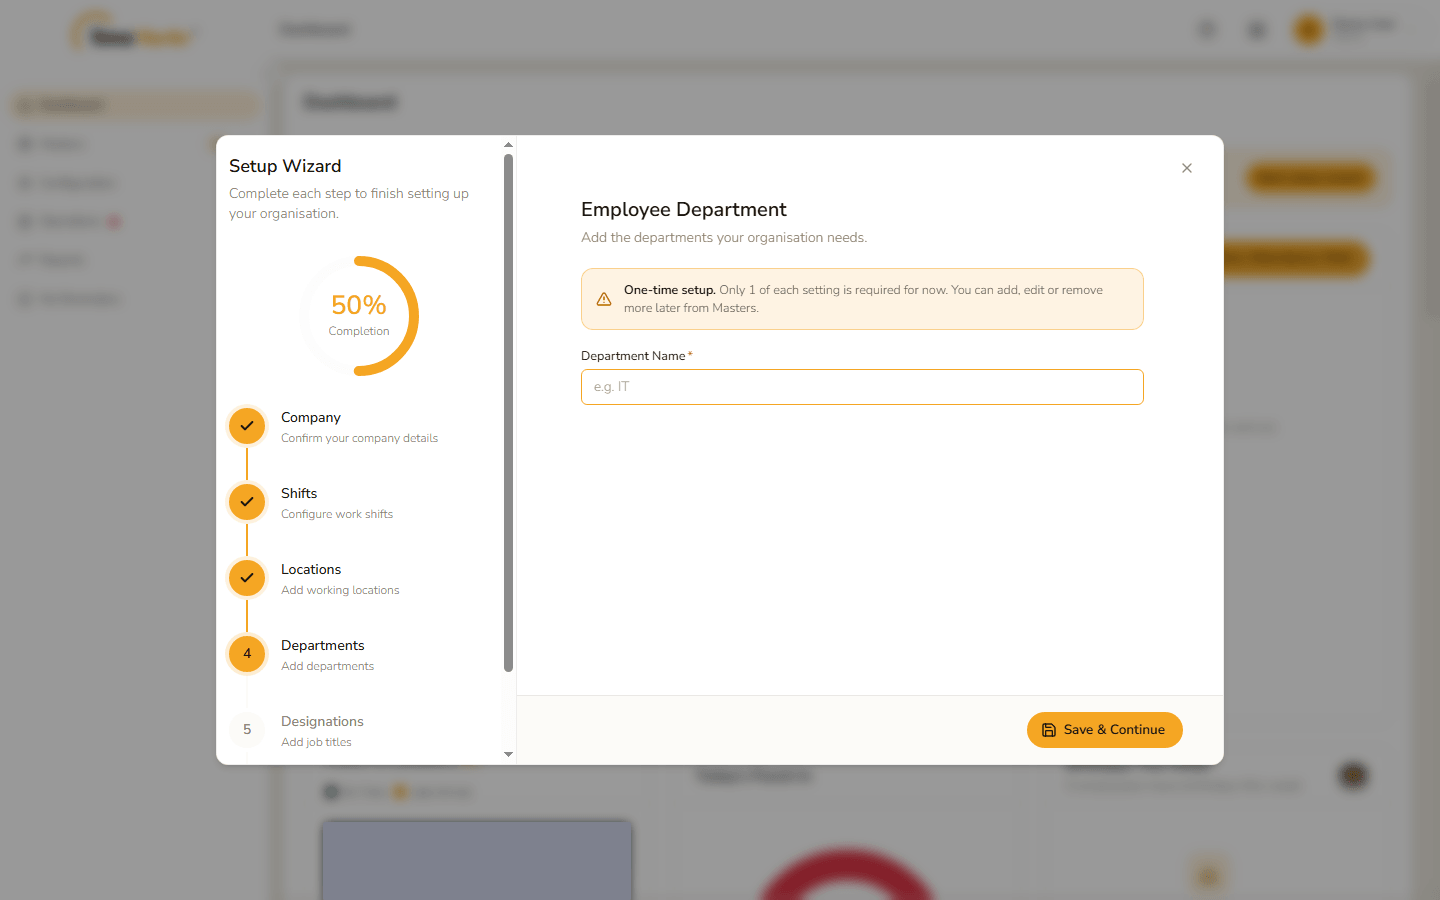
The panel on the left is called Setup Wizard – Complete each step to finish setting up your organisation. It shows how far you are as a percentage, with the six steps below it: Company, Shifts, Locations, Departments, Designations and Employees. A finished step shows a tick.
- It opens on the first step still to do. A step that already has something saved is skipped: the company profile counts as done once its address, contact number and e-mail are filled in, and each of the other steps once at least one record exists. A company that has set up shifts and locations before goes straight to Departments.
- It only moves forward. The steps on the left only show where you are – they cannot be clicked – and there is no Back button. A step that is done is not shown again; to change what you saved, use the page for that record (the last section lists them).
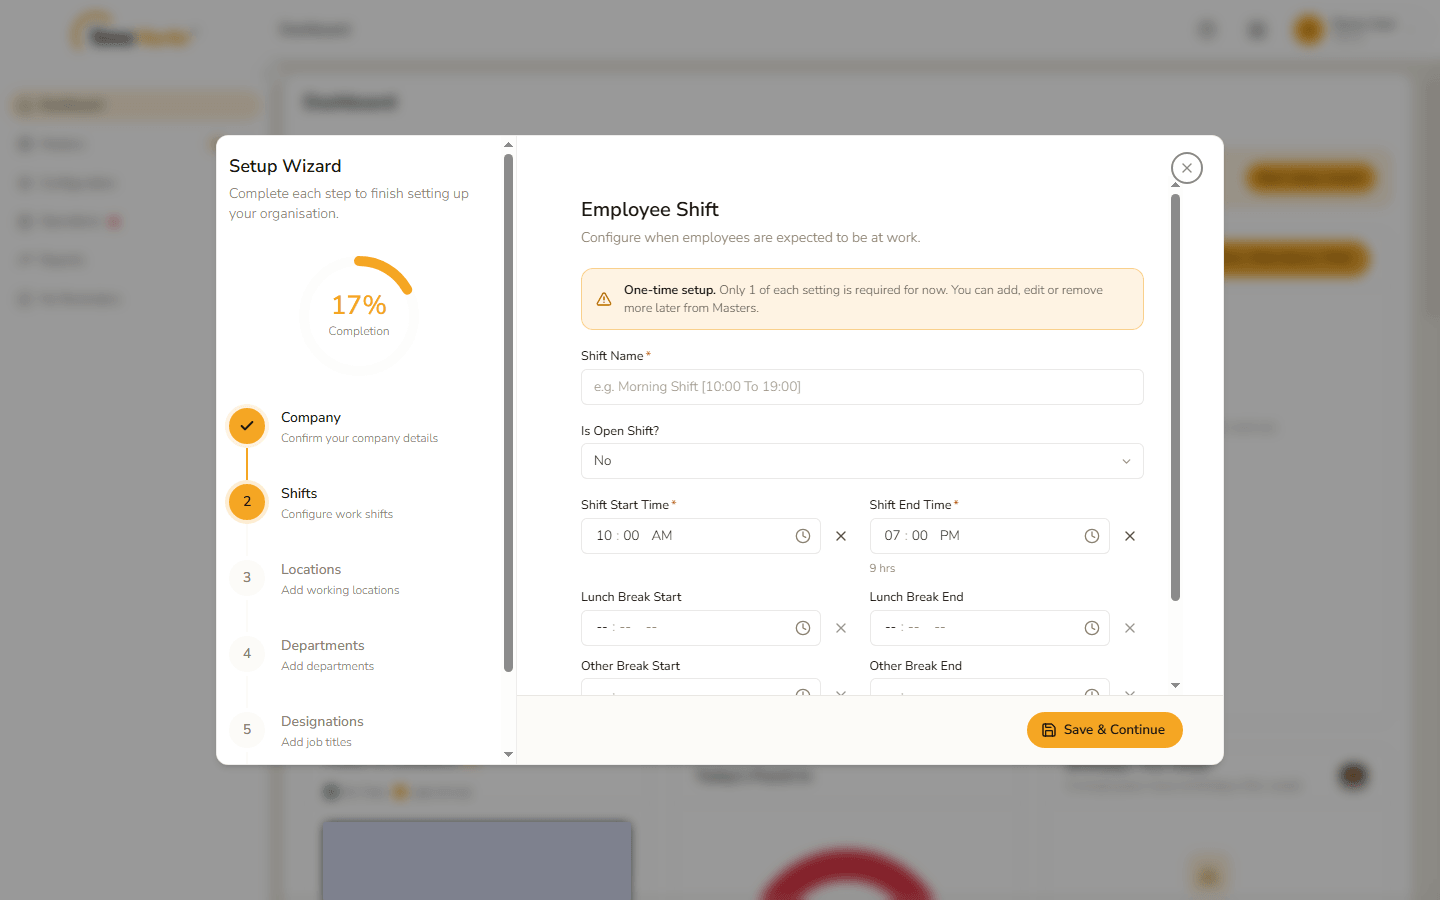
- One of each is enough. Every step from Shifts to Employees starts with a notice: One-time setup. Only 1 of each setting is required for now. You can add, edit or remove more later from Masters.
- Each step has one button at the bottom: Save & Continue, or Save & Finish on the last step. A step that is not filled in correctly stays where it is and marks the fields in red.
- You can close the wizard at any time with the ×. What you have saved stays saved, and the next time the wizard opens it starts at the next step still to do.
3. The six steps
Company
The company profile, with the same fields as Company Profile: Name, WhatsApp Notification Name, Time Zone, Address, Contact Number and E-Mail ID are required; the three HR fields are optional. The form opens filled in with what is already saved, so usually only the address is missing.
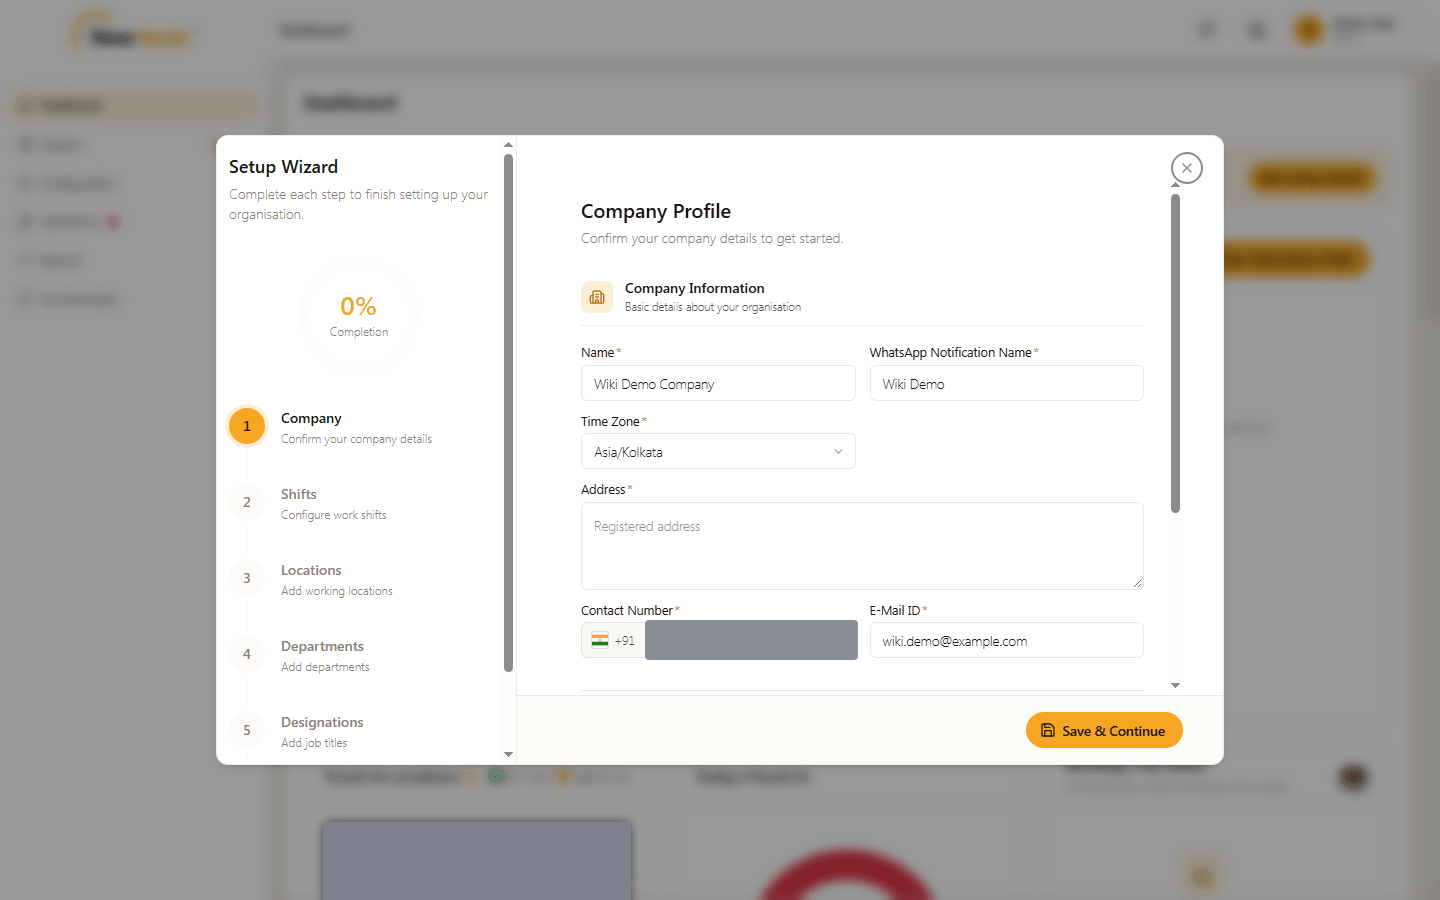
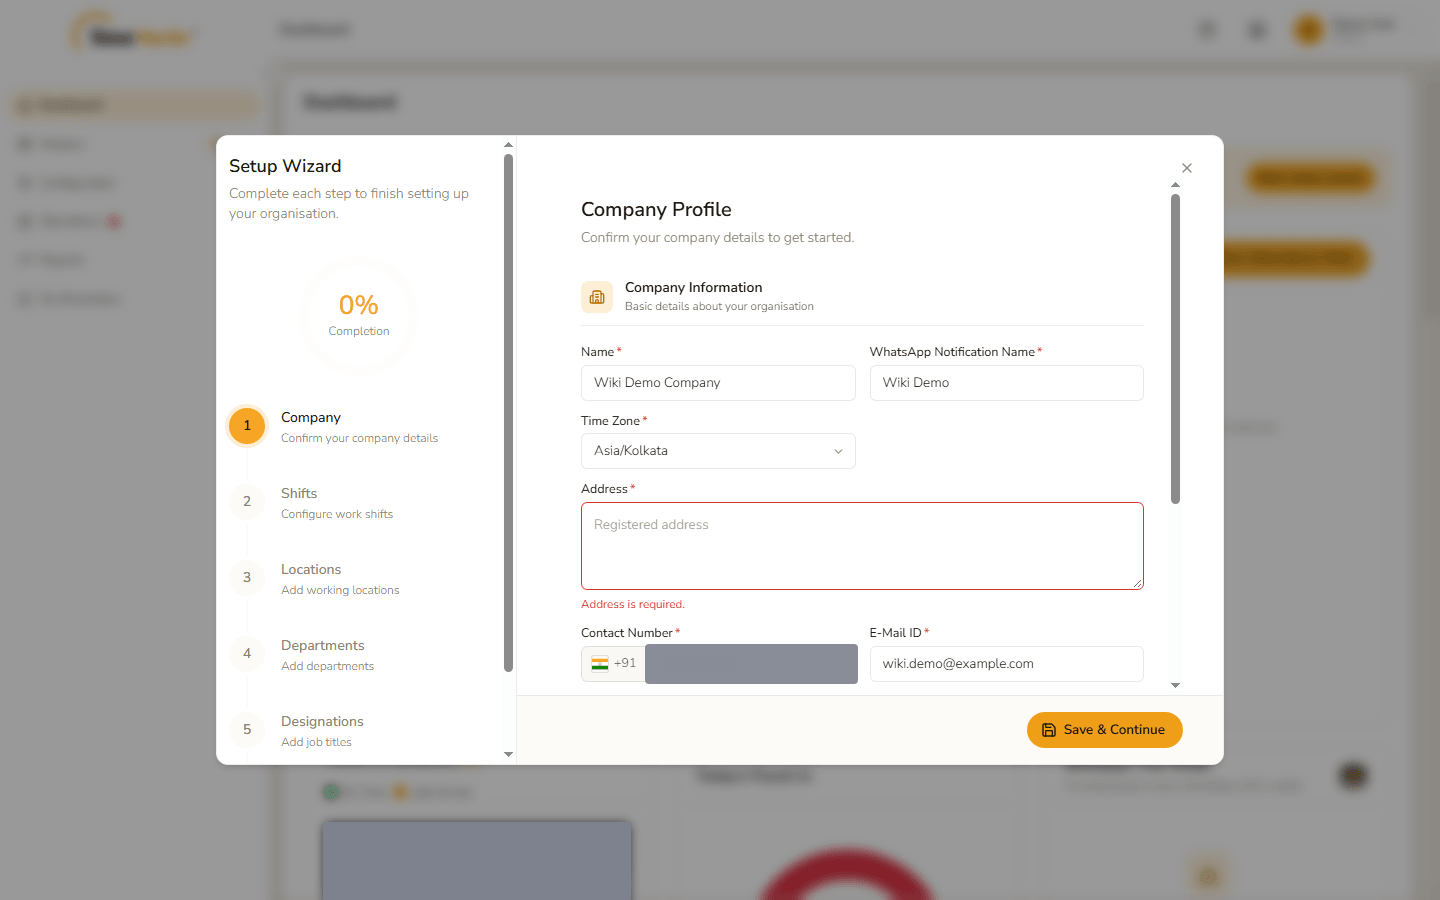
Click Save & Continue with the address empty and the field turns red and says "Address is required." Nothing is saved until it is filled in.
If the saved profile cannot be loaded, the step shows the error with a Try again button instead of the form.
Shifts
The Employee Shift form, the same one as on Shift: a name, whether it is an open shift, and the start and end time with optional breaks. The notice sits above the form.
Locations
The Employee Working Location form, the same one as on Work Location. Choose the shift you just created, then fill in the HR / admin contact and the geo-fence.
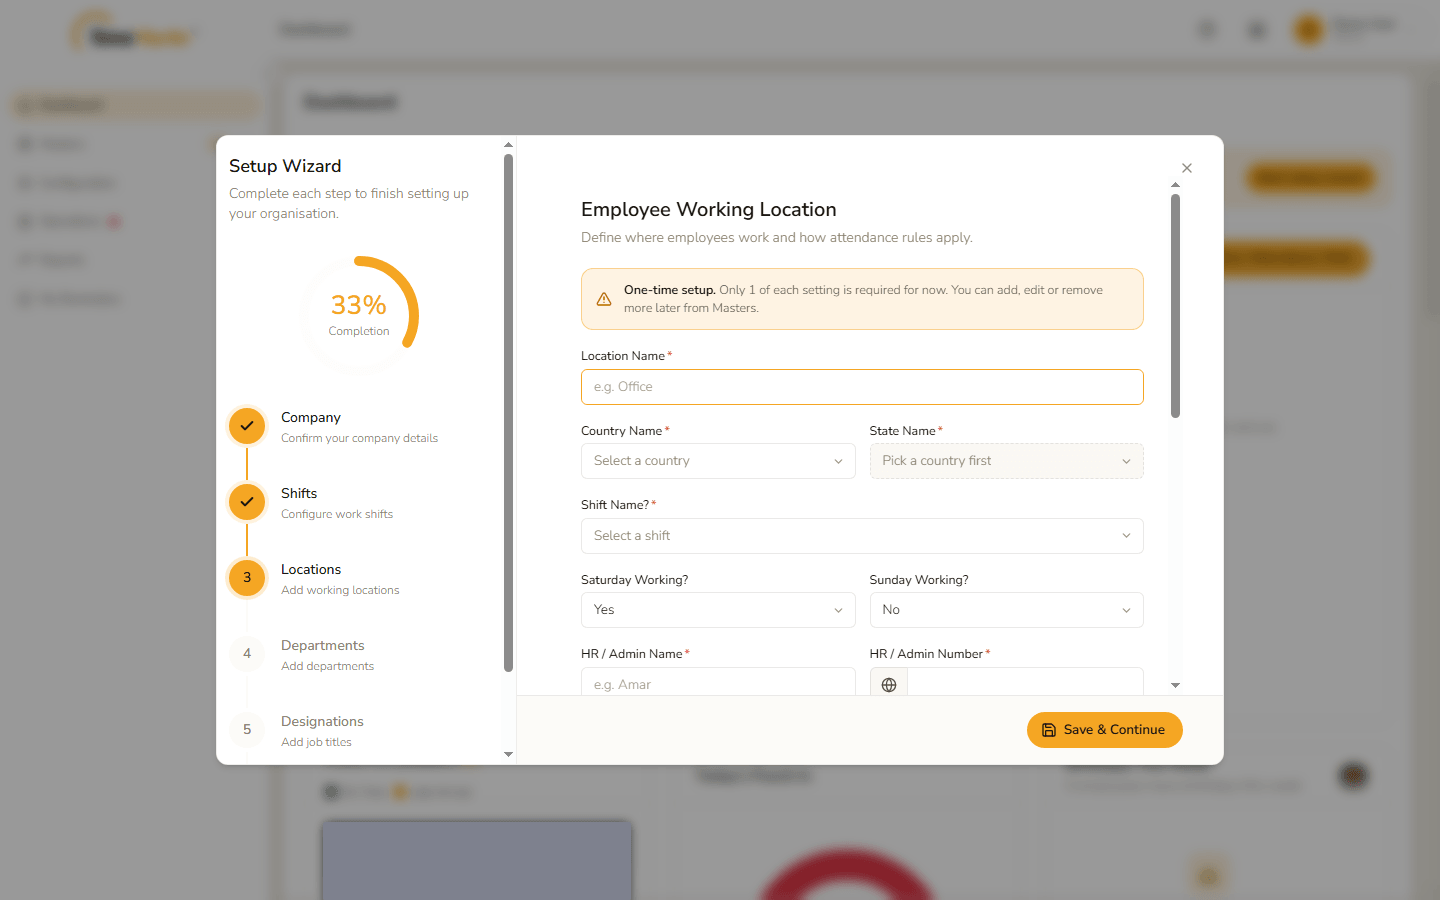
Each of Ask for Late Punch Reason?, Ask for Early Punch Out Reason? and Ask for Over Time Reason? that is set to Yes shows a required text field below – Late Punch Reason, Early Punch Out Reason and Over Time Reason – the first reason to offer employees who punch in late, punch out early or work overtime, such as Heavy traffic, Medical appointment or Project deadline. Set the question to No and its field disappears.
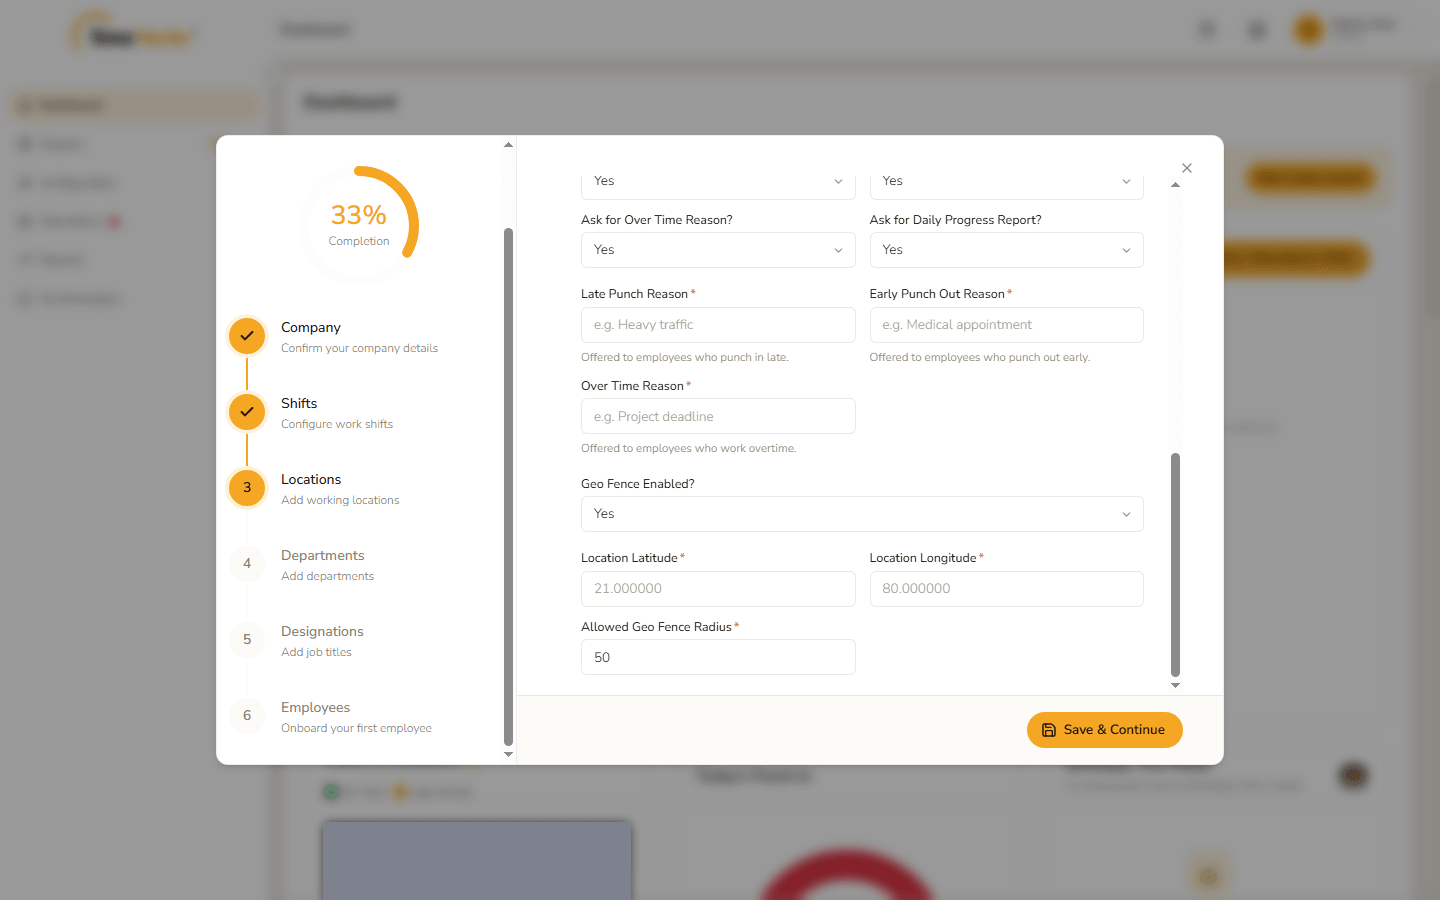
The wording is added to the matching list under Late Punch-In, Early Punch-Out and Over Time reasons before the location itself is saved. If a reason cannot be saved, you see an error and the location is not saved, so you can fix it and try again.
Departments
Just a Department Name. The same record as on Department.
Designations
Just a Designation Name, as on Designation.
Employees
The first employee, with the same form as Employee: the photo comes first, then the Basic, Work Location & Position, Government ID and Bank Details sections. The form asks for a working location, a department and a designation to choose from. The button on this step reads Save & Finish.
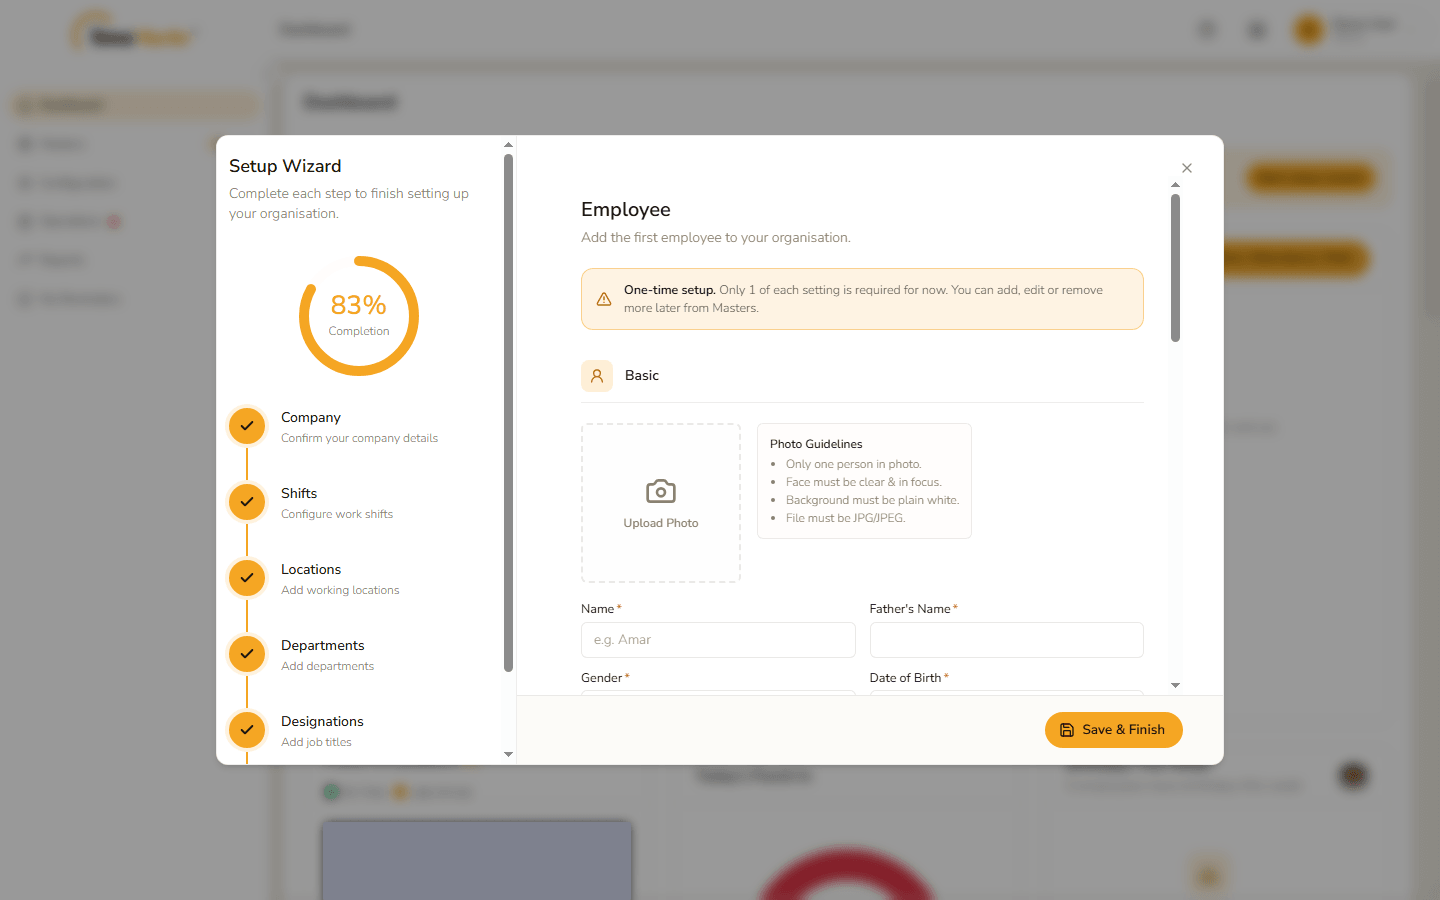
When the last step is saved the wizard closes and the Dashboard refreshes.
4. Changing things afterwards
The wizard never edits. Use these pages to change, add or remove what it created:
| What | Where |
|---|---|
| Company details | Company Profile |
| Shifts | Shift |
| Working locations | Work Location |
| Departments and designations | Department · Designation |
| Employees | Employee |
| Late, early and over-time reasons | Attendance reasons |
Related: Dashboard · Company Profile · Shift · Employee