
Reimbursement Claims
Where: Admin portal → Operations → Reimbursement Claims
Route: /operations/reimbursement-claims
The claims your employees have raised from New Claim. Open a claim, decide each expense item – approve it, approve it for less, or reject it – and send the decision back. The number beside Reimbursement Claims in the menu counts the claims that are still Submitted, waiting for you.
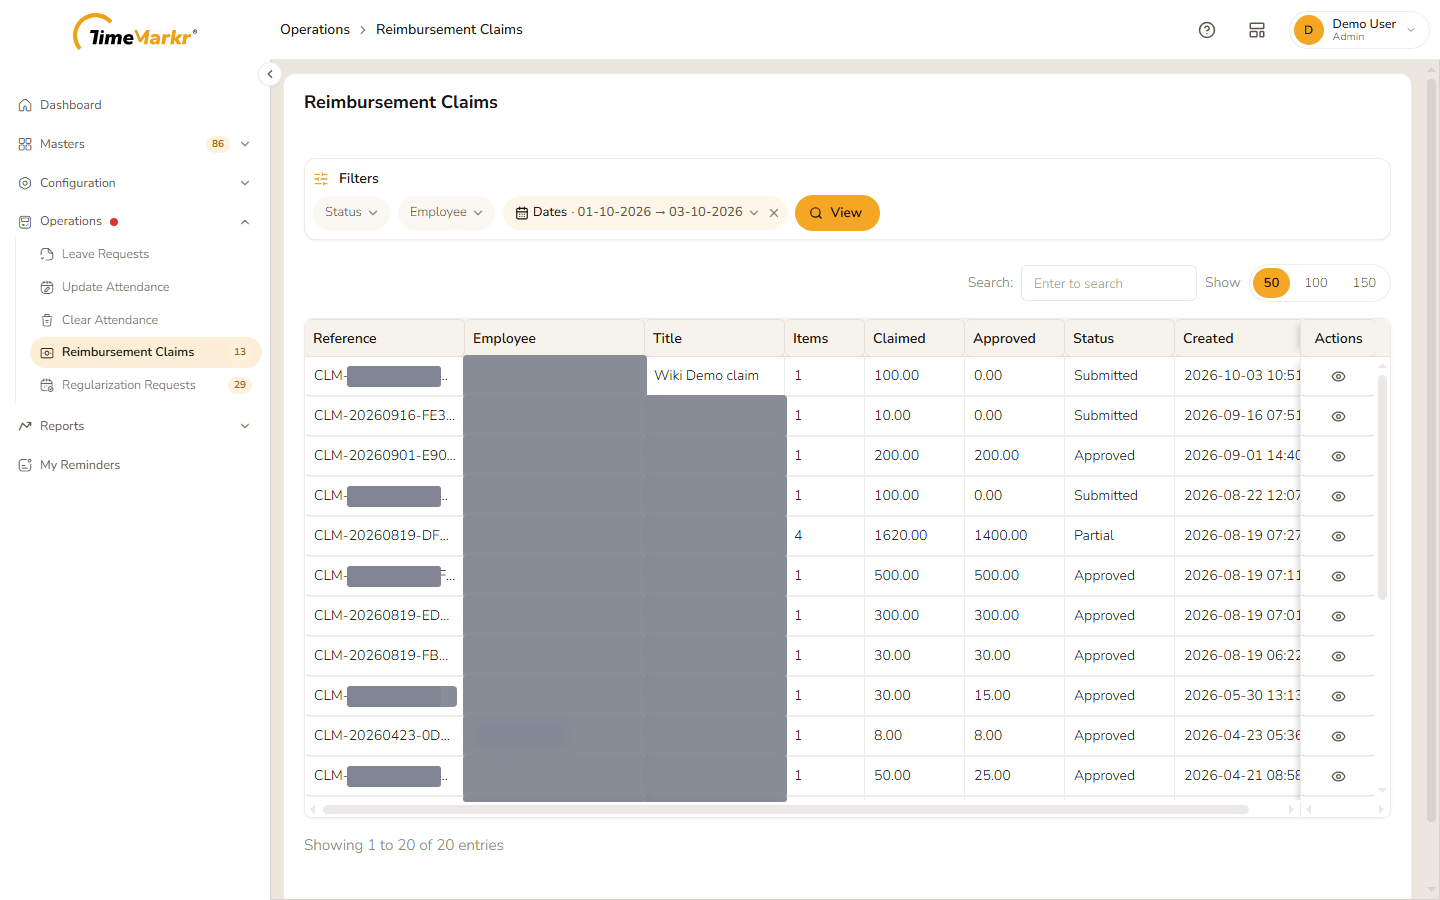
1. The list
| Column | What it shows |
|---|---|
| Reference | The claim number – CLM- followed by the date and a code. |
| Employee | Who raised the claim. |
| Title | The claim title. |
| Items | How many expense items it holds. |
| Claimed | The total asked for, in rupees. |
| Approved | The total approved so far. |
| Status | Submitted, Returned, Approved, Rejected, Partial or Paid. |
| Created | When the claim was raised. |
| Actions | The eye icon, View claim details. |
Filters
Status – pick one of All, Submitted, Returned, Approved, Rejected, Partial or Paid.
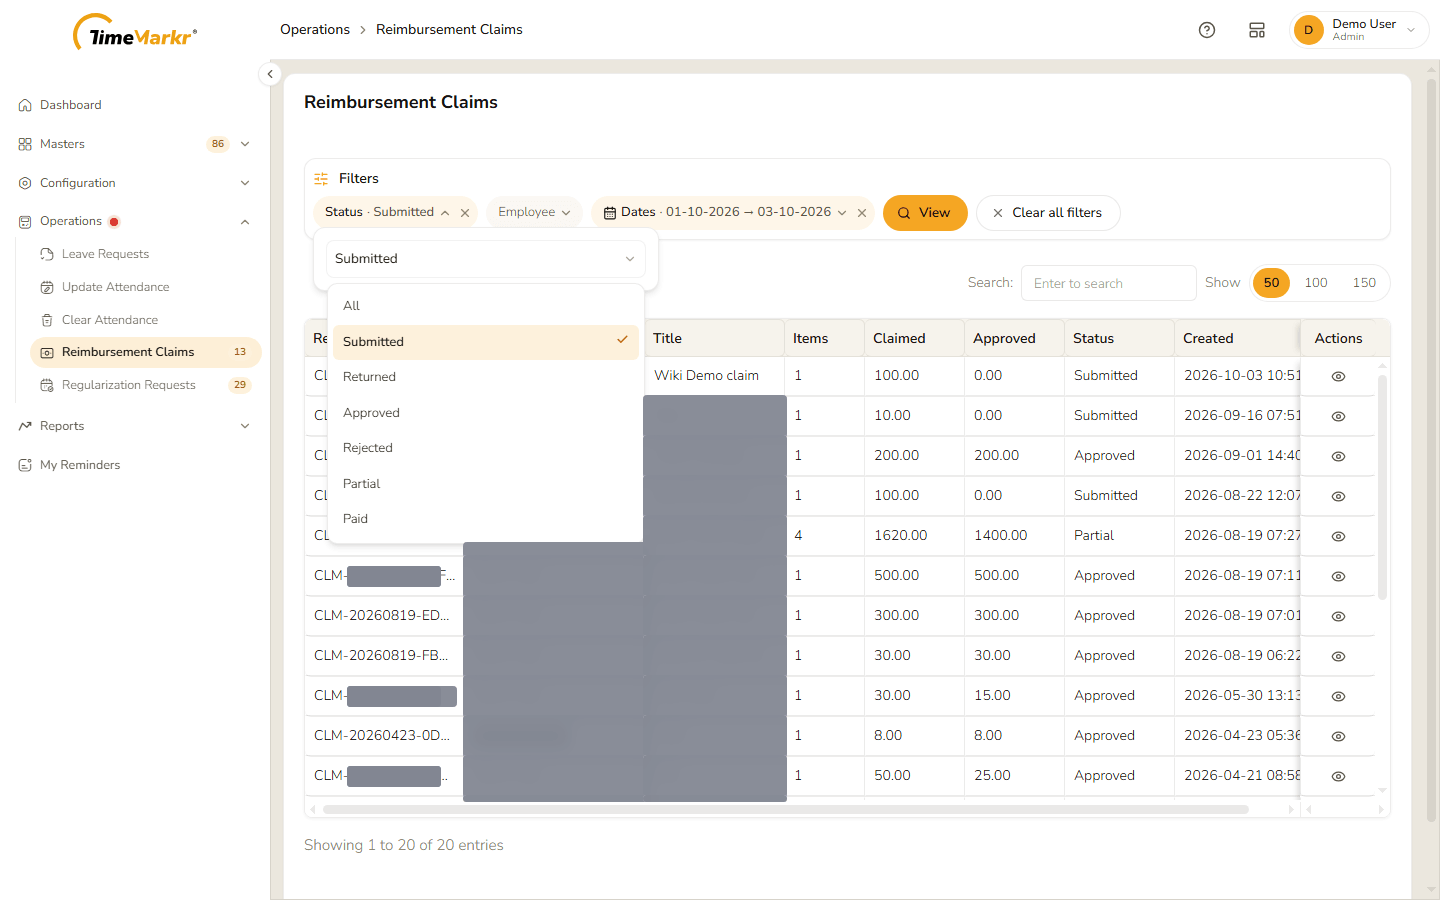
The Status filter - Employee – type at least three characters of a name and pick the person, as on Leave Requests.
- Dates – a from and a to date: "Leave a box empty for no limit. Both boxes filled means between those two days."
Click View to apply the filters, Clear all filters to start again. Search filters the rows on screen and Show 50 / 100 / 150 chooses how many to see.
2. Open a claim
Click the eye icon on the claim. The claim opens in a large window.
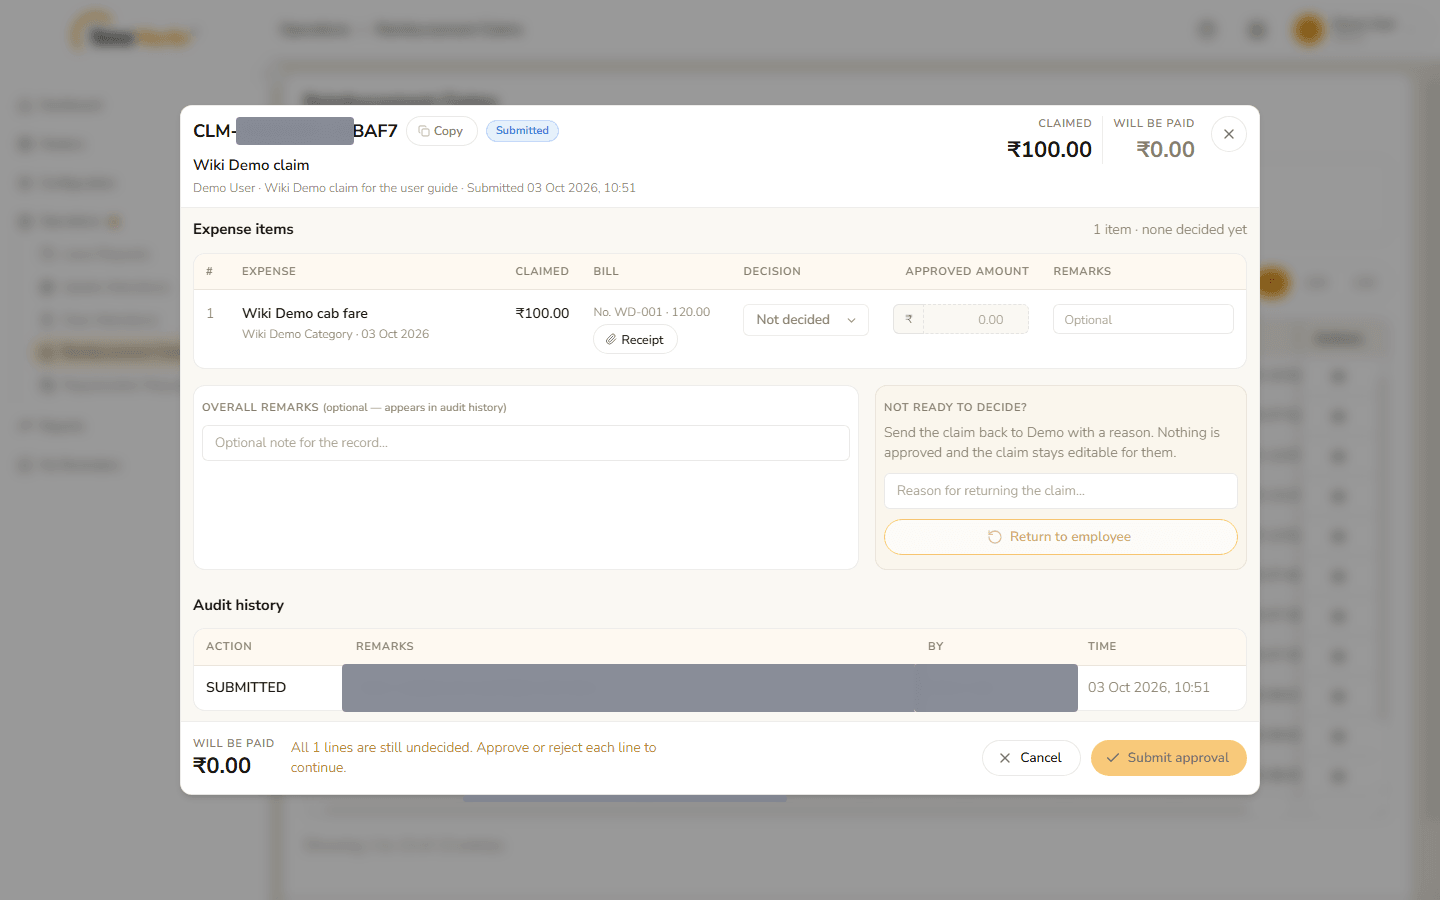
- Top bar – the claim number (Copy puts it on the clipboard), the status, the title, and who raised it · the description · when it was submitted. At the right, Claimed is the total asked for and Will be paid is the total you have decided so far.
- Expense items – one row for each bill: the item and its category and date, the Claimed amount, the Bill number and amount, a Receipt button that opens the receipt, and the controls for your decision (below). The line above the table counts the decisions – 1 item · none decided yet.
- Overall remarks – an optional note for the record. It appears in the audit history and the employee sees it as Approval Remarks.
- Not ready to decide? – "Send the claim back to <employee> with a reason. Nothing is approved and the claim stays editable for them." Write the Reason for returning the claim and click Return to employee.
- Audit history – every step the claim has been through: the action, the remarks, who did it and when.
3. Decide the items
For every expense item:
Open the Decision list. The choices are Not decided, Approve and Reject.
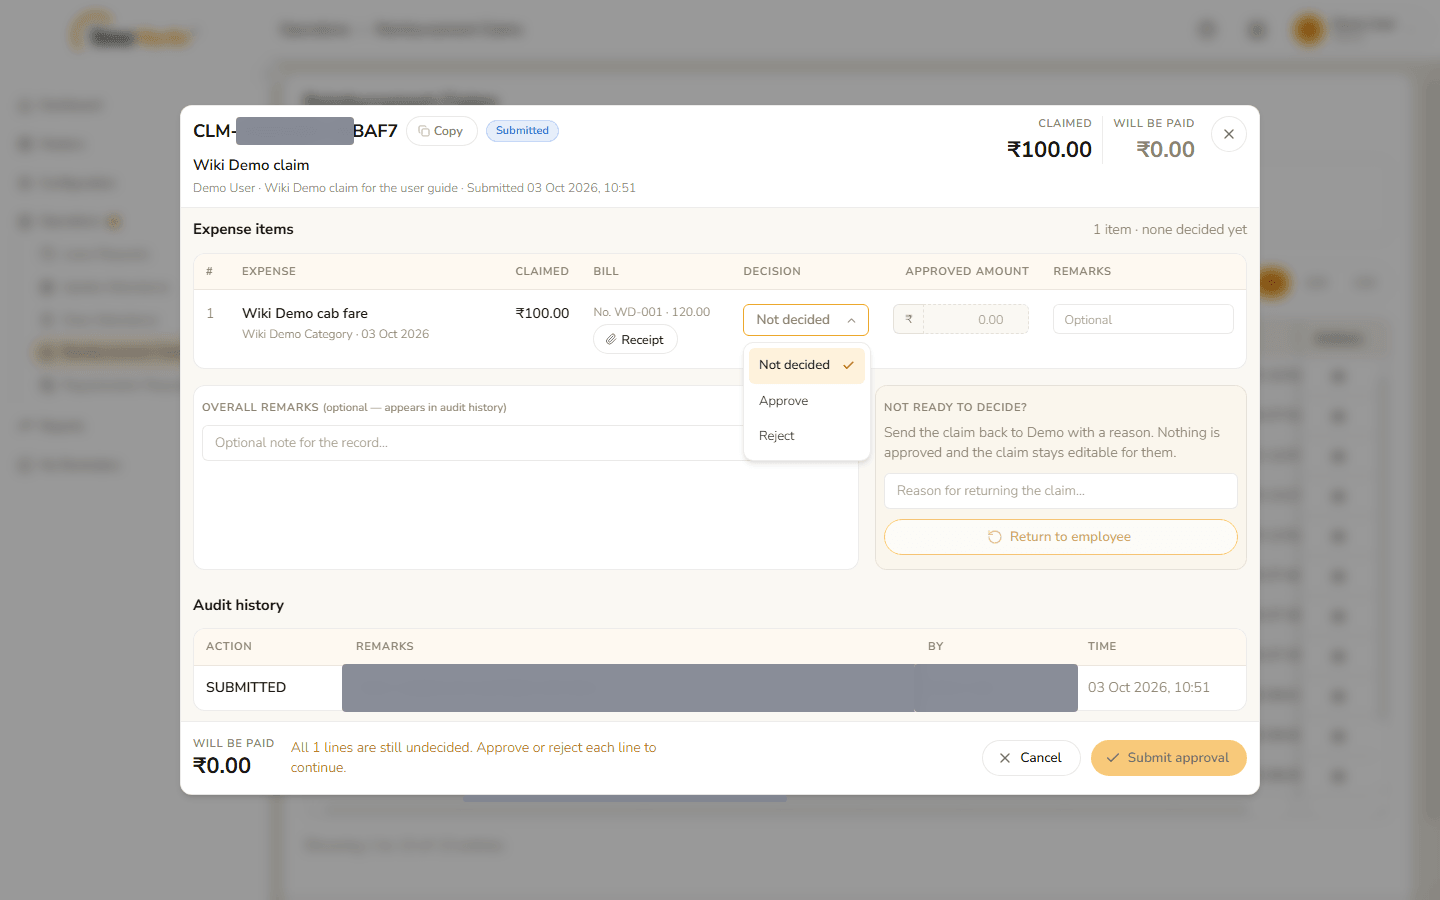
The decision list Approve – the Approved amount fills in with the full claim. Change it to approve less; "Reduced from ₹100.00" appears under it. The total at the bottom left follows: "The full ₹100.00 claimed will be paid." or, for less, "₹20.00 of the ₹100.00 claimed will not be paid."
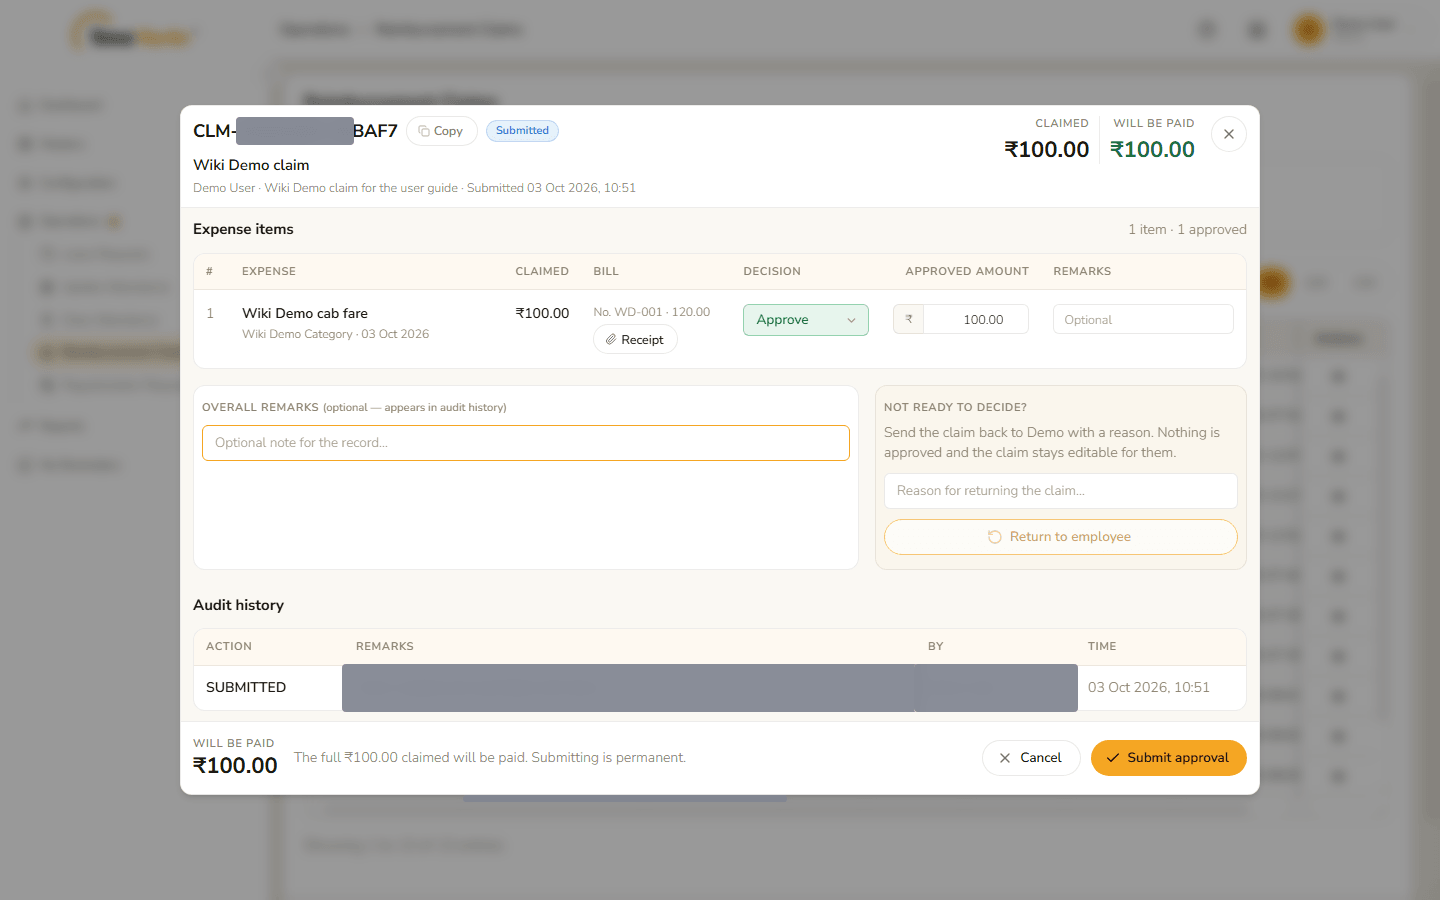
Approved in full 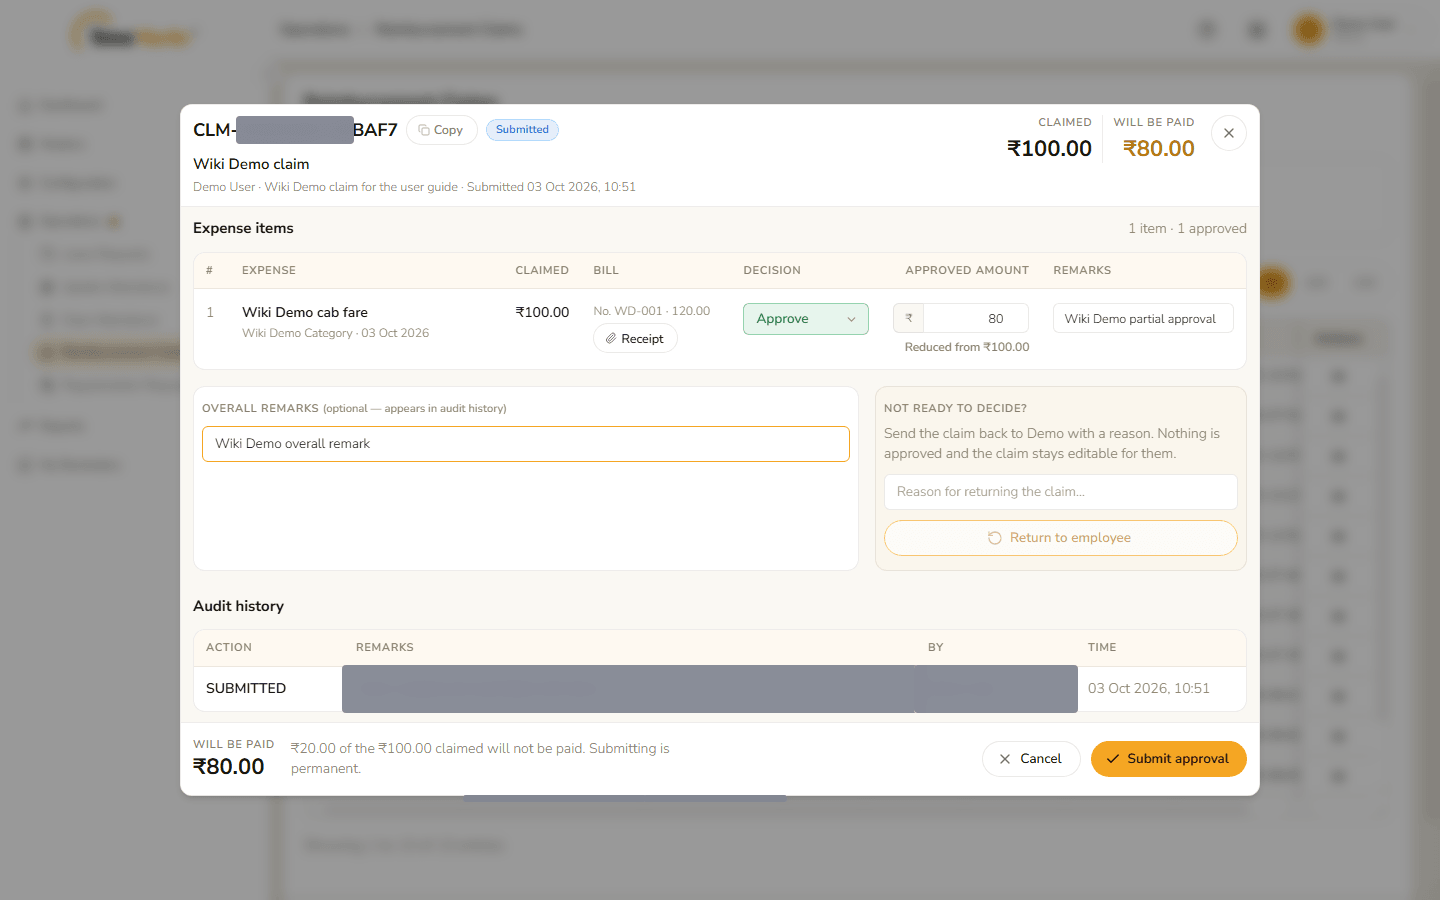
Approved for ₹80 Reject – the amount drops to ₹0.00 and the total says "₹100.00 of the ₹100.00 claimed will not be paid."
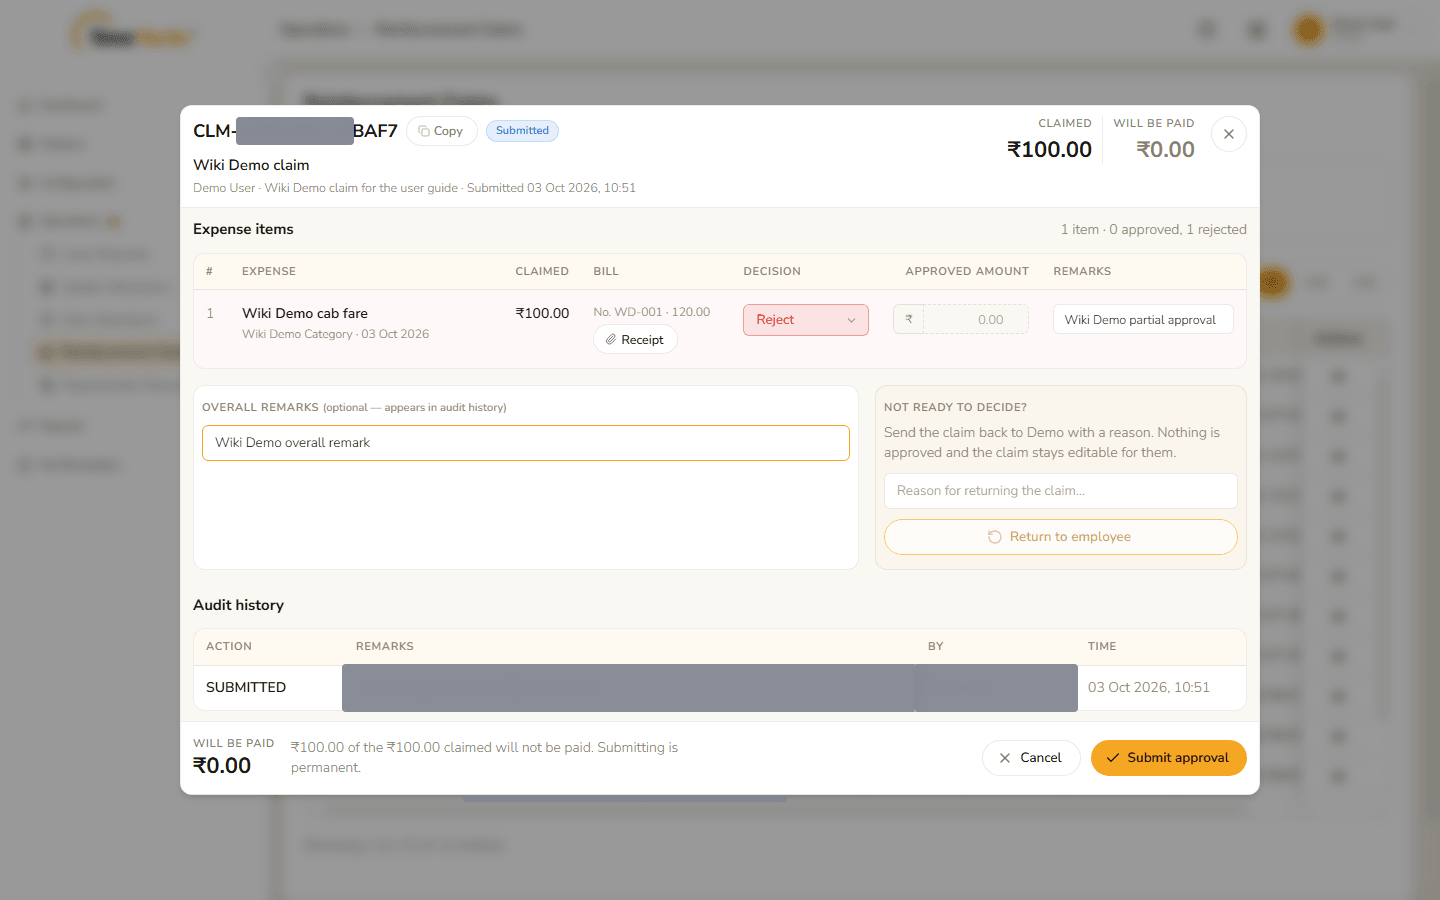
A rejected line - Use the Remarks box on the line for a note about that item. The employee sees it as Item Remarks.
Submit approval stays pale – "All 1 lines are still undecided. Approve or reject each line to continue." – until every line has a decision.
4. Submit the decision
Click Submit approval. Submitting is permanent. A confirmation – Claim approved – Claim CLM-… is now "Approved": 1 expense(s) approved and 0 rejected, for a total of 80.00. – appears. Click Got it.
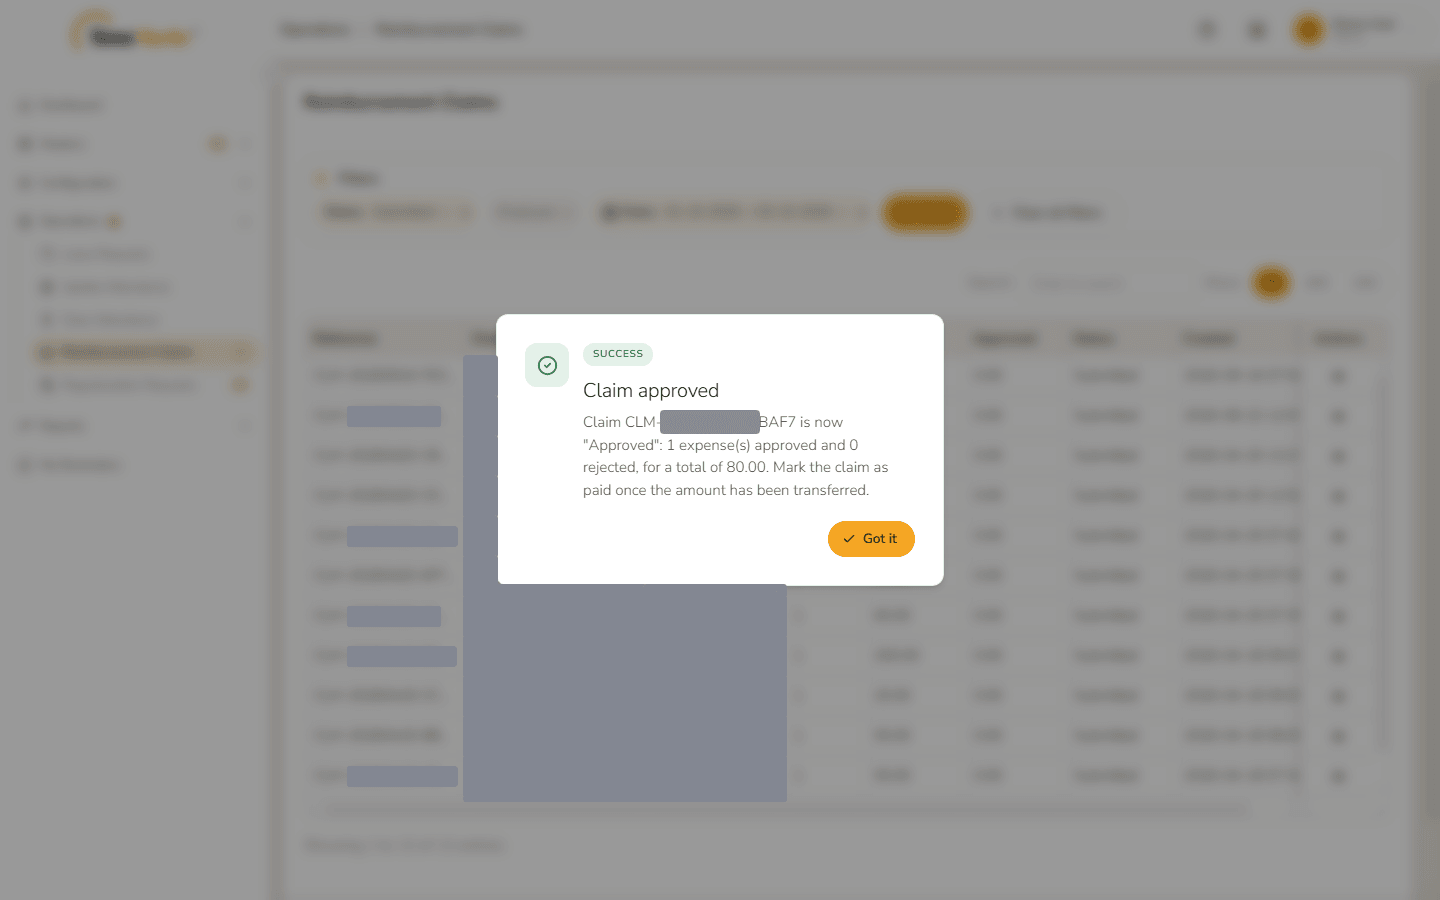
The claim now shows the status Approved and the approved total in the list. When you open it again, the decision is shown – "Decided on … by … — this claim can no longer be approved or returned." – with the overall remarks, how much was not paid, and the new line in the audit history.
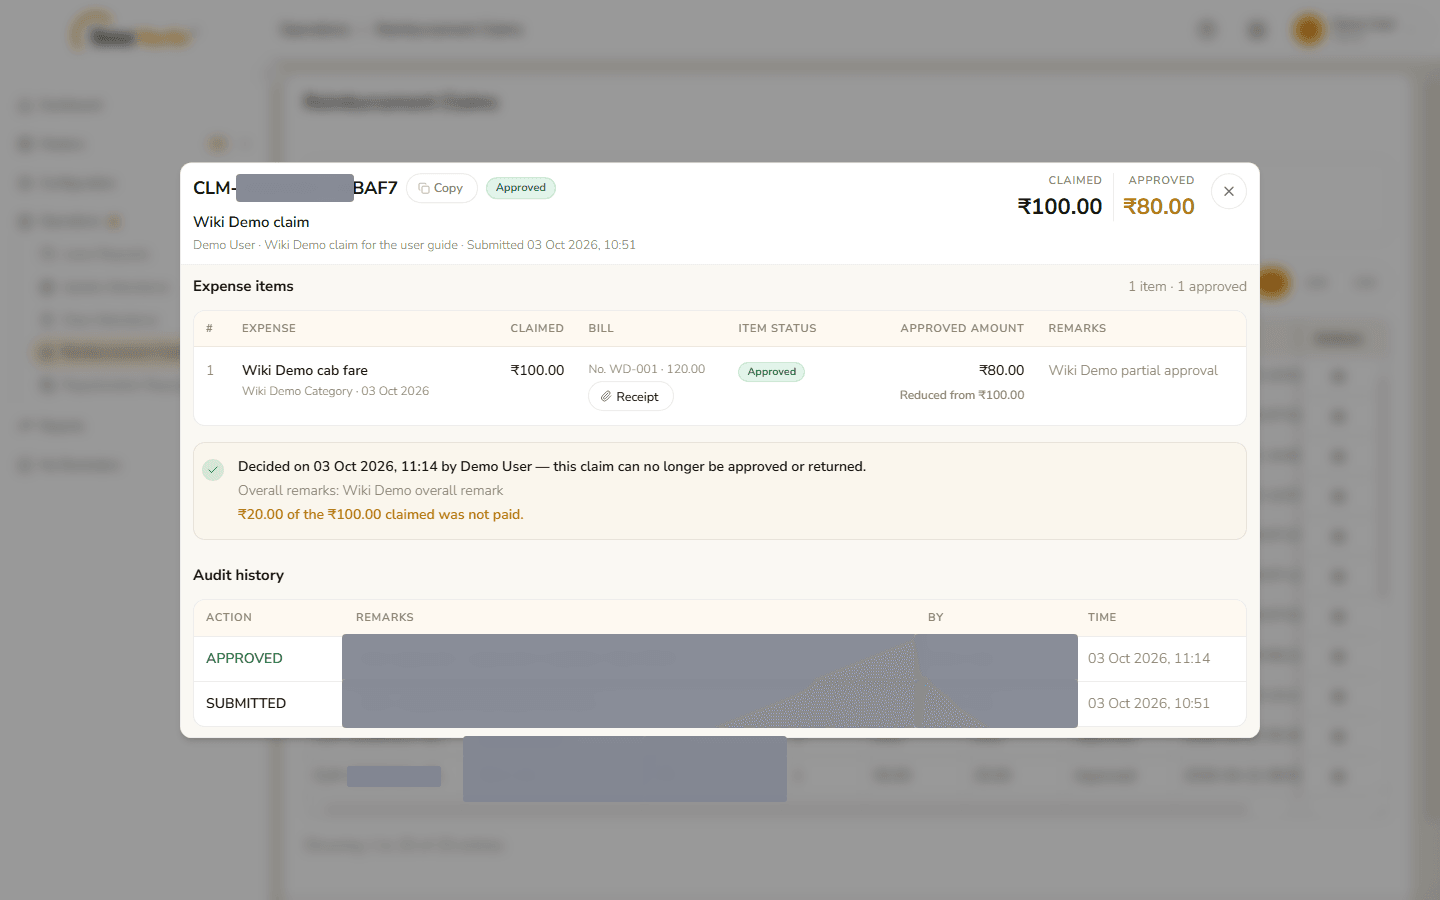
The employee sees the same decision under My Claims.
Related: Reimbursement (employee portal) · Expense Categories