
Reimbursement
Two pages under Reimbursement in the employee portal: New Claim – where you ask the company to pay back money you spent – and My Claims – where you follow what happened to each claim.
A claim has a title and one or more expense items. Each item is a single bill – a cab fare, a meal, a hotel night – with its category, its amounts and the receipt.
1. My Claims
Where: Employee portal → Reimbursement → My Claims
Route: /employee/reimbursement
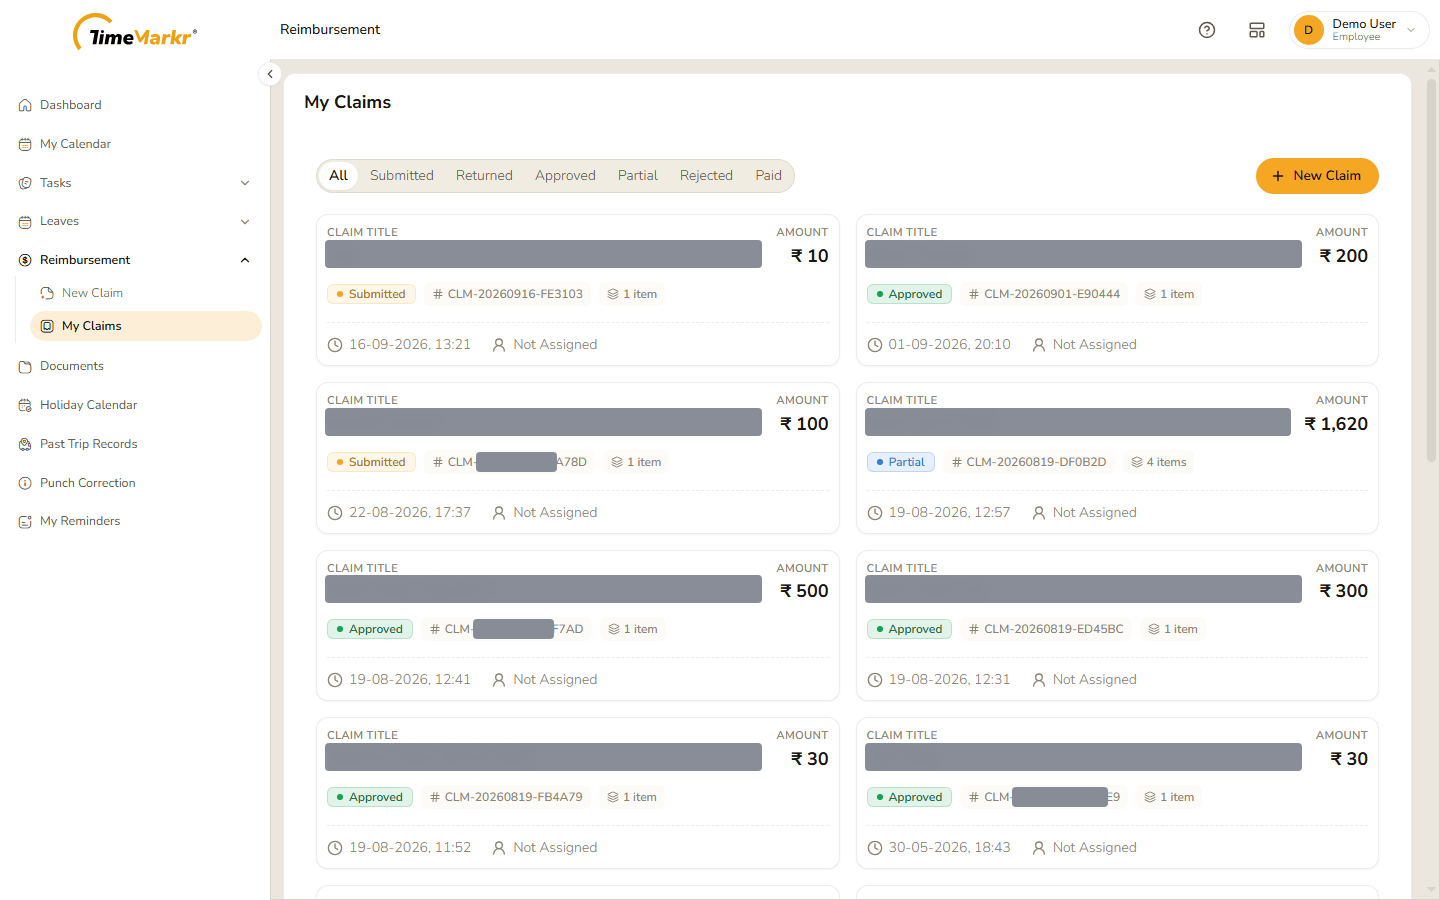
Each claim is a card with:
- the Claim title and the Amount claimed, in rupees;
- a coloured status – Submitted, Returned, Approved, Partial, Rejected or Paid;
- the claim number (
CLM-followed by the date and a code) and the number of items (1 item, 4 items); - the date and time it was raised, and who is handling it – Not Assigned until someone is.
The tabs above the cards – All, Submitted, Returned, Approved, Partial, Rejected, Paid – show only the claims in that state. New Claim starts a claim.
Click a card to open its details.
2. New Claim
Where: Employee portal → Reimbursement → New Claim
Route: /employee/reimbursement/create
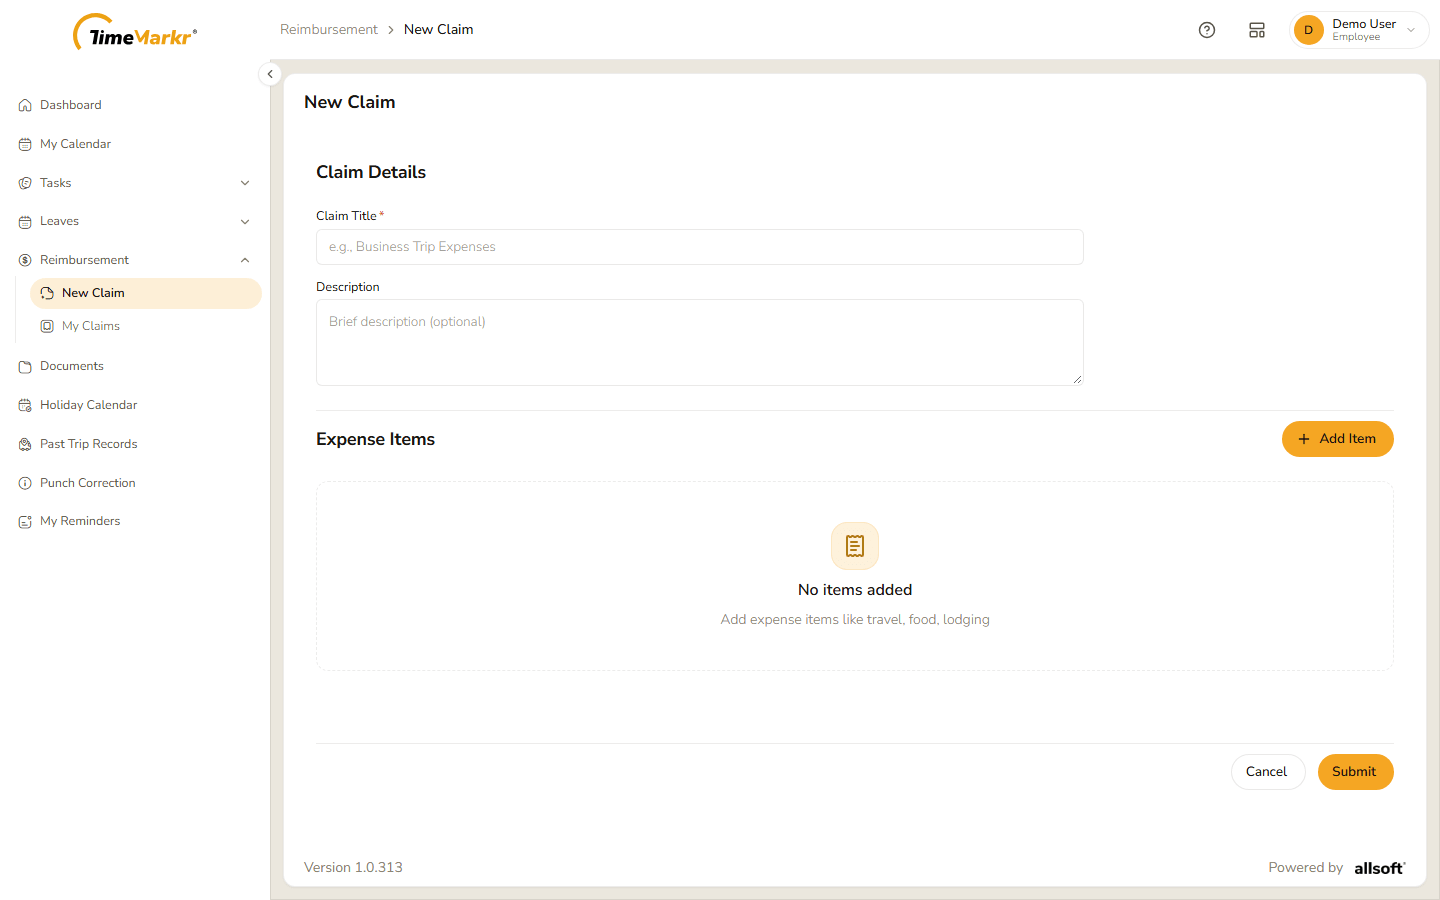
- Under Claim Details, type the Claim Title* (for example Business Trip Expenses) and, if you like, a Description ("Brief description (optional)").
Under Expense Items ("No items added – Add expense items like travel, food, lodging") click Add Item. Add Expense Item opens.
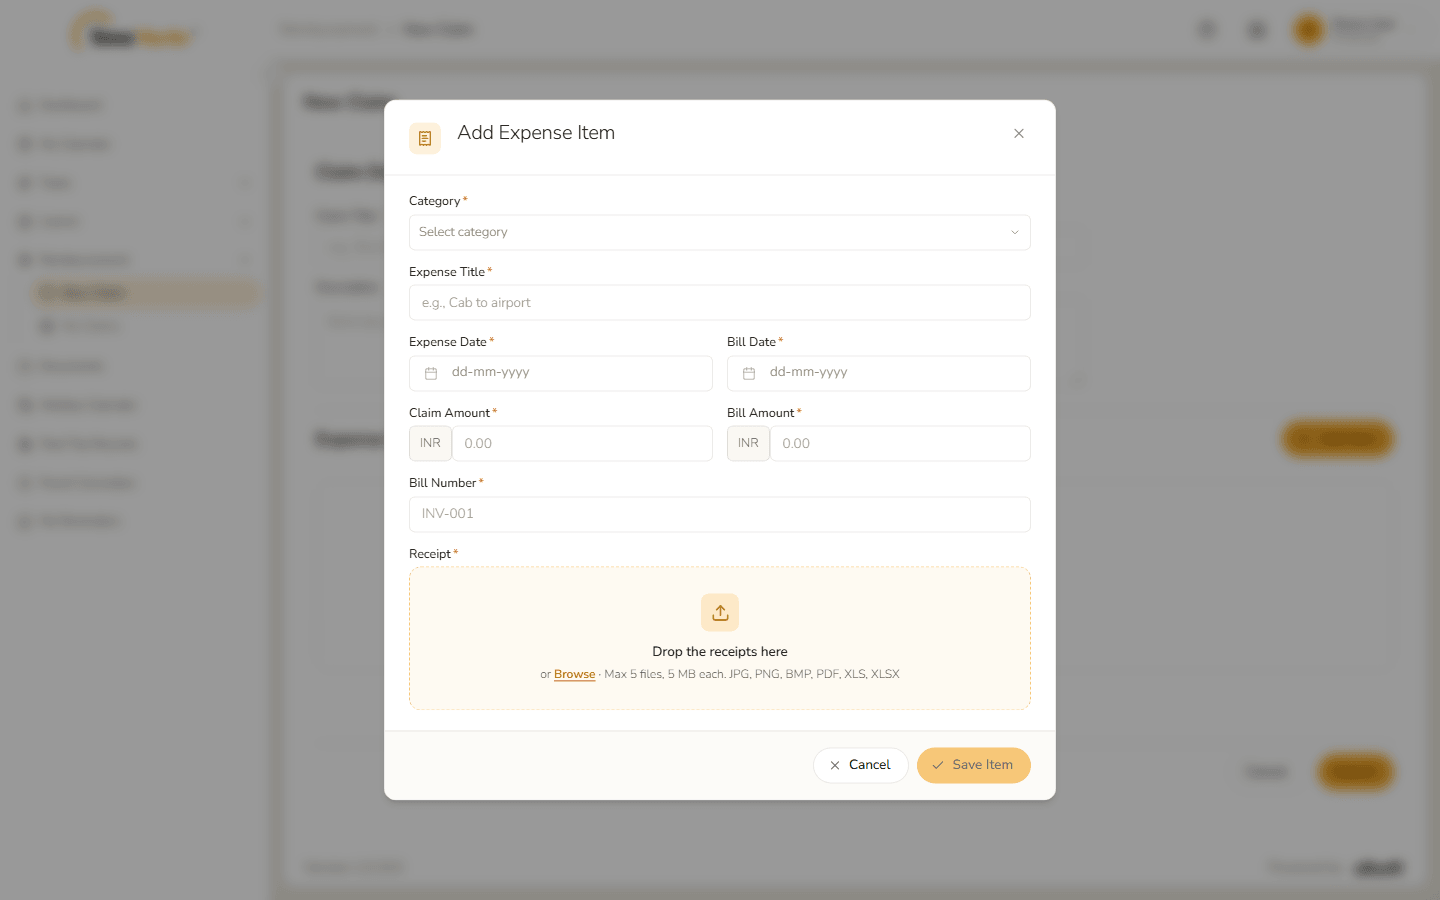
Add Expense Item Fill it in. Save Item stays pale until every required field is filled in.
Field Notes Category* Click the field and choose from the list – each category shows its description (2 categories). Click Done to close the list. The categories are set up by HR – see Expense Categories. Expense Title* What the money was spent on, for example Cab to airport. Expense Date* The day you spent it. Bill Date* The date printed on the bill. Claim Amount* The amount you are asking to be paid back, in INR. Bill Amount* The total on the bill, in INR. Bill Number* The number on the bill, for example INV-001.Receipt* "Drop the receipts here or Browse · Max 5 files, 5 MB each. JPG, PNG, BMP, PDF, XLS, XLSX." A counter such as 1/5 added shows how many files you have attached. 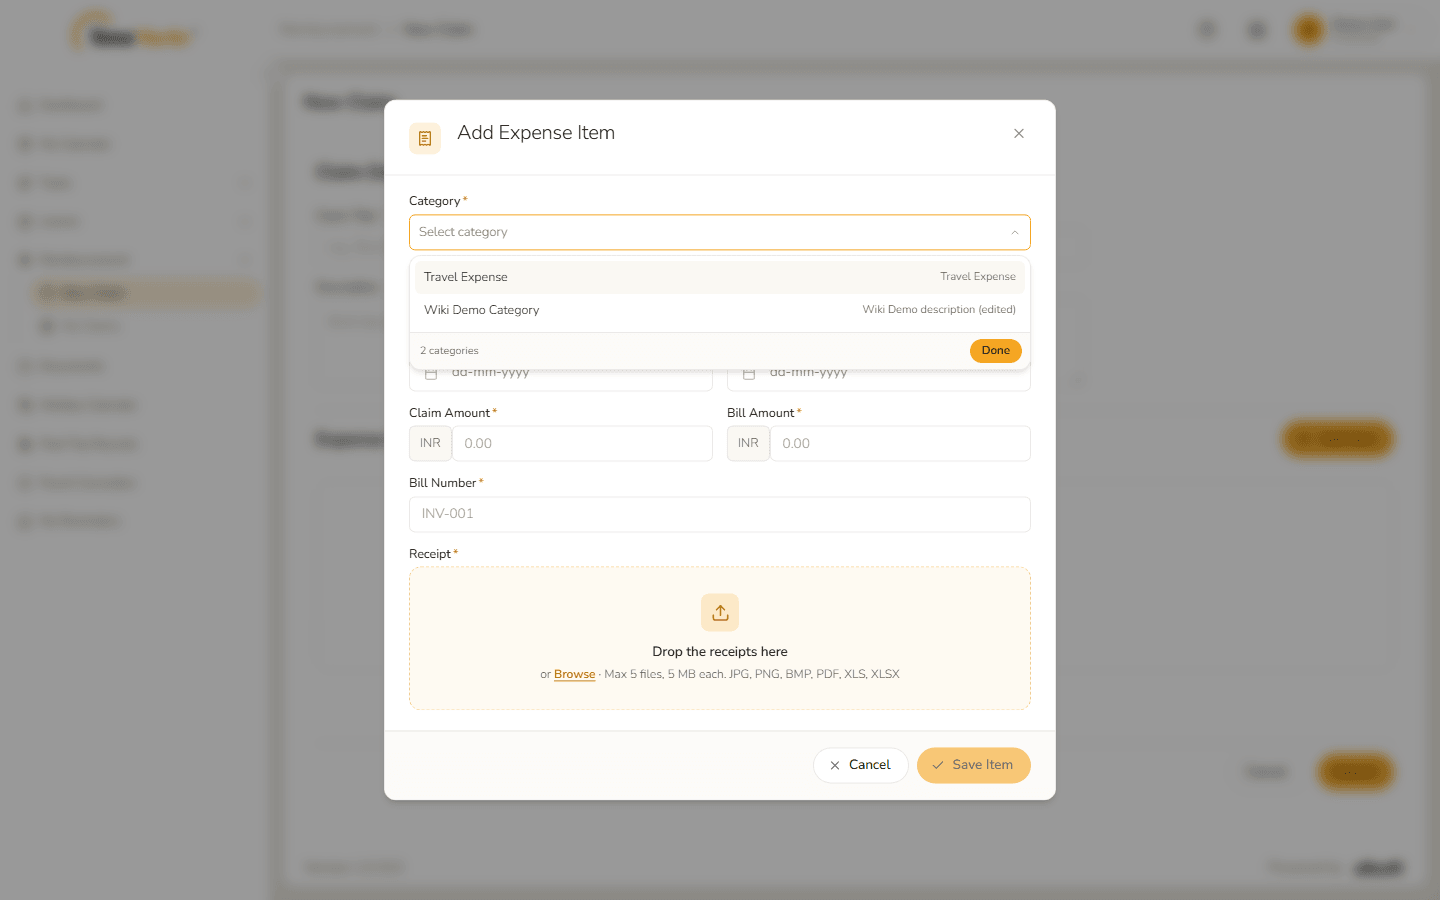
The category list The claim cannot be bigger than the bill: with a Claim Amount of 150 against a Bill Amount of 120 the field turns red and says "Claim amount cannot be more than the bill amount".
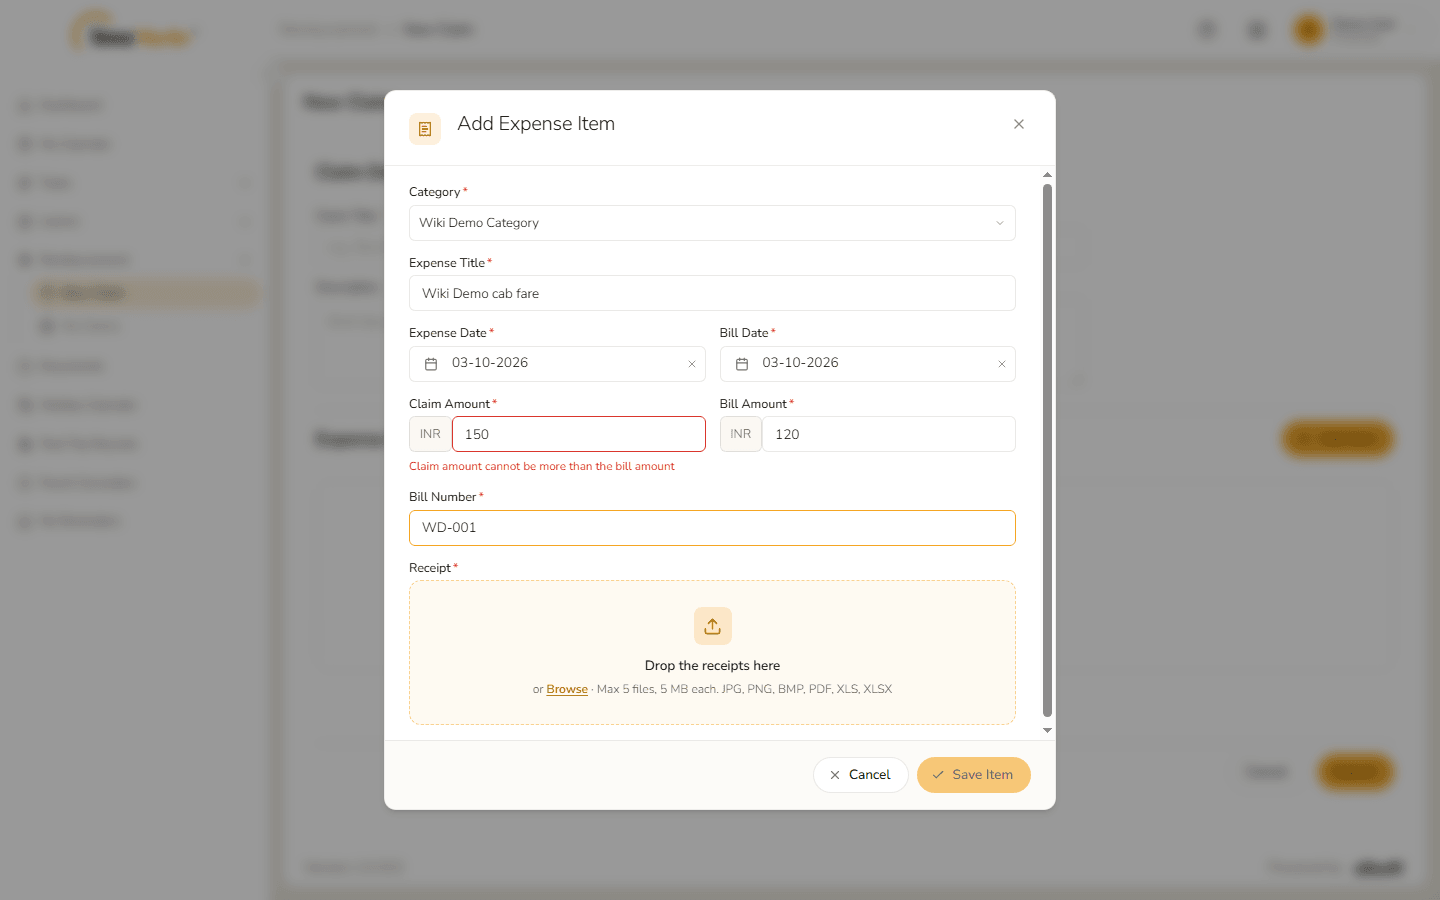
Claim amount larger than the bill 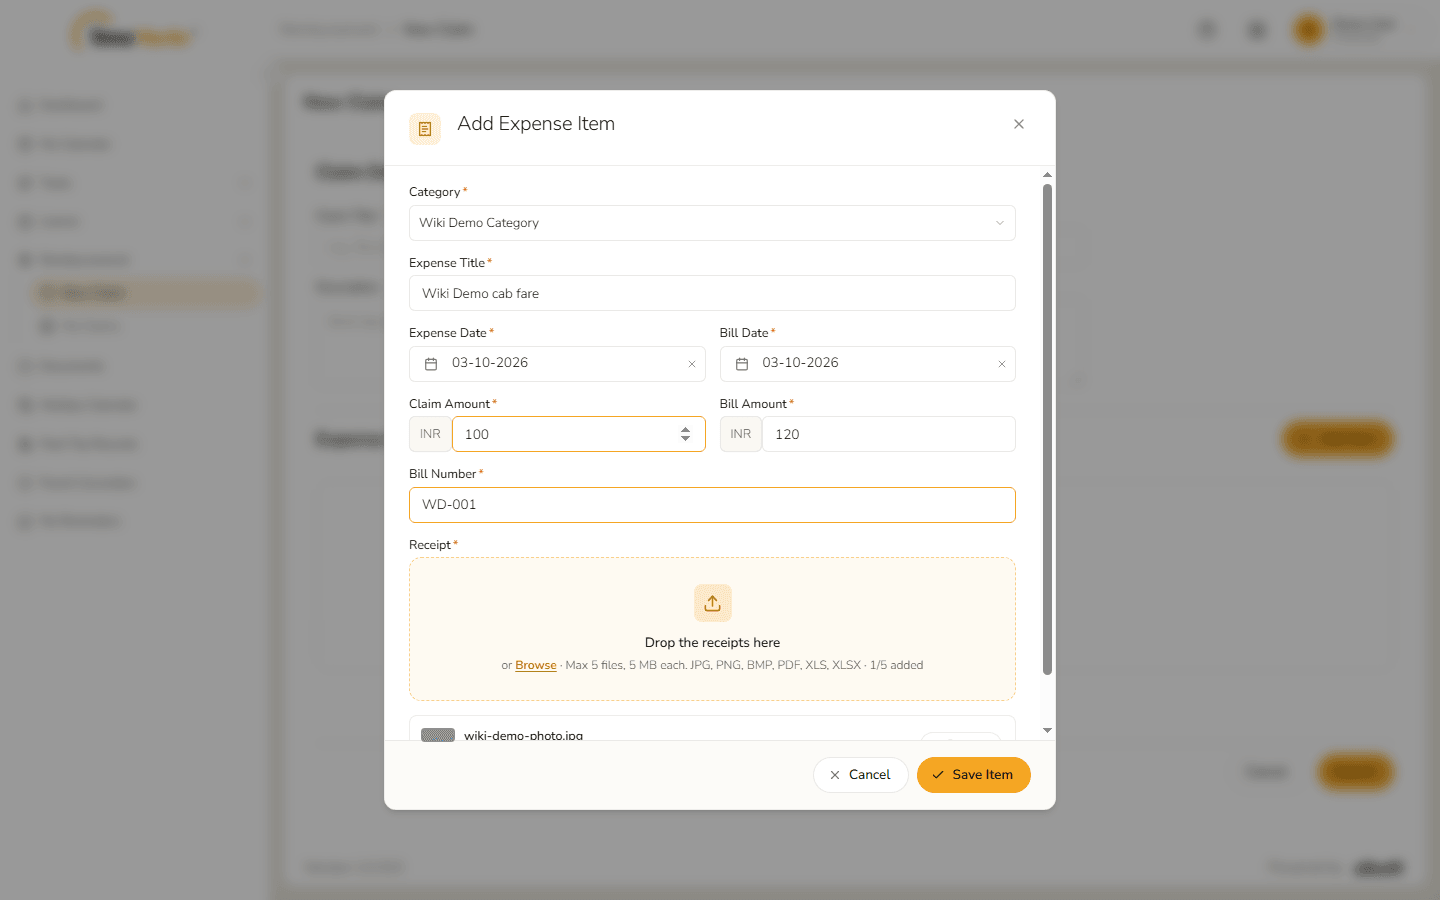
Item filled in Click Save Item. The item is added under Expense Items with its category, title, amount, date, bill number and Receipt attached, and the heading shows the total (1 item · ₹ 100). The bin icon on the item removes it; Add Item adds another.
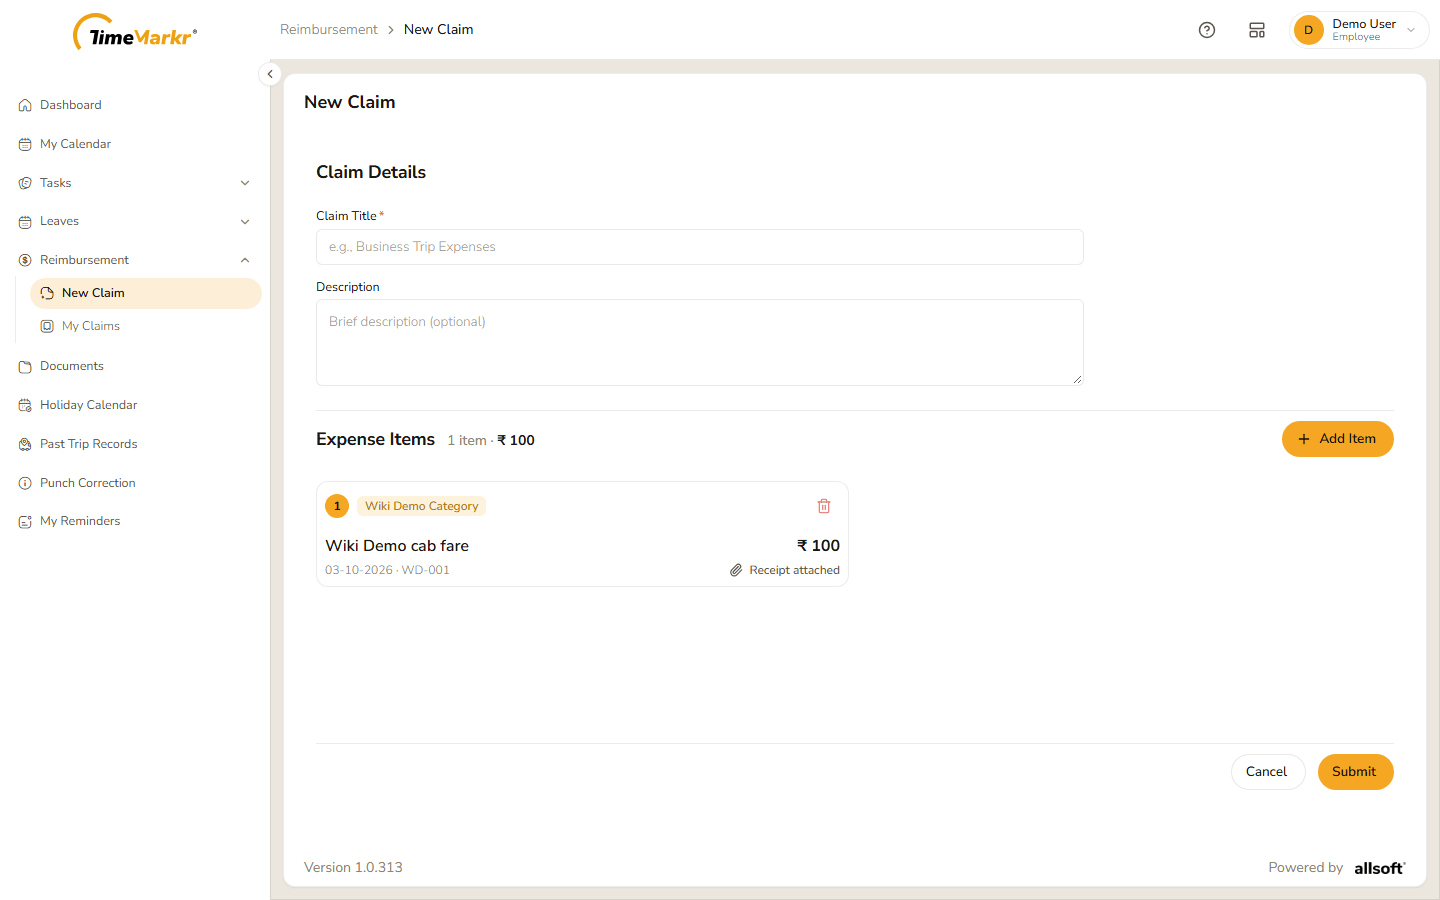
Item added Check the claim and click Submit. (Cancel leaves without sending anything.)
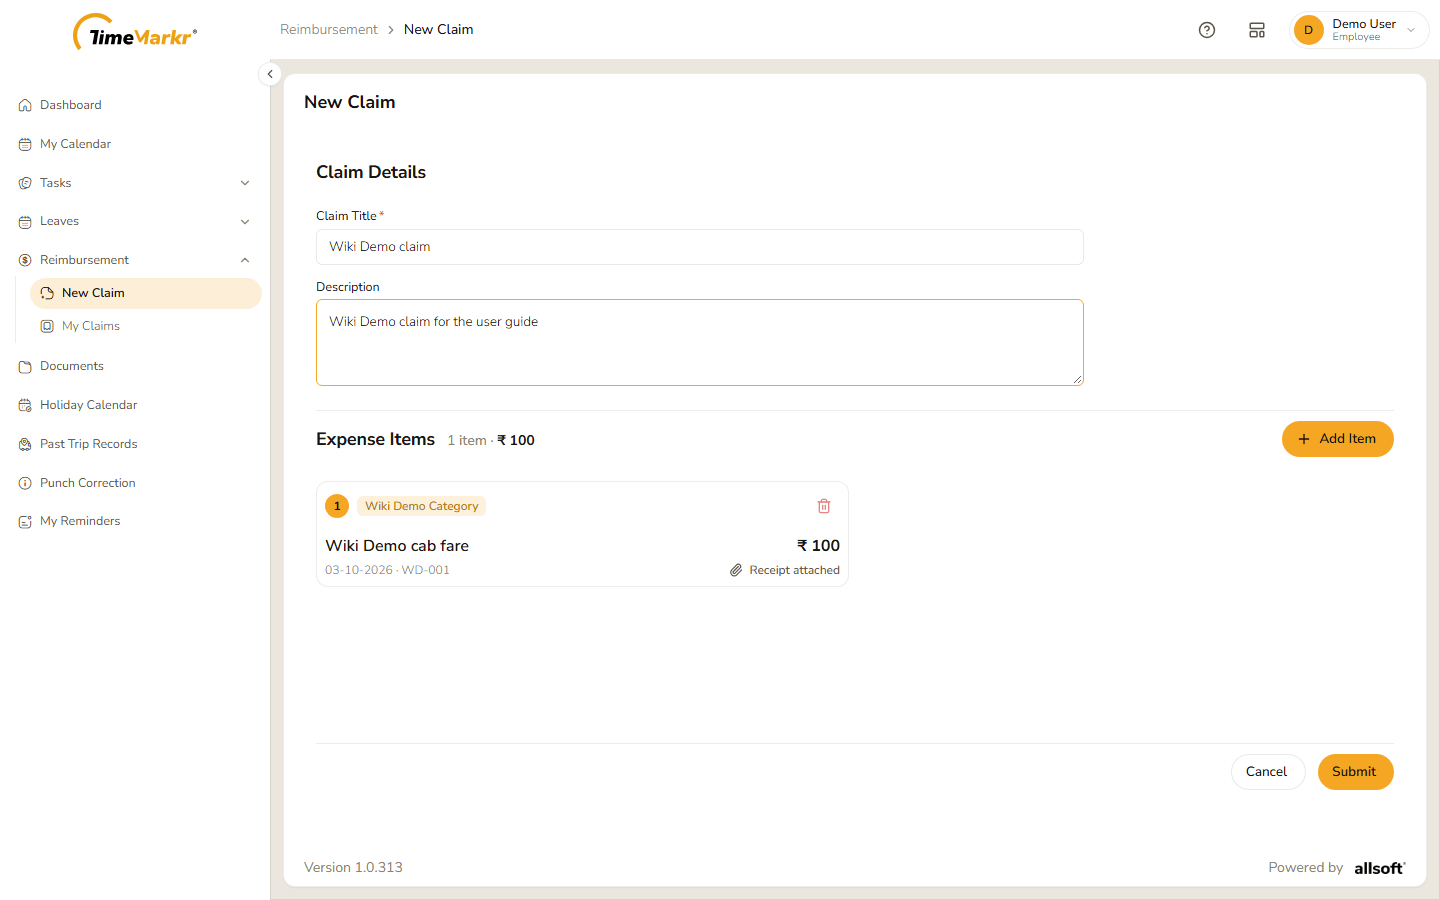
Claim ready to submit Claim submitted – Claim CLM-… submitted successfully. confirms it and gives the claim number. Click Got it.
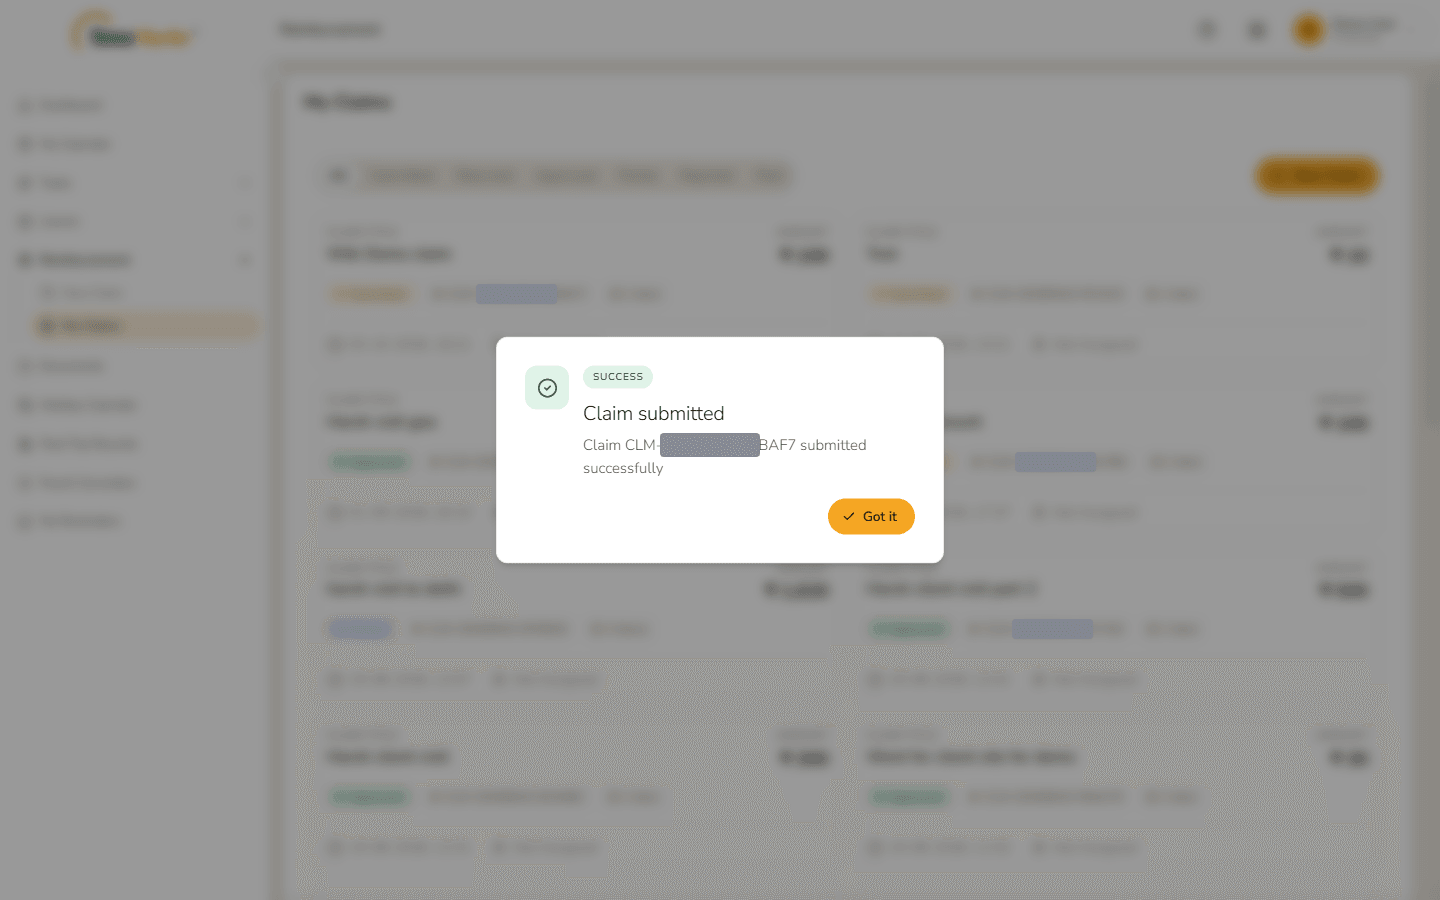
Claim submitted You land on My Claims, where the new claim is first in the list with the status Submitted.
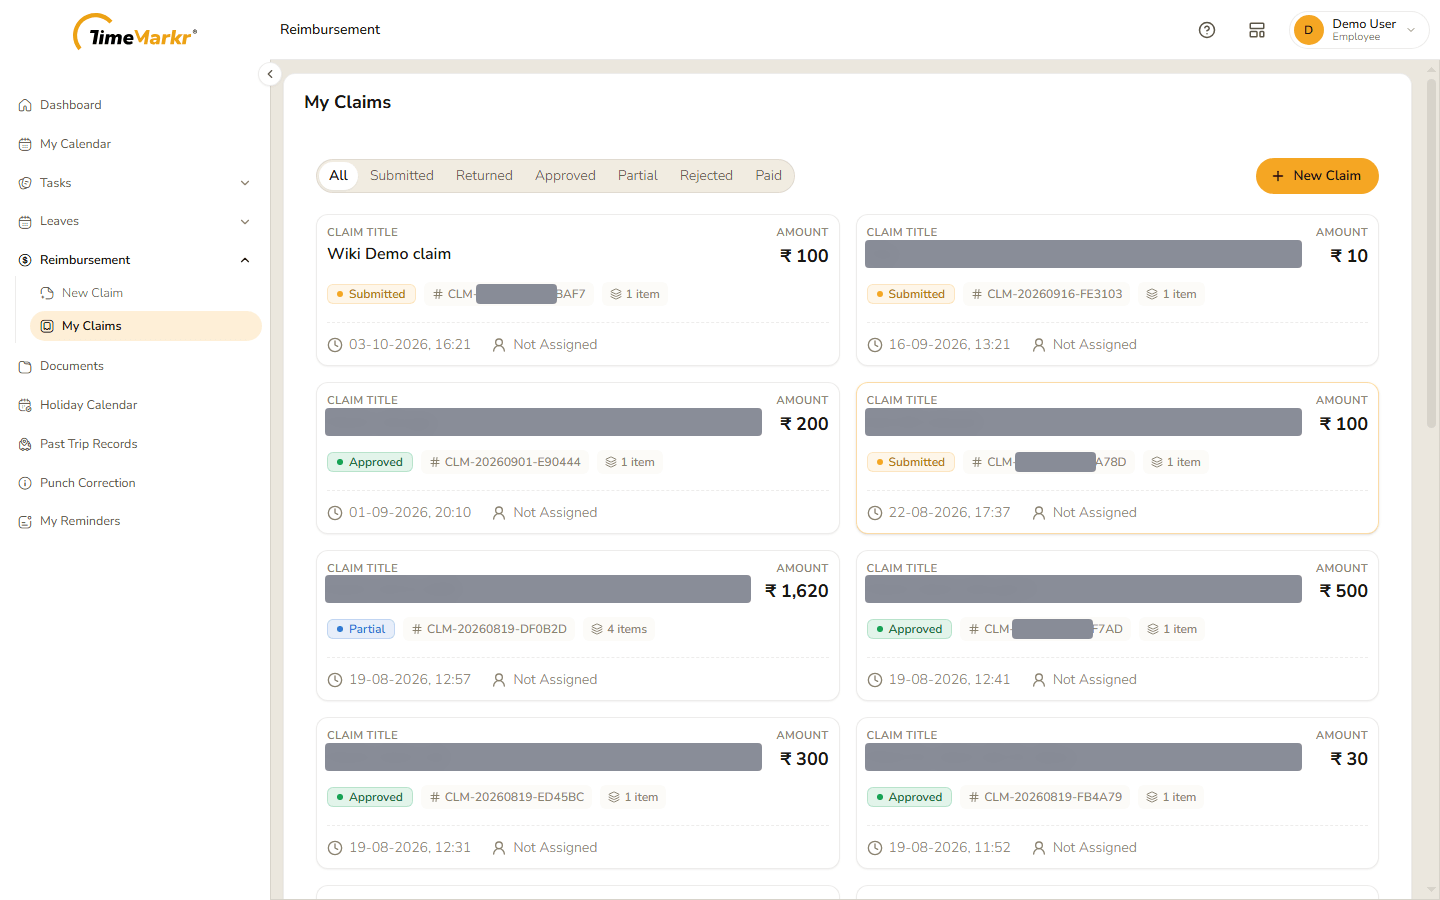
My Claims after submitting
3. Open a claim
Click a card on My Claims. Reimbursement Details opens.
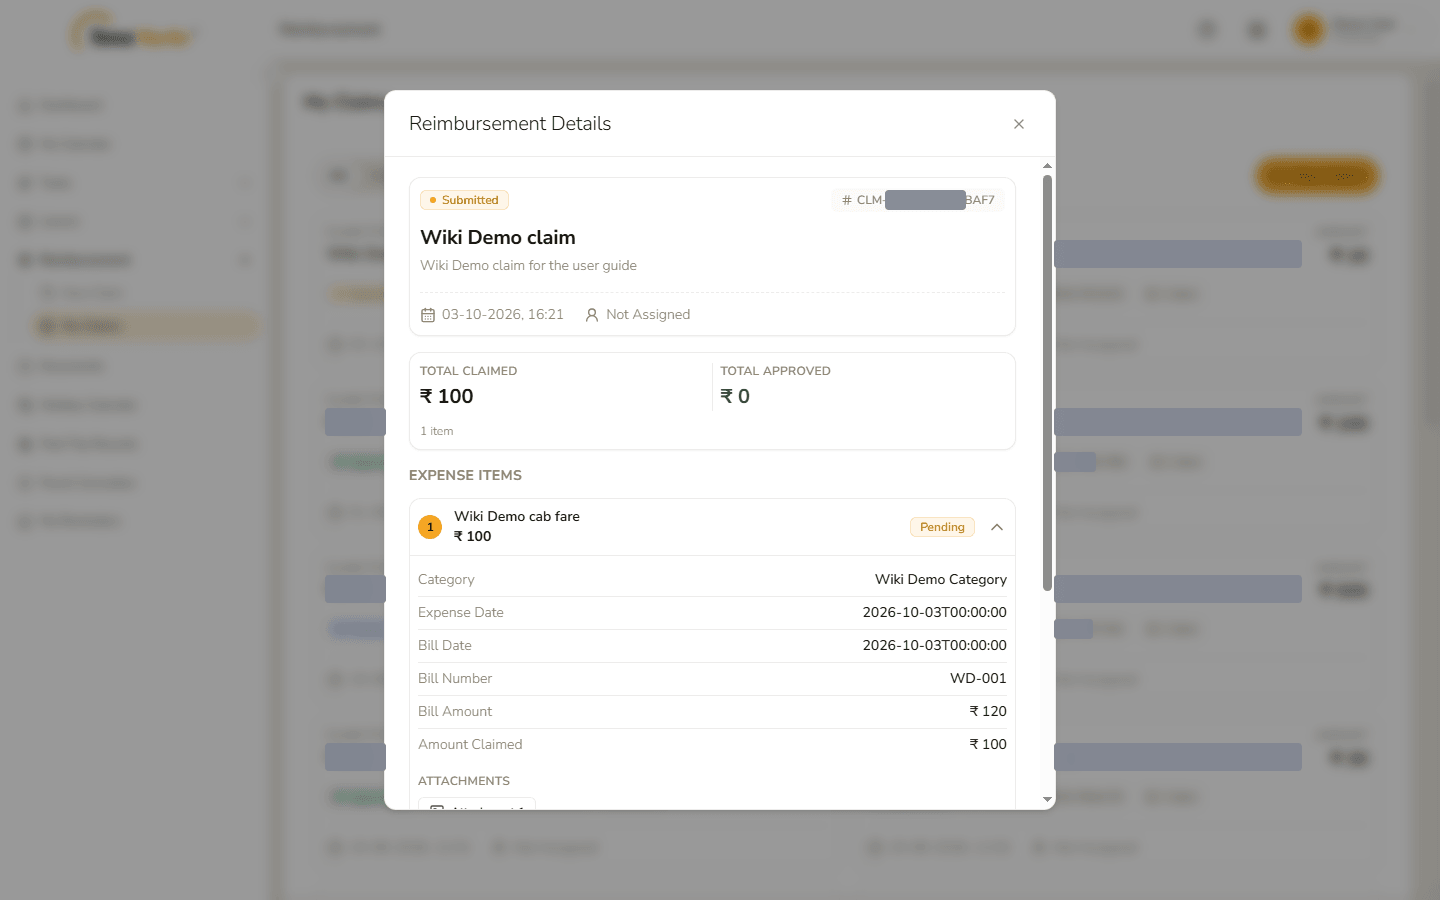
- The top block shows the status, the claim number, the title, the description, when the claim was raised and who is handling it.
- Total Claimed is what you asked for; Total Approved is what has been approved so far (₹ 0 until someone approves).
- Under Expense items each item has its own status – Pending until it has been looked at. An open item lists its Category, Expense Date, Bill Date, Bill Number, Bill Amount and Amount Claimed, with its Attachments below; the arrow at the right of the item opens and closes it.
Once HR has decided, the claim shows what was approved:
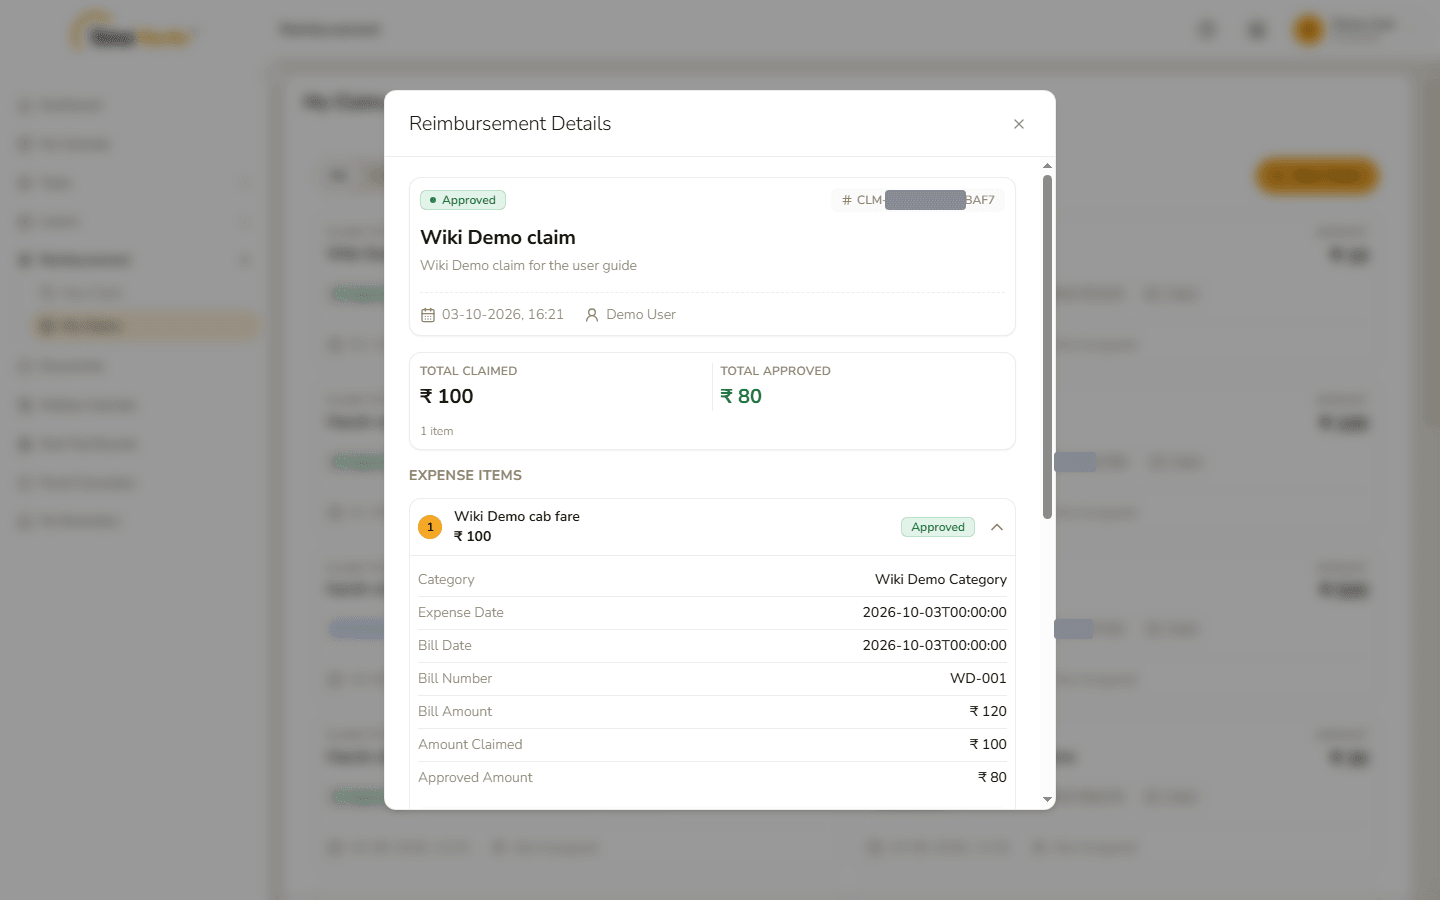
- Total Approved and each item's Approved Amount – here ₹ 80 of the ₹ 100 claimed, because HR approved the item for less than the claim.
- Item Remarks – HR's note on that item – and Approval Remarks – HR's note on the whole claim.
- Progress – the steps a claim goes through: Submitted, Acknowledged, Under Review, Approved and Processed, with the date and time of the steps that have happened.
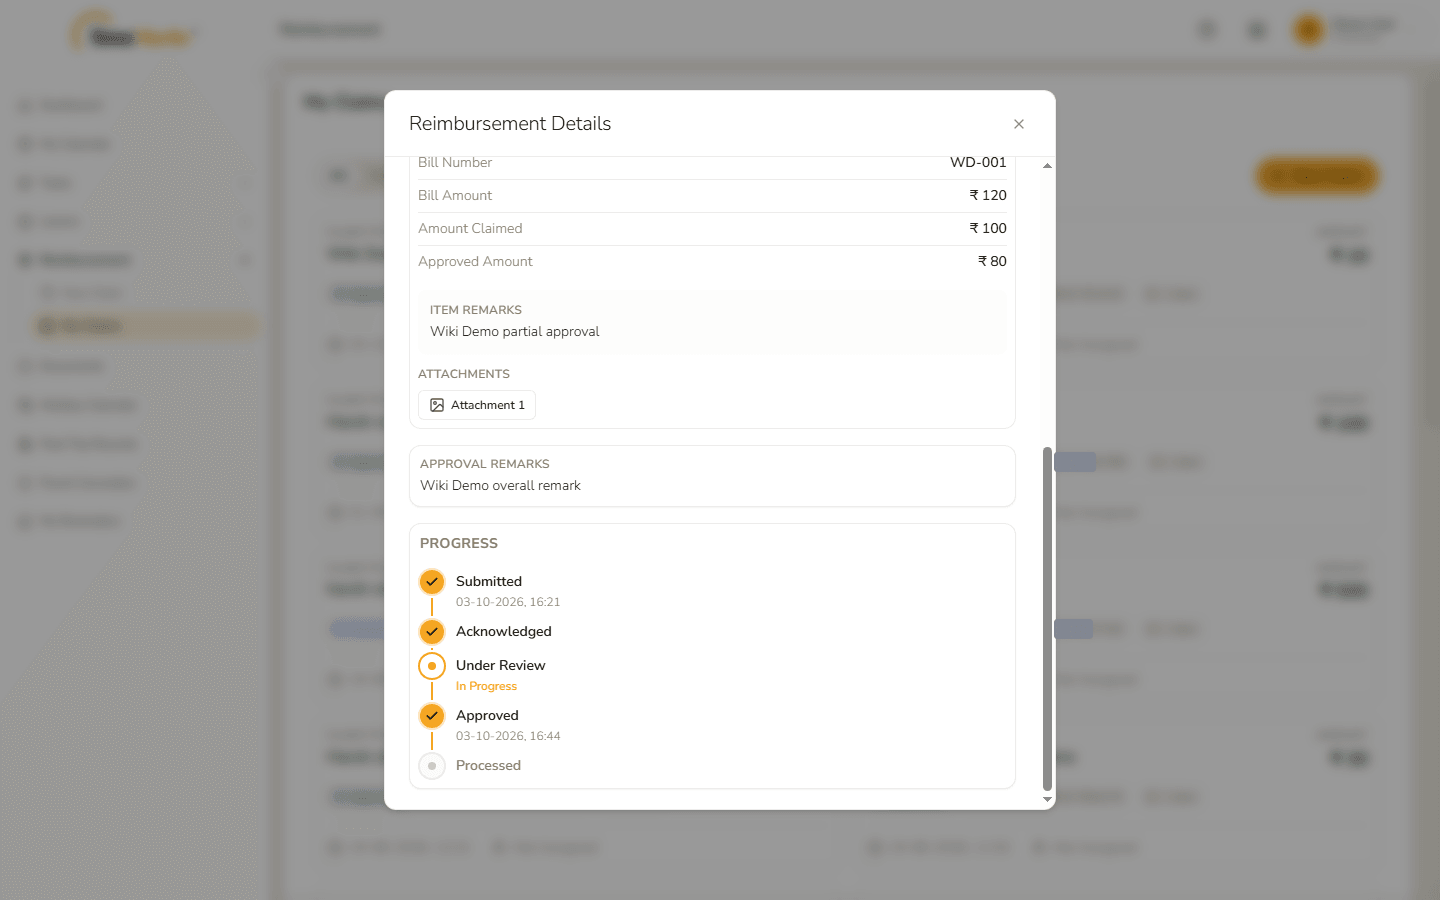
Click × to close.
Related: Reimbursement Claims (admin) · Expense Categories